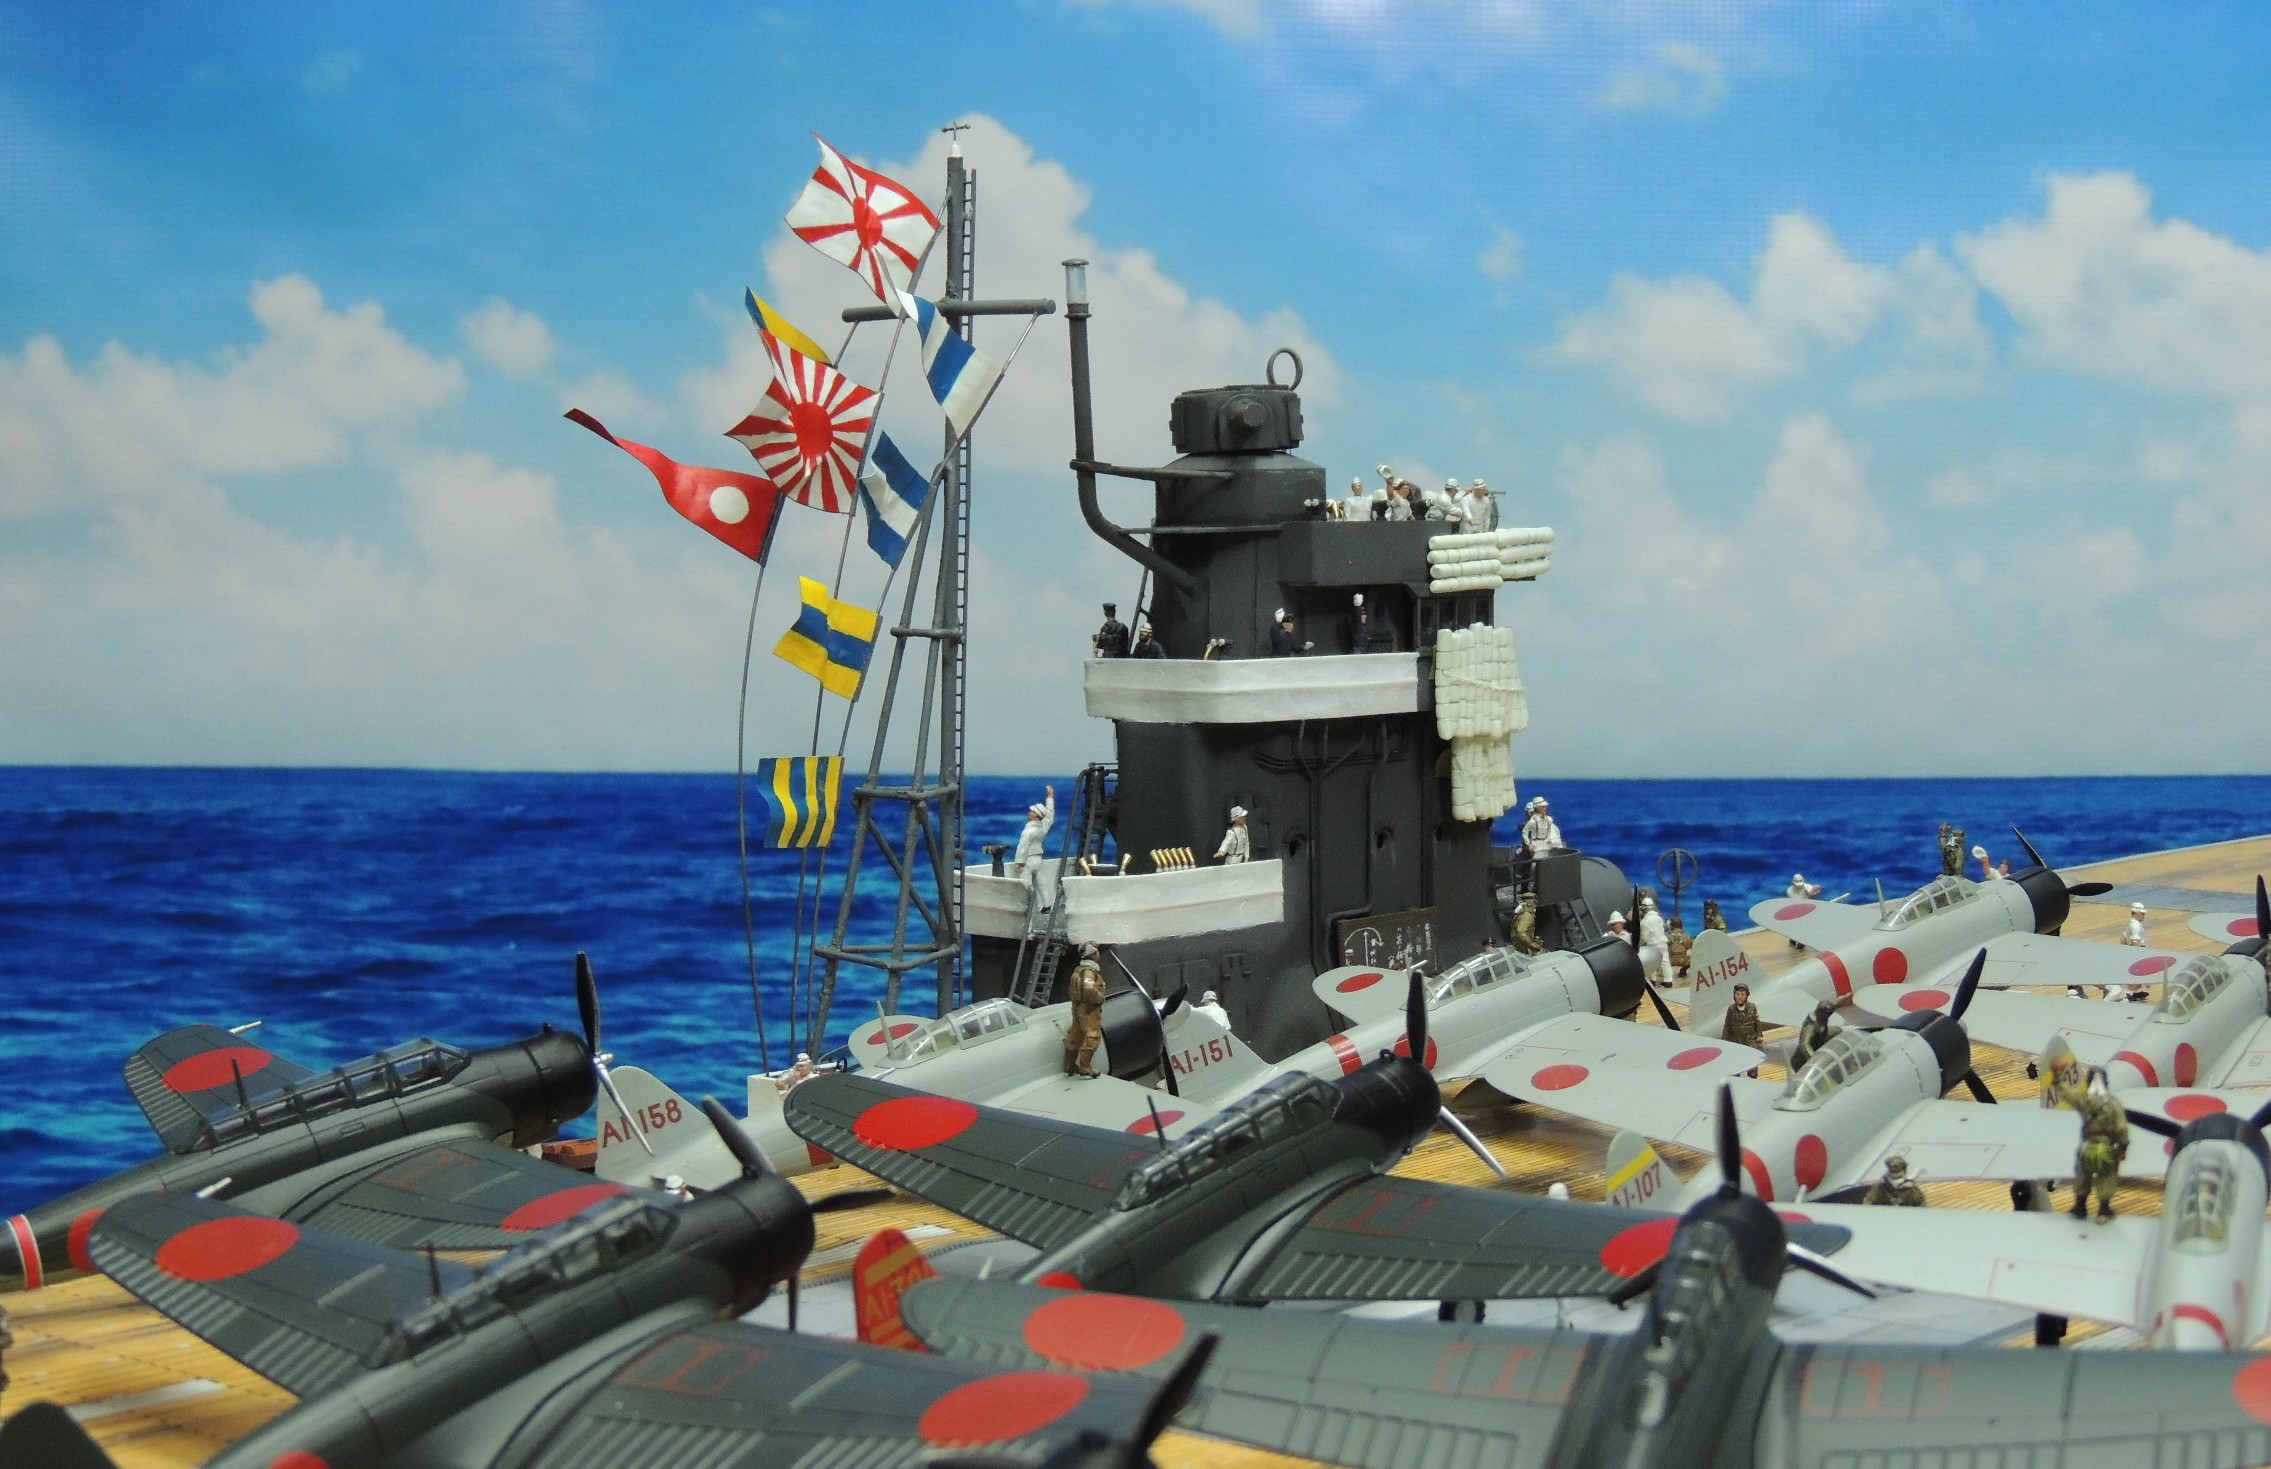
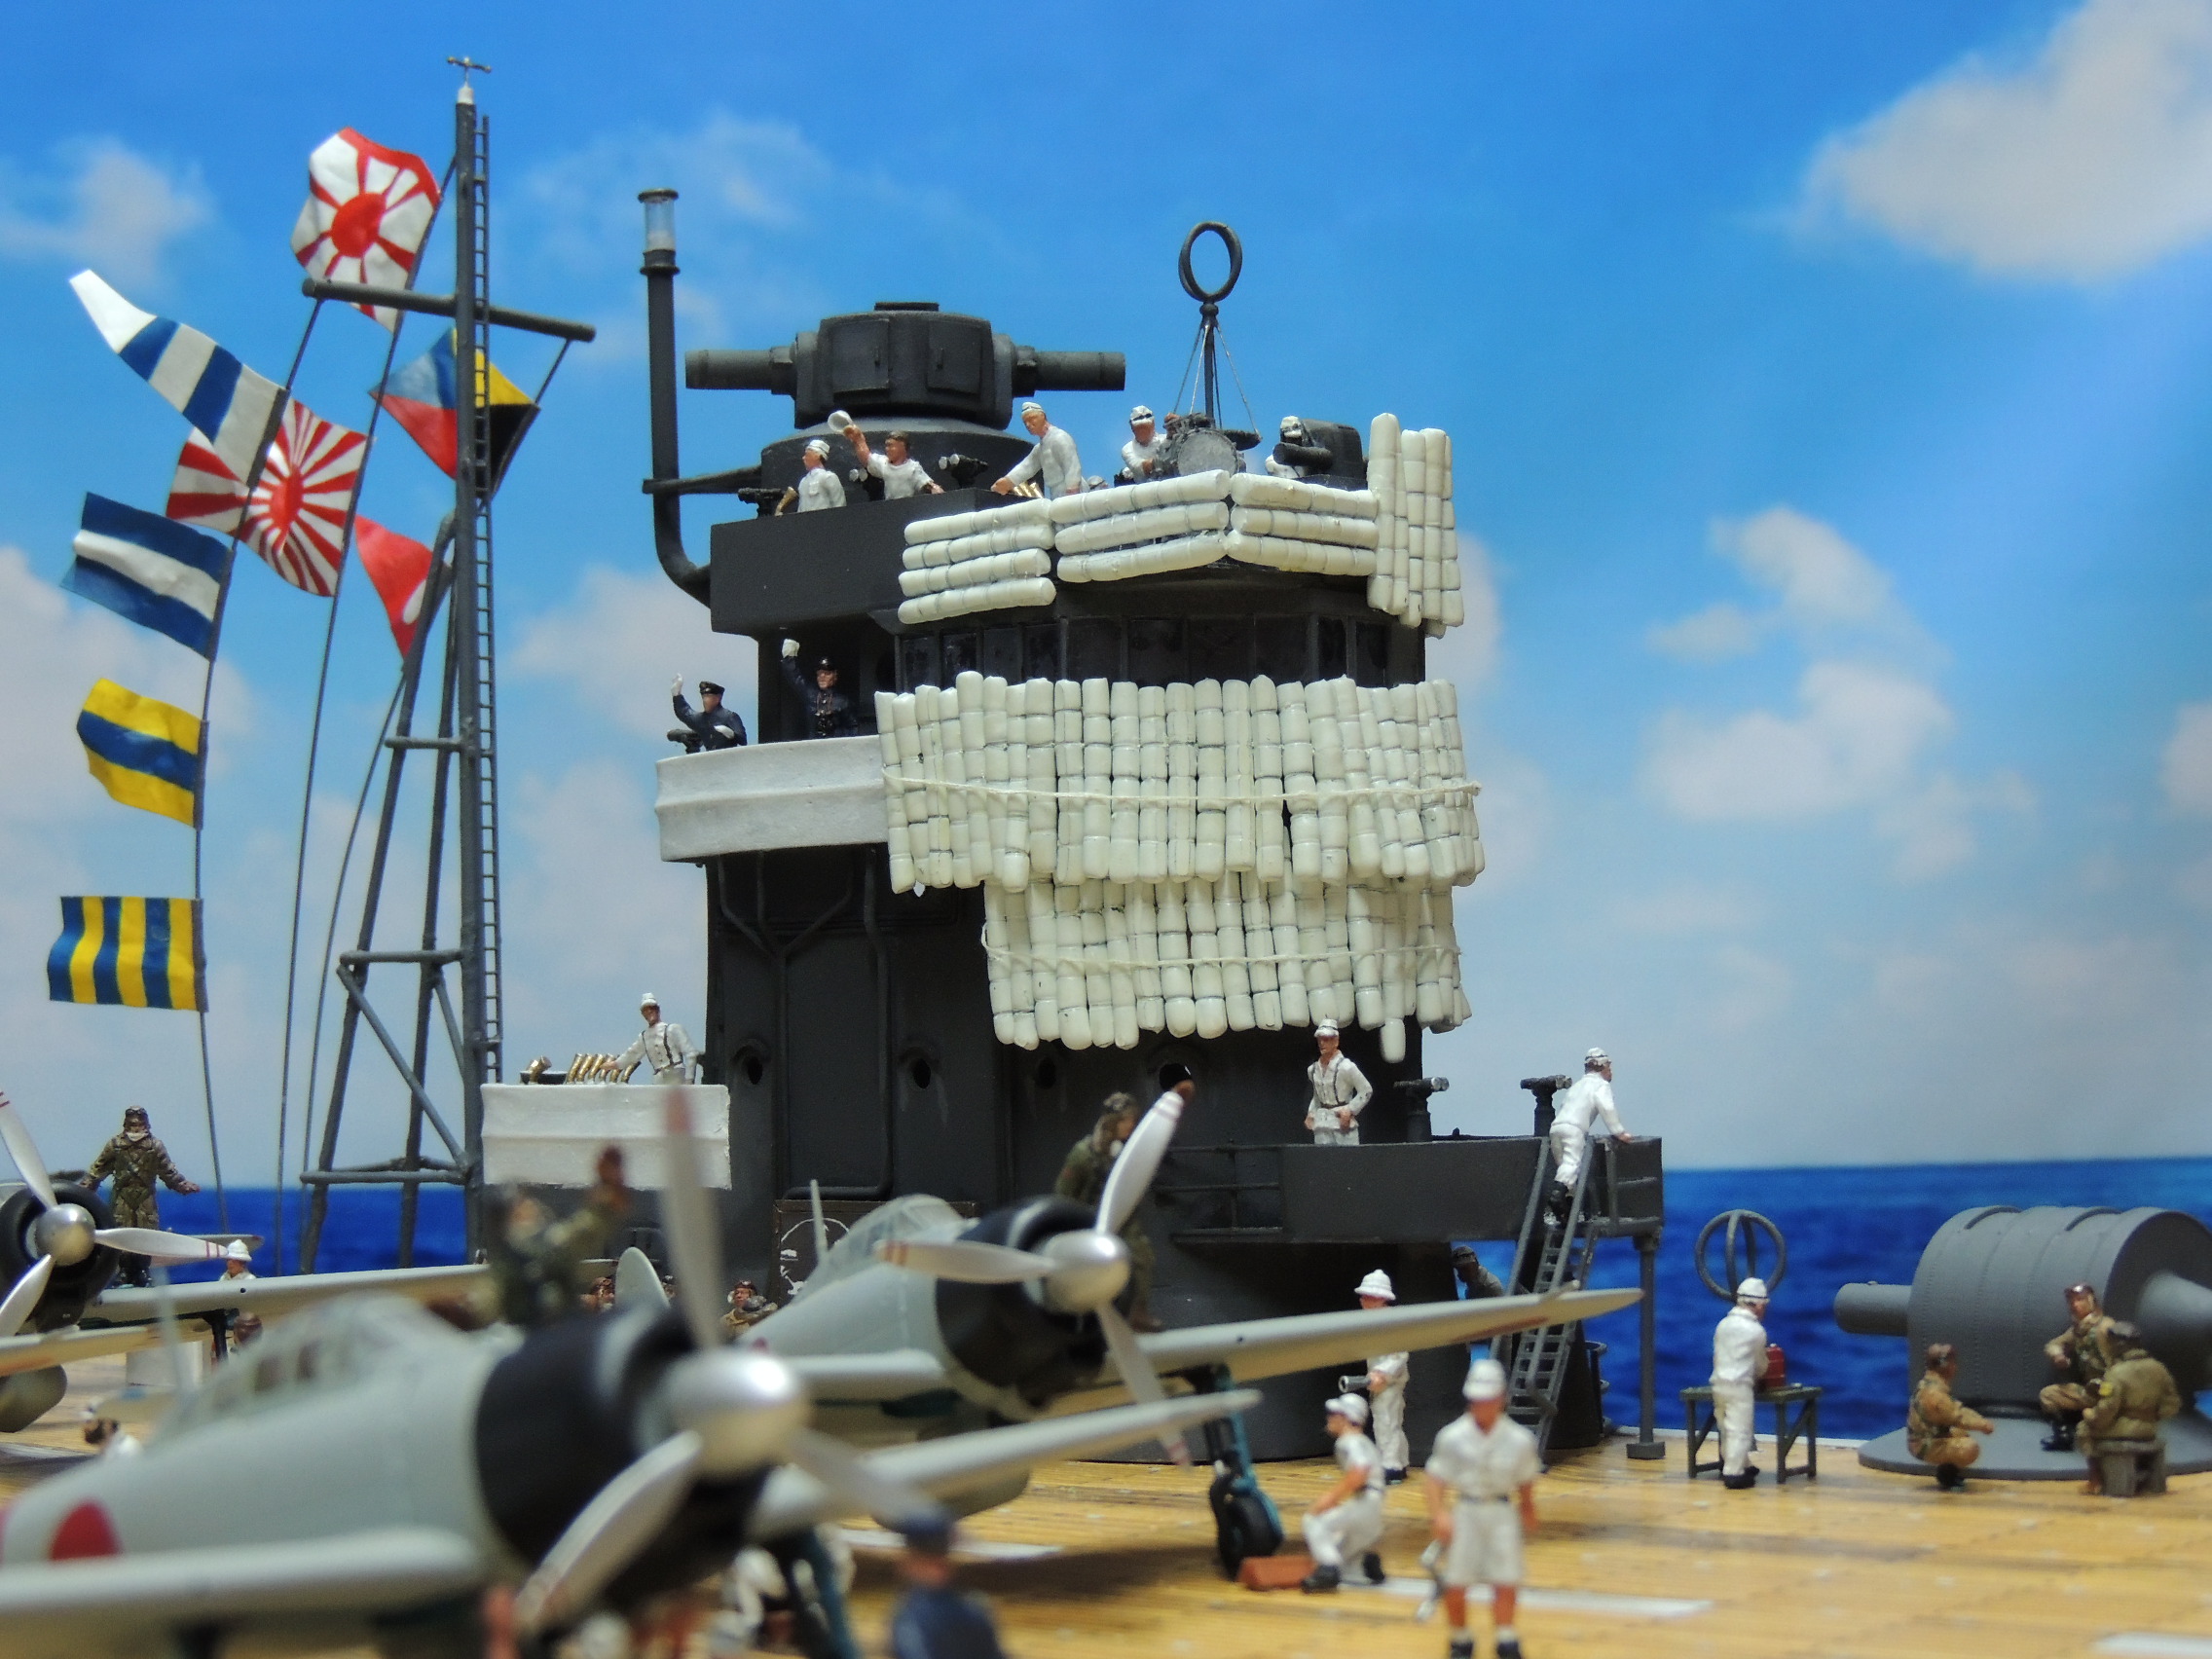
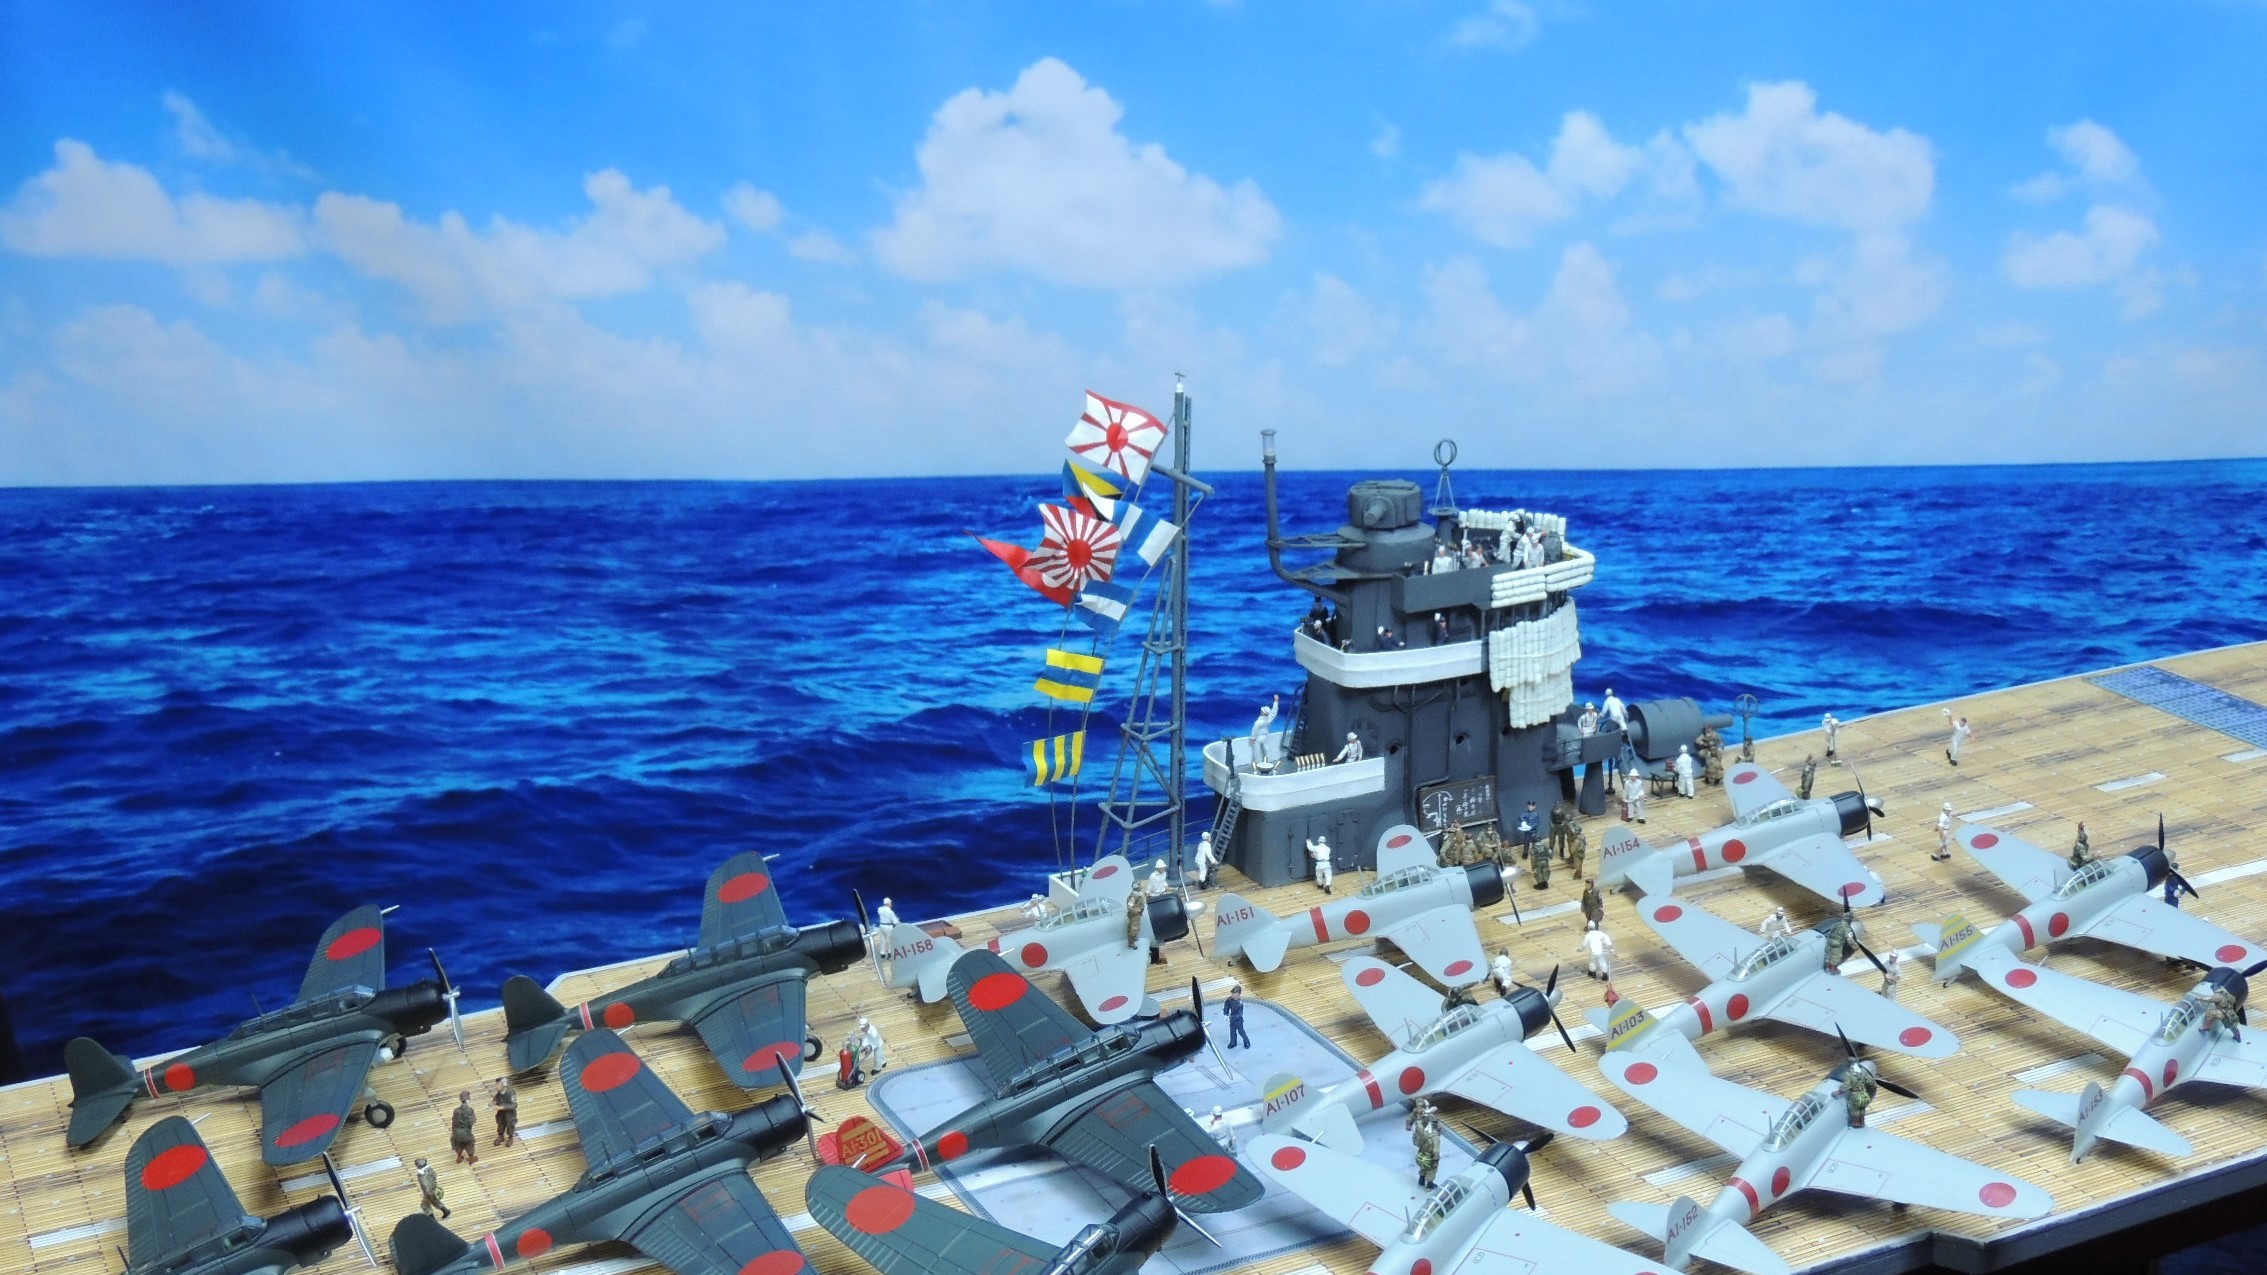
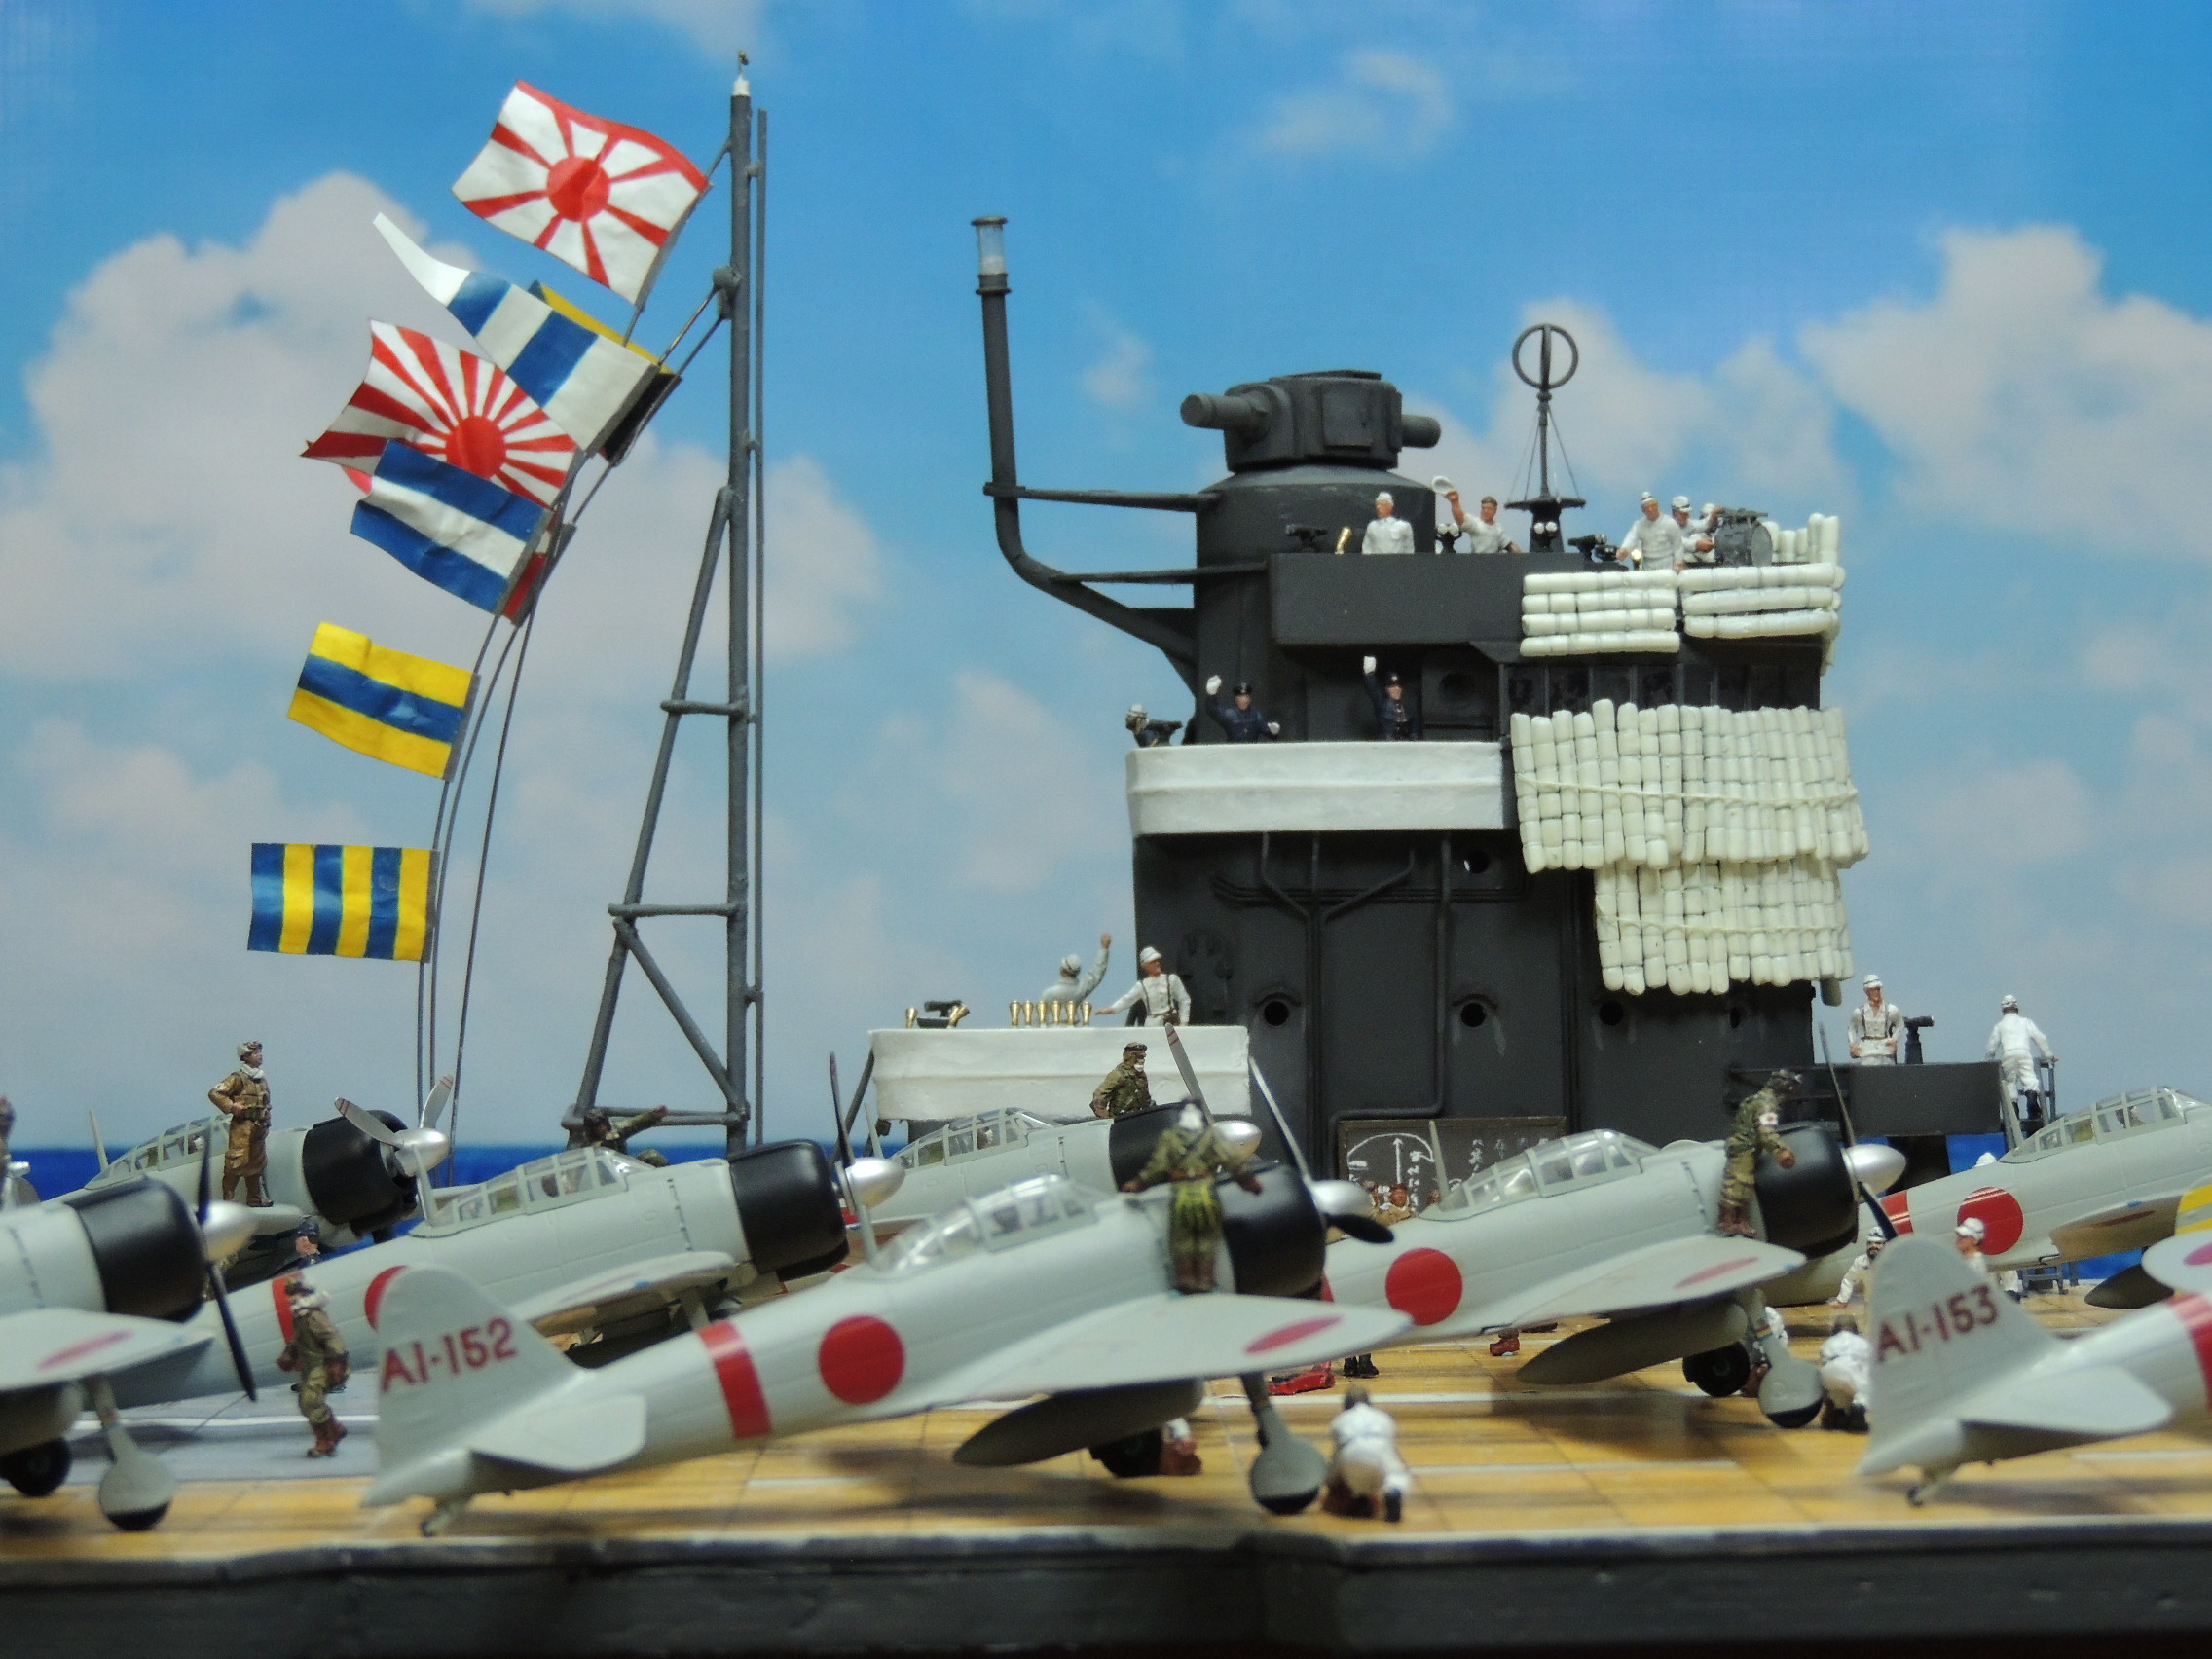
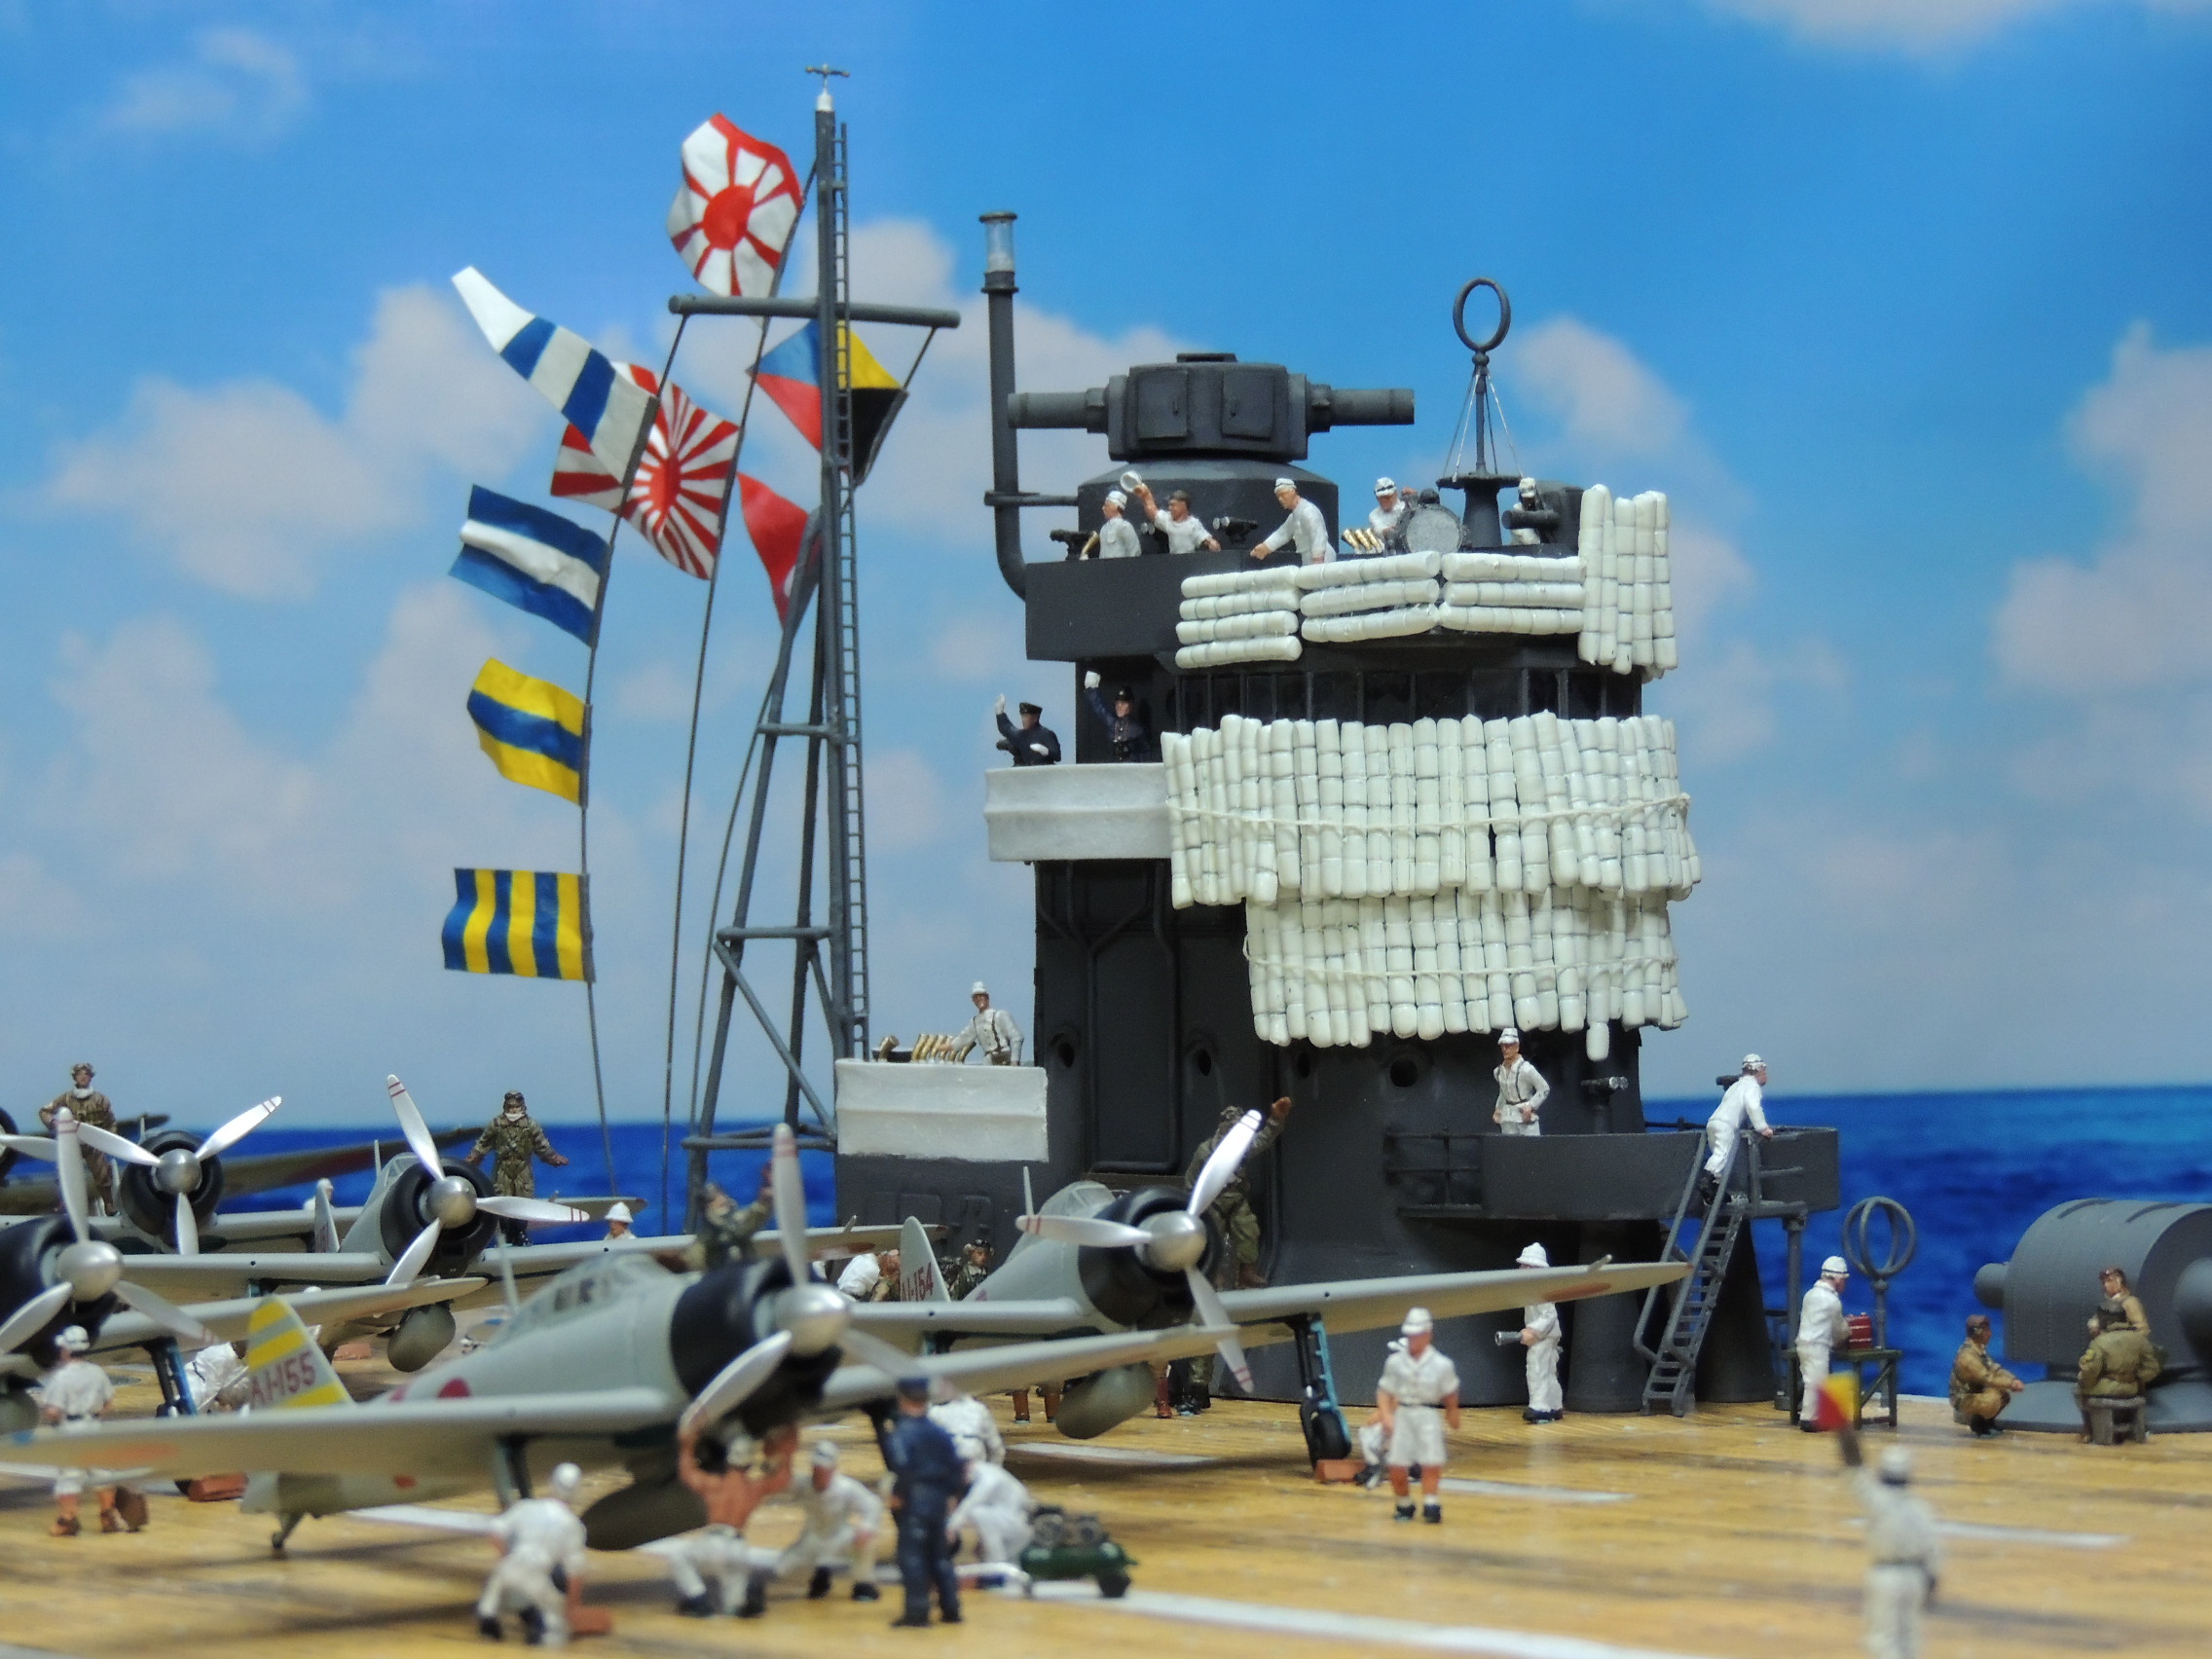
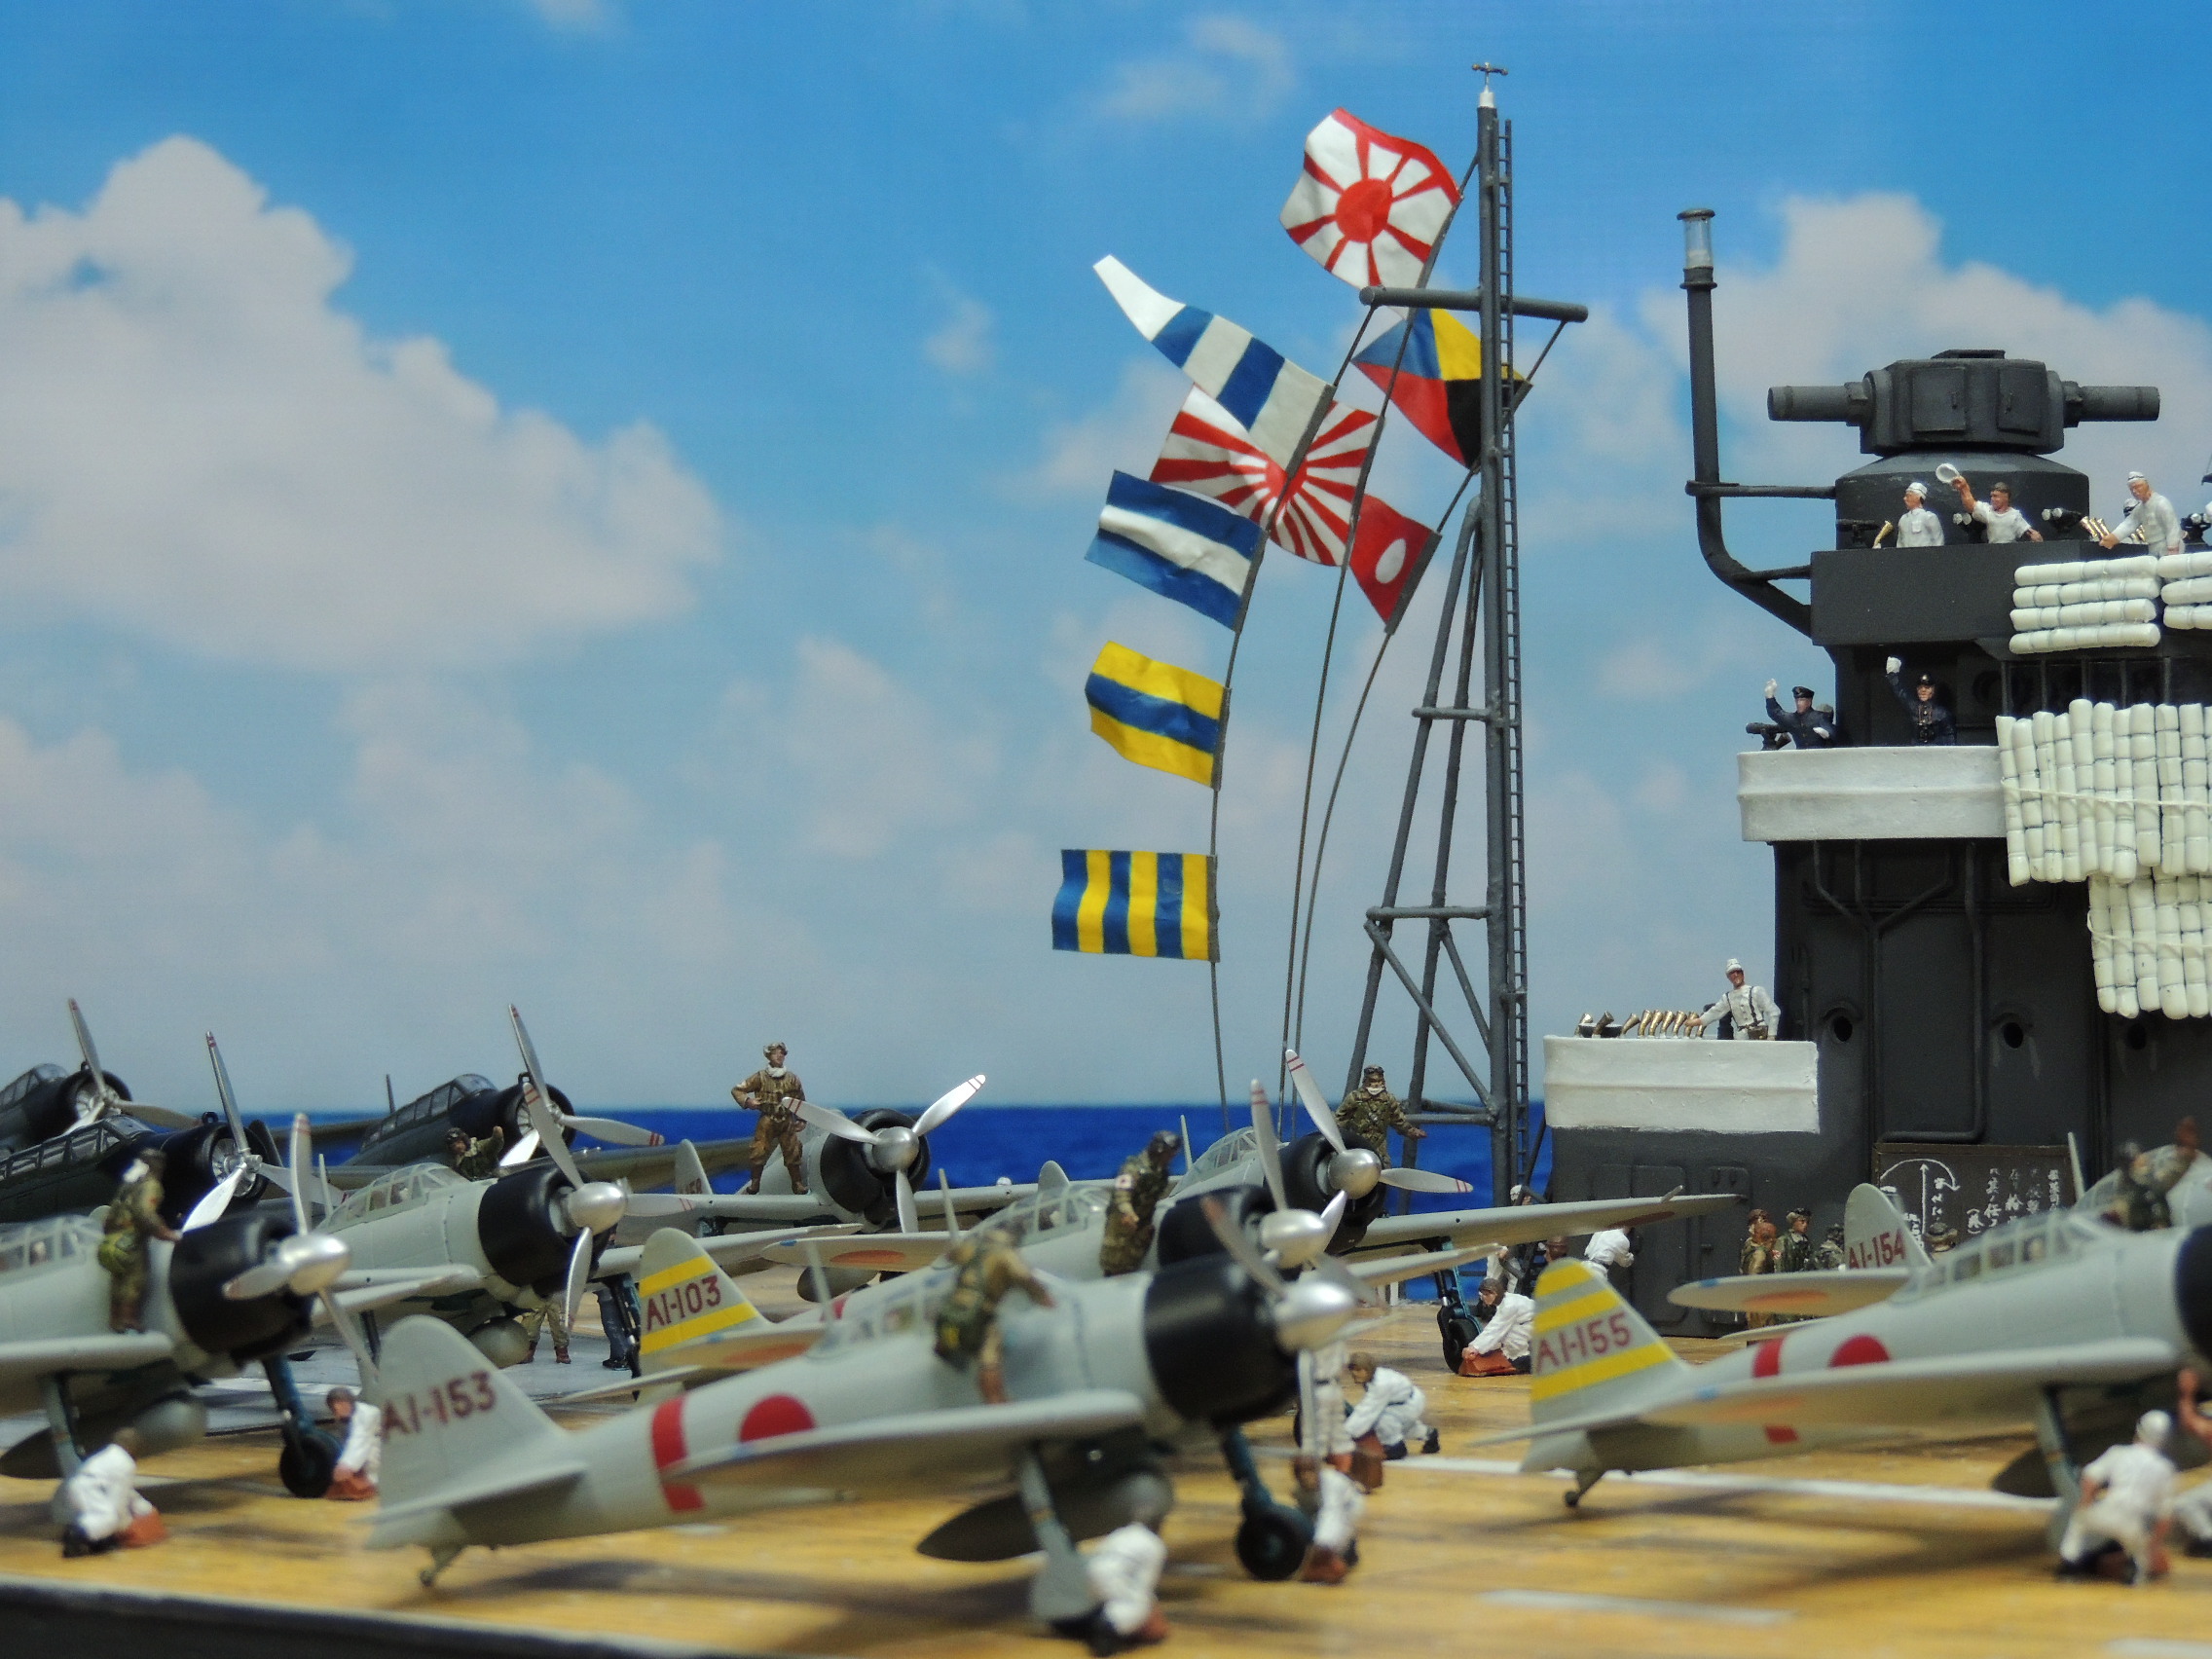
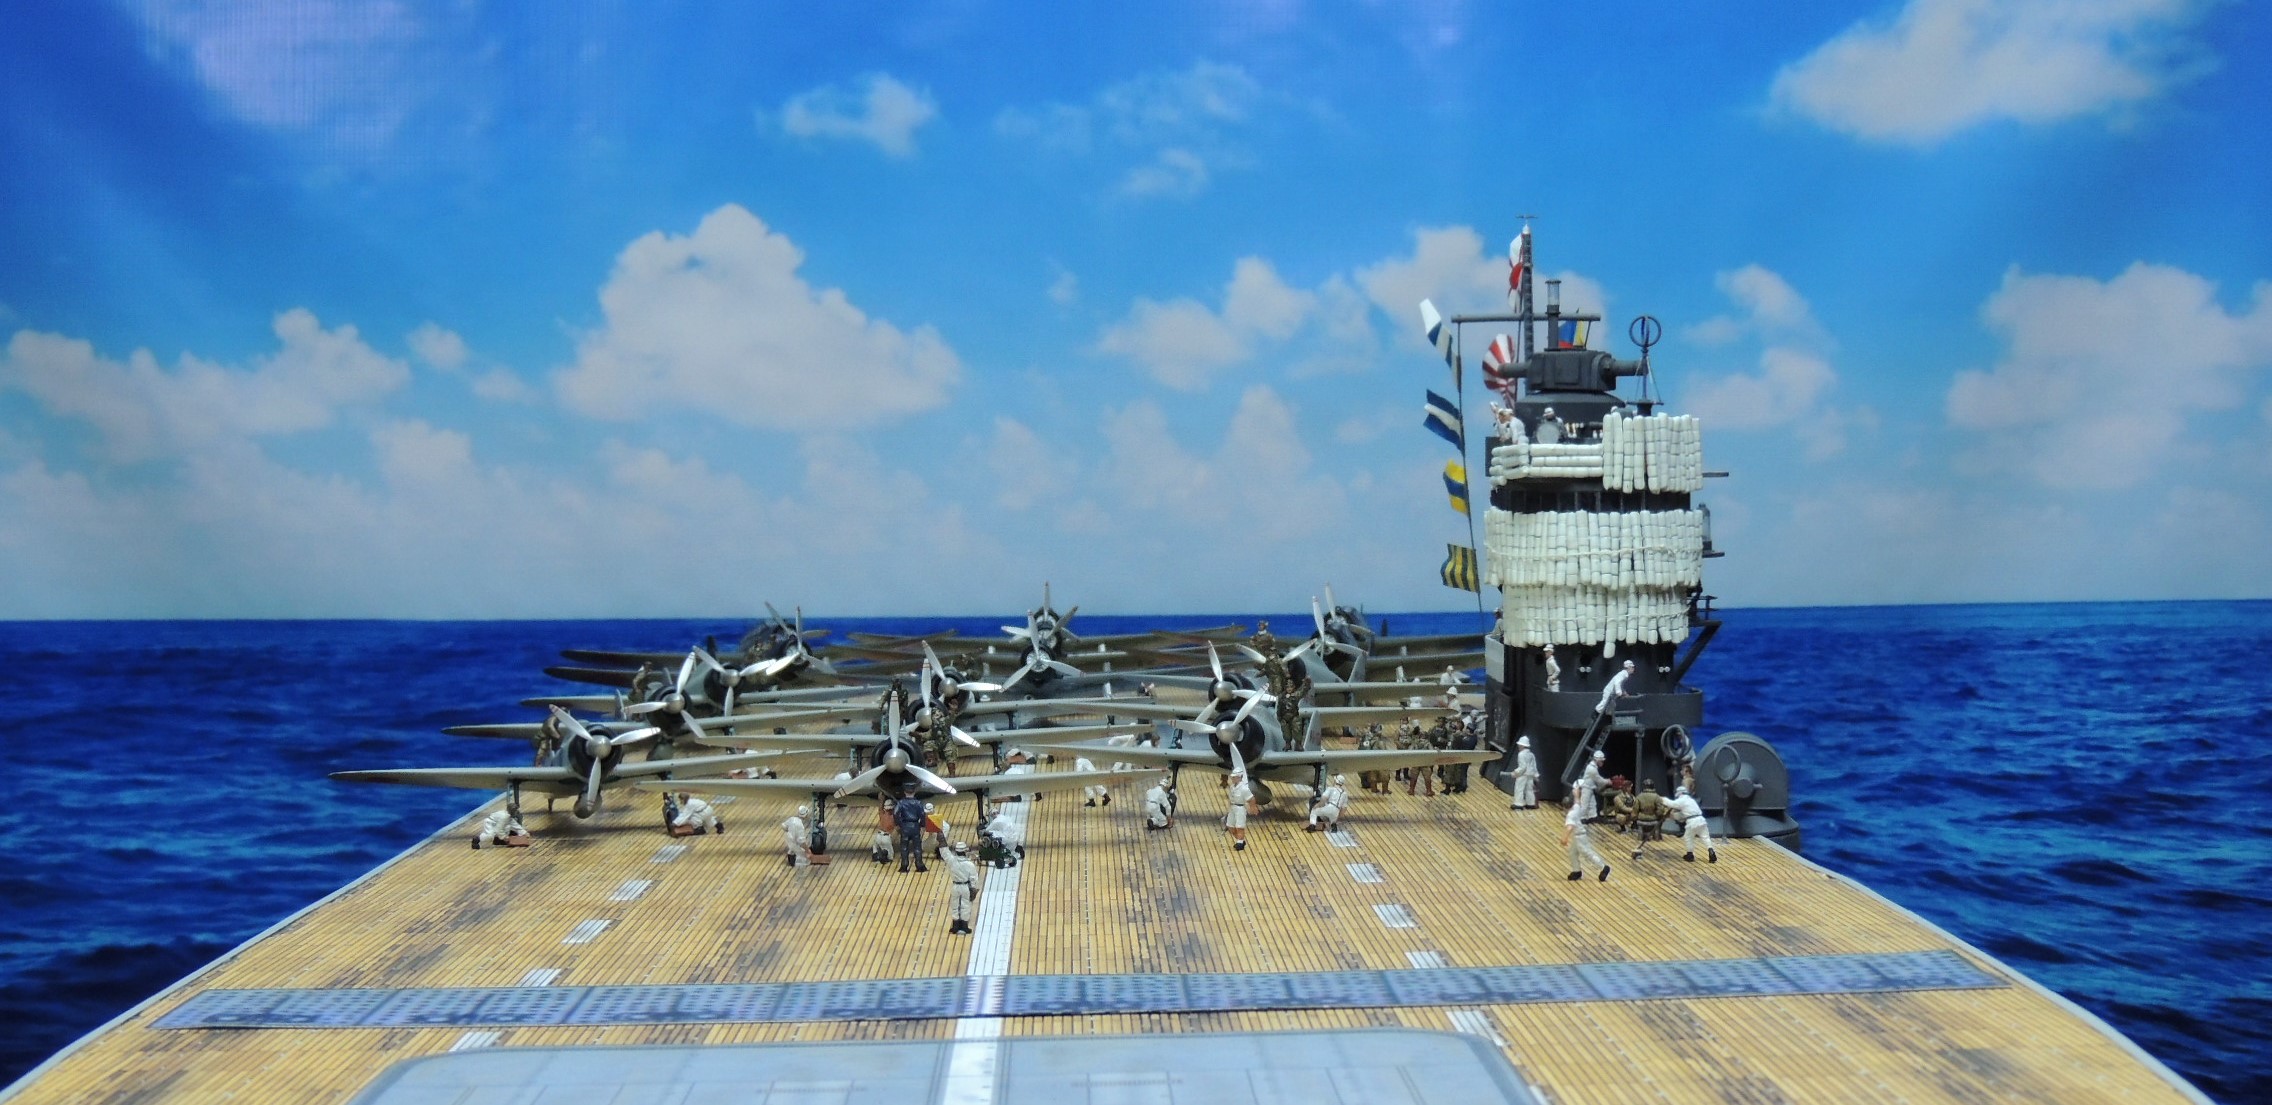
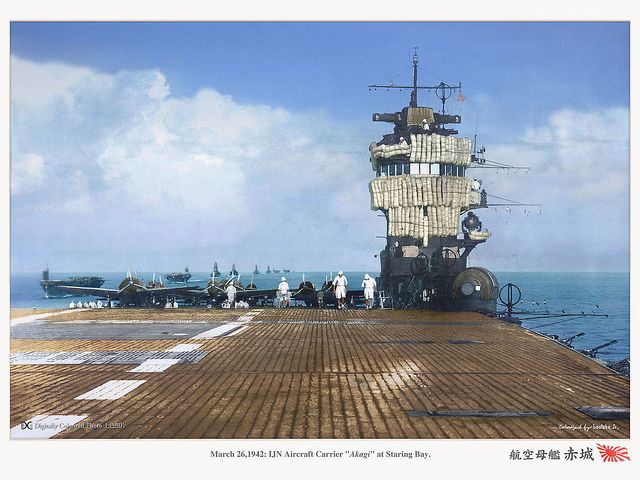
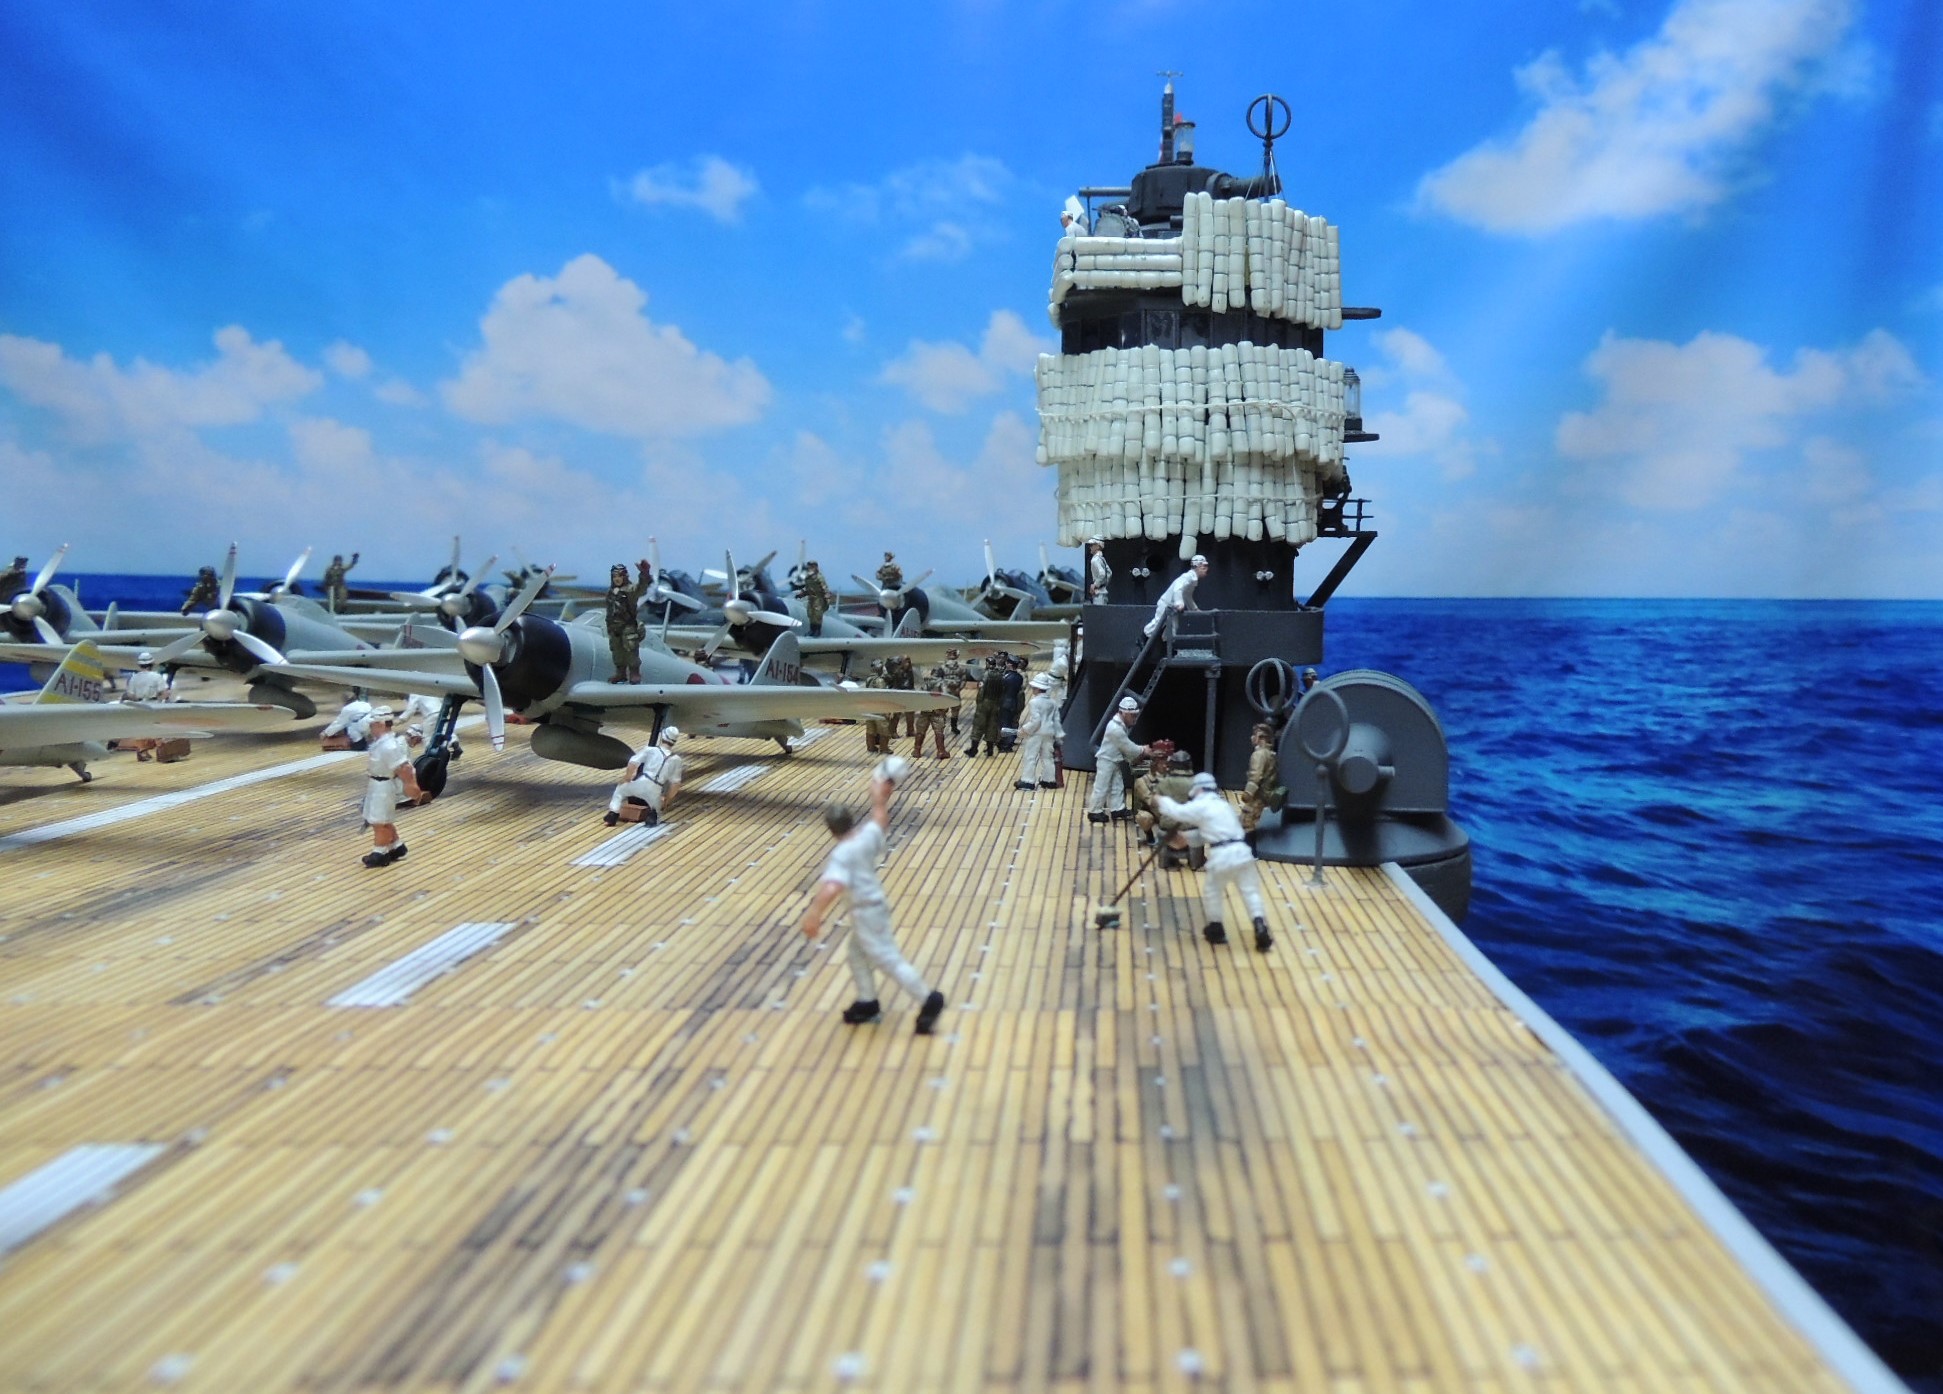
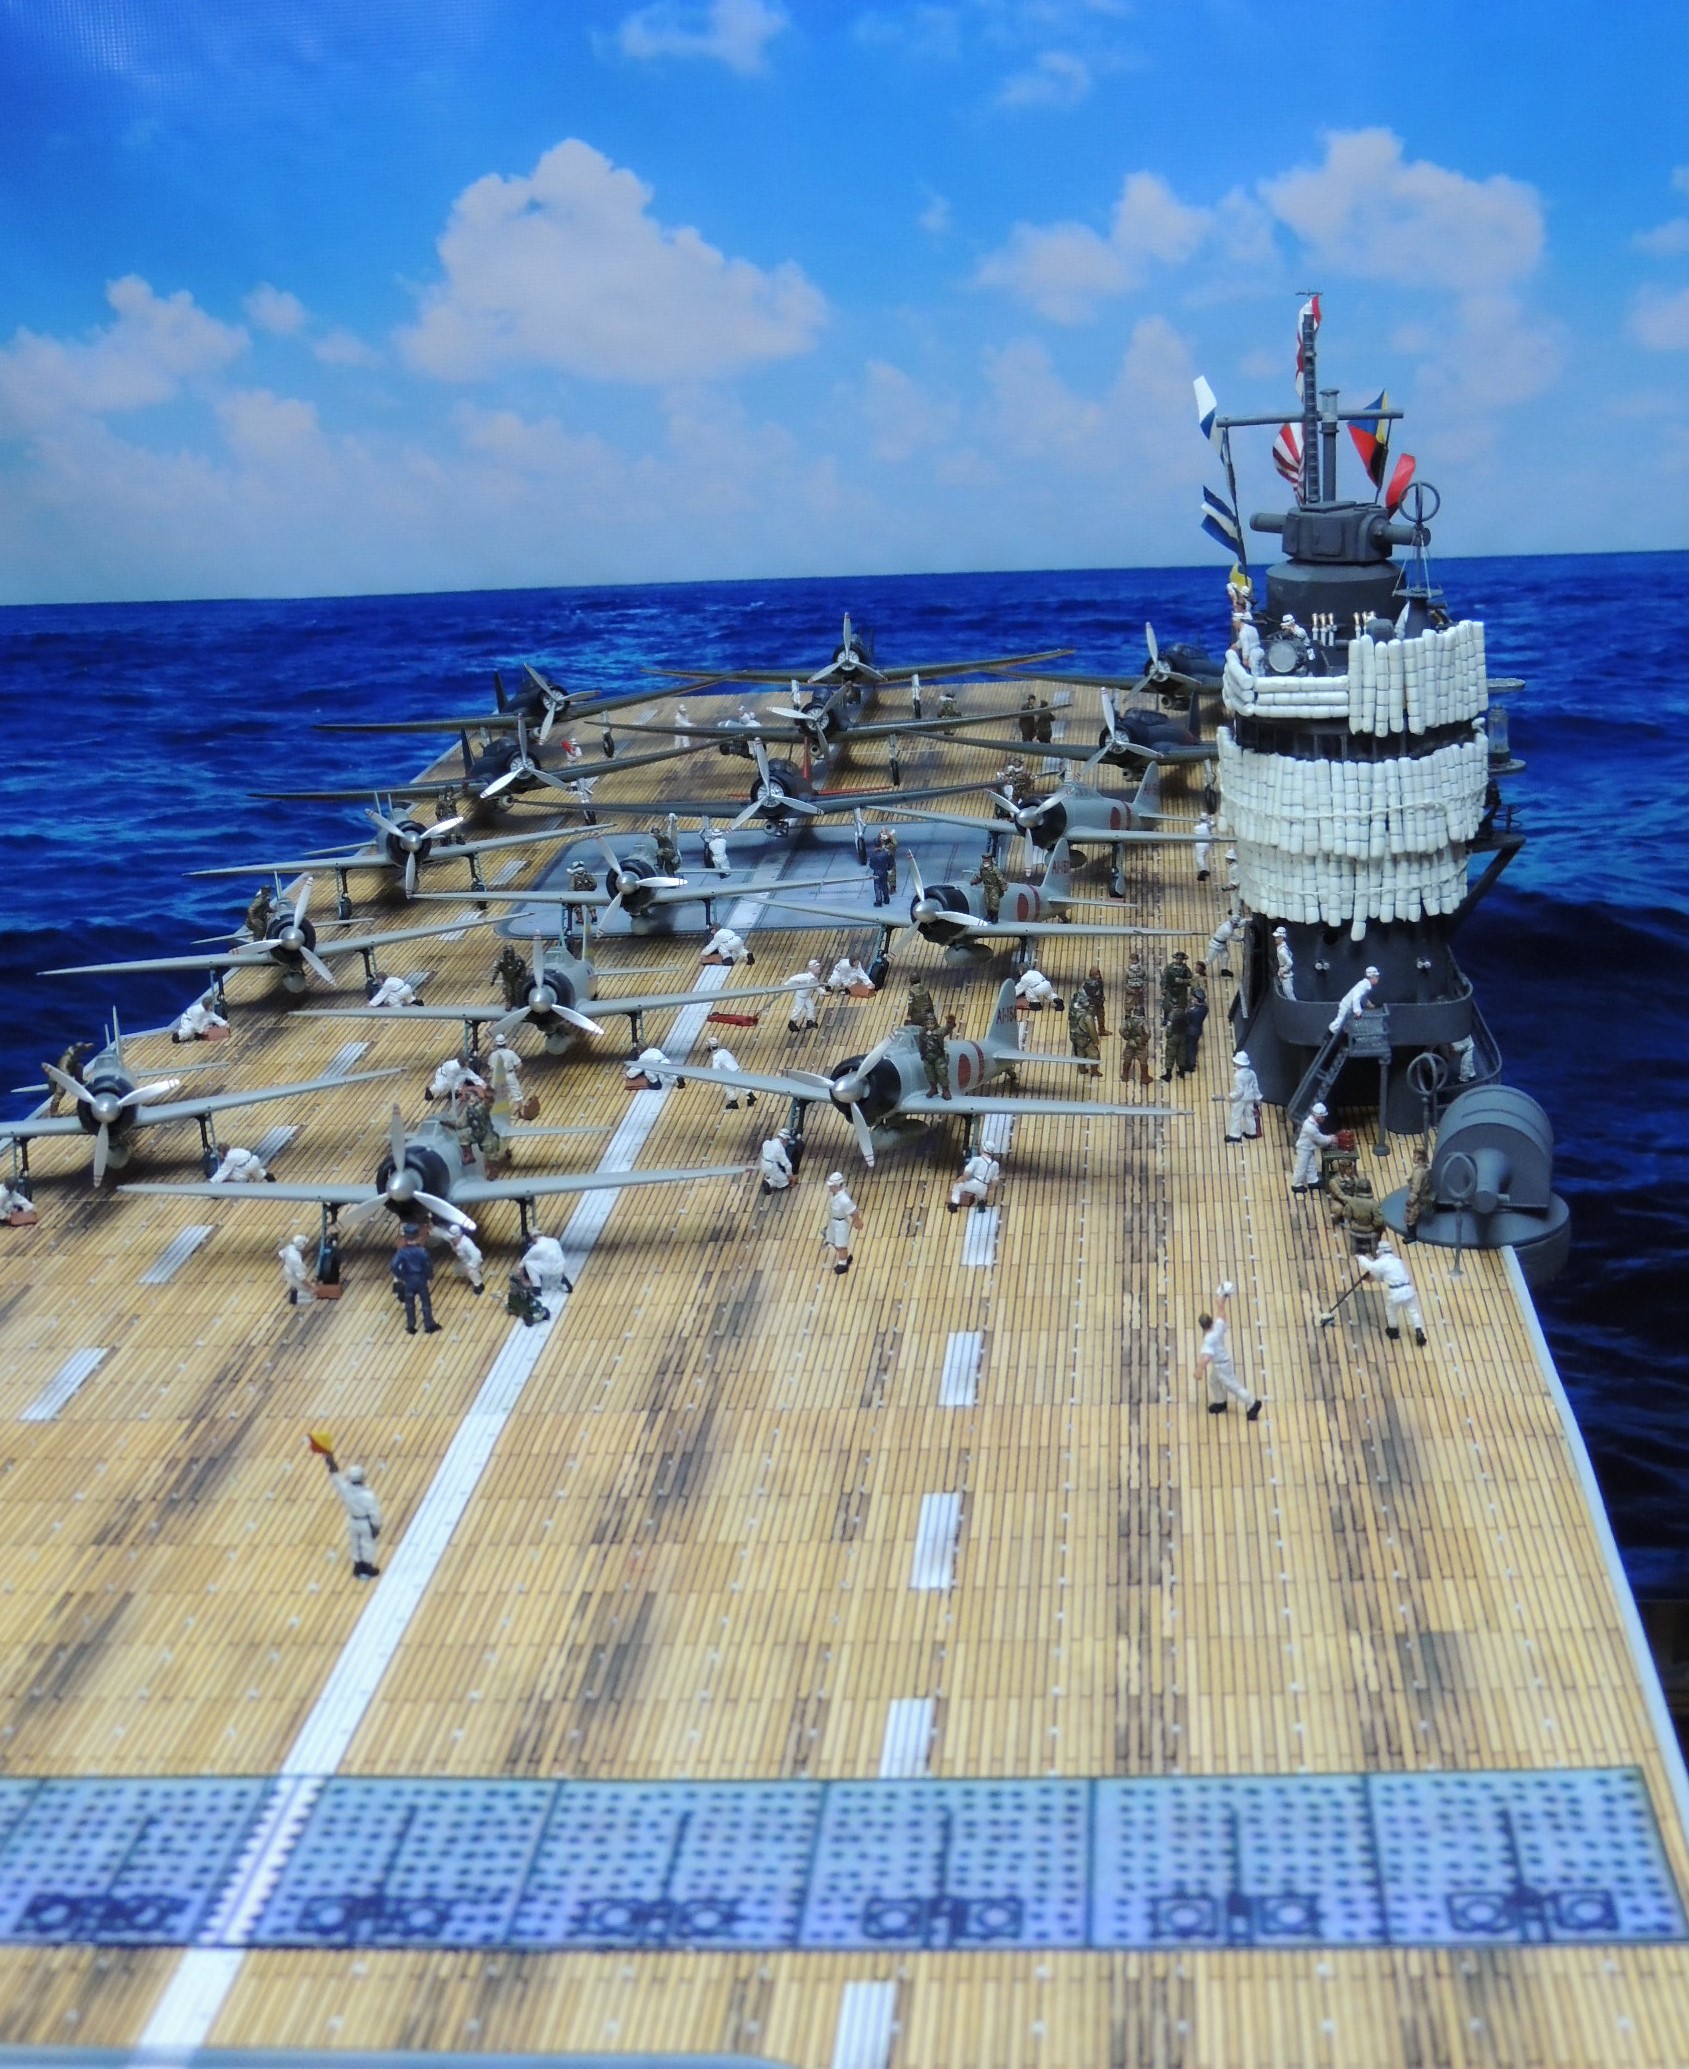
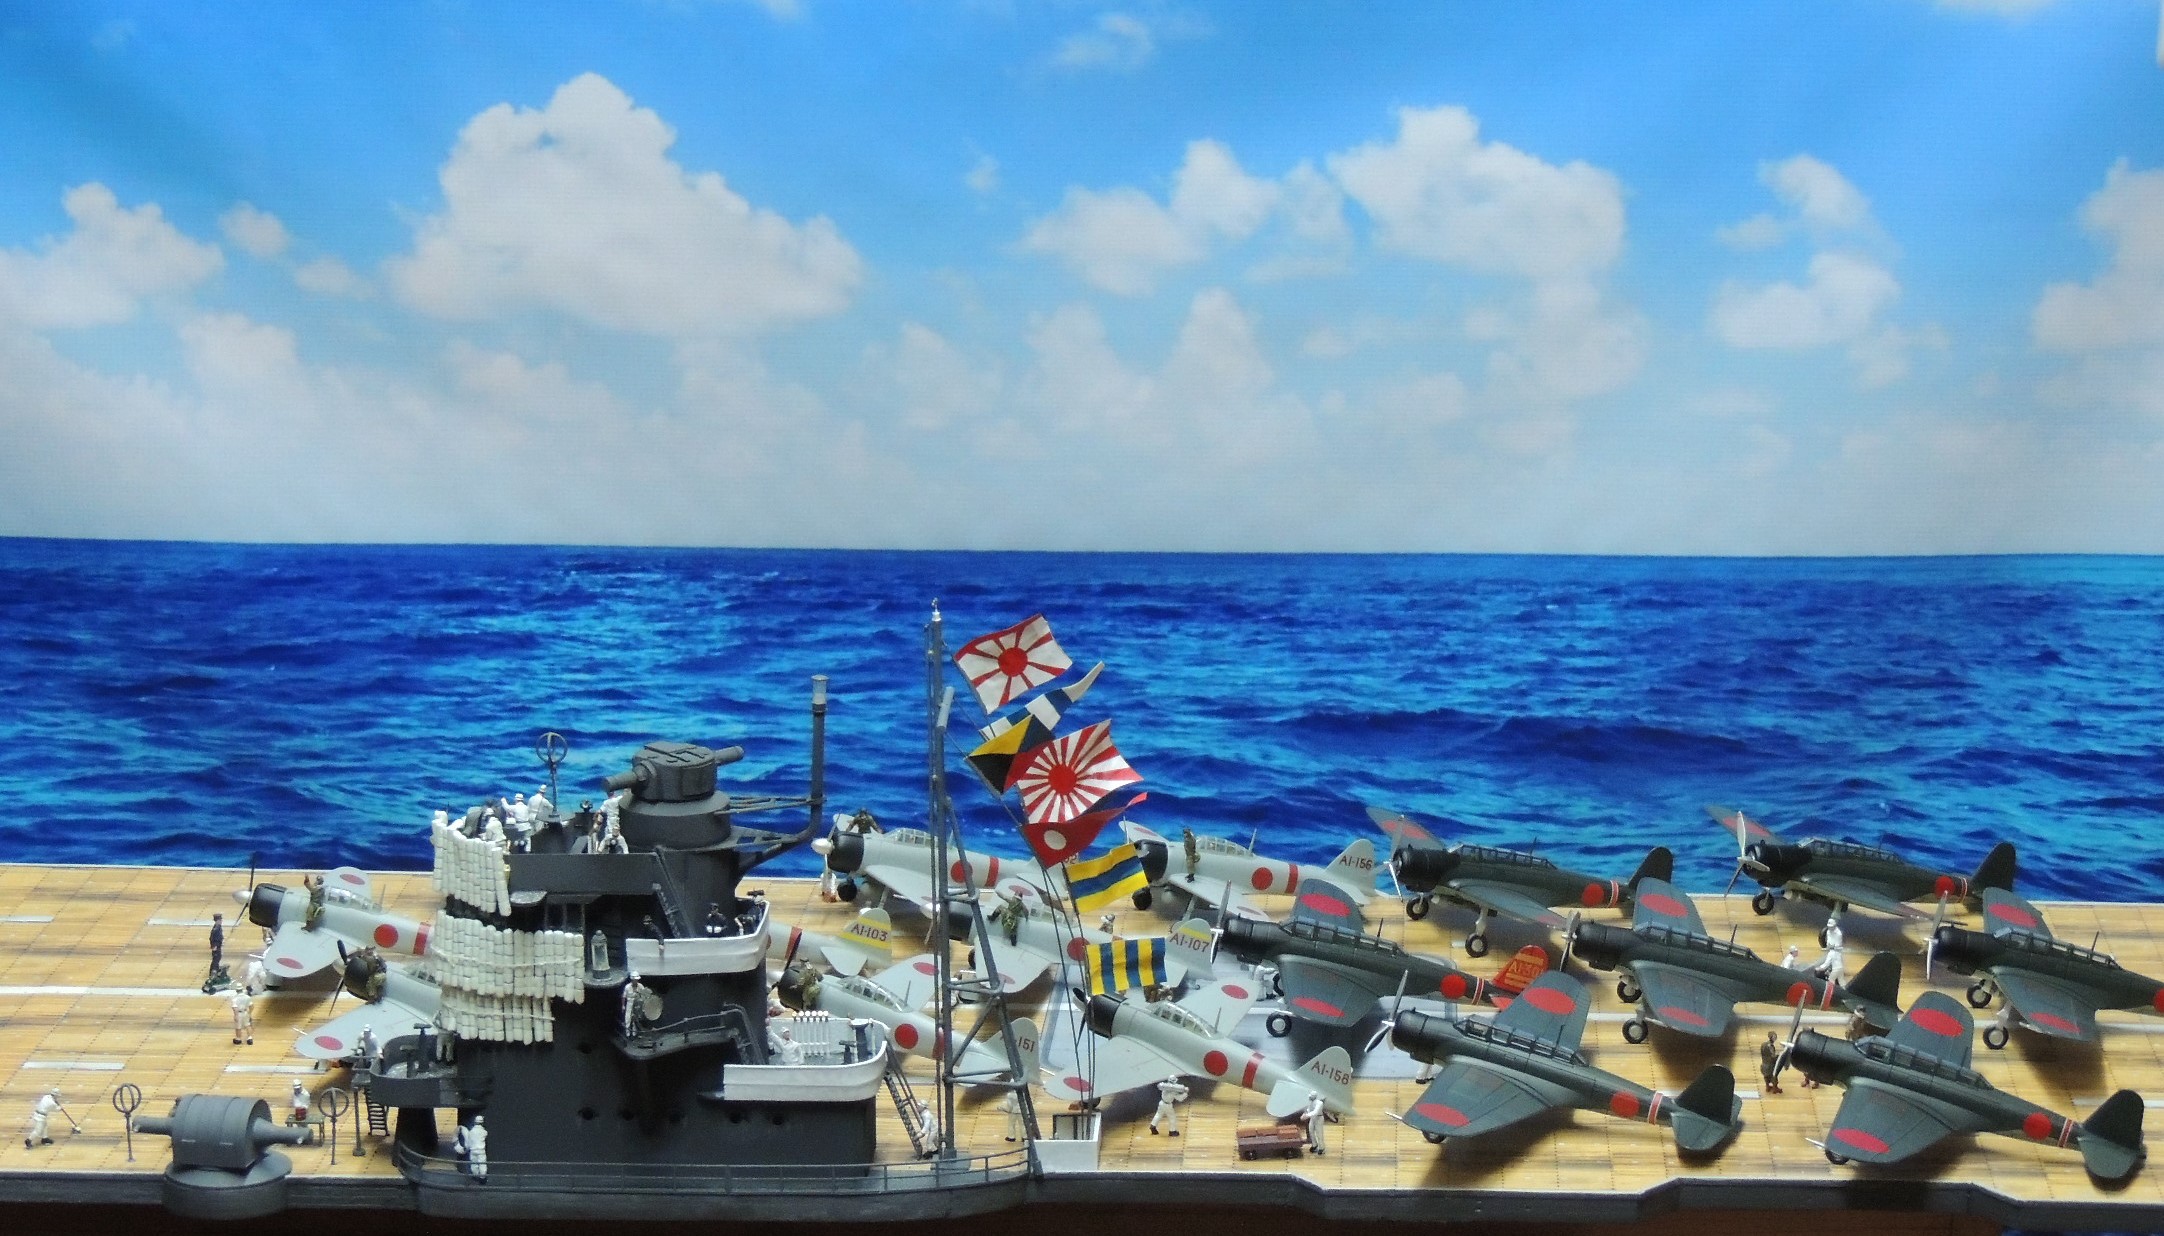
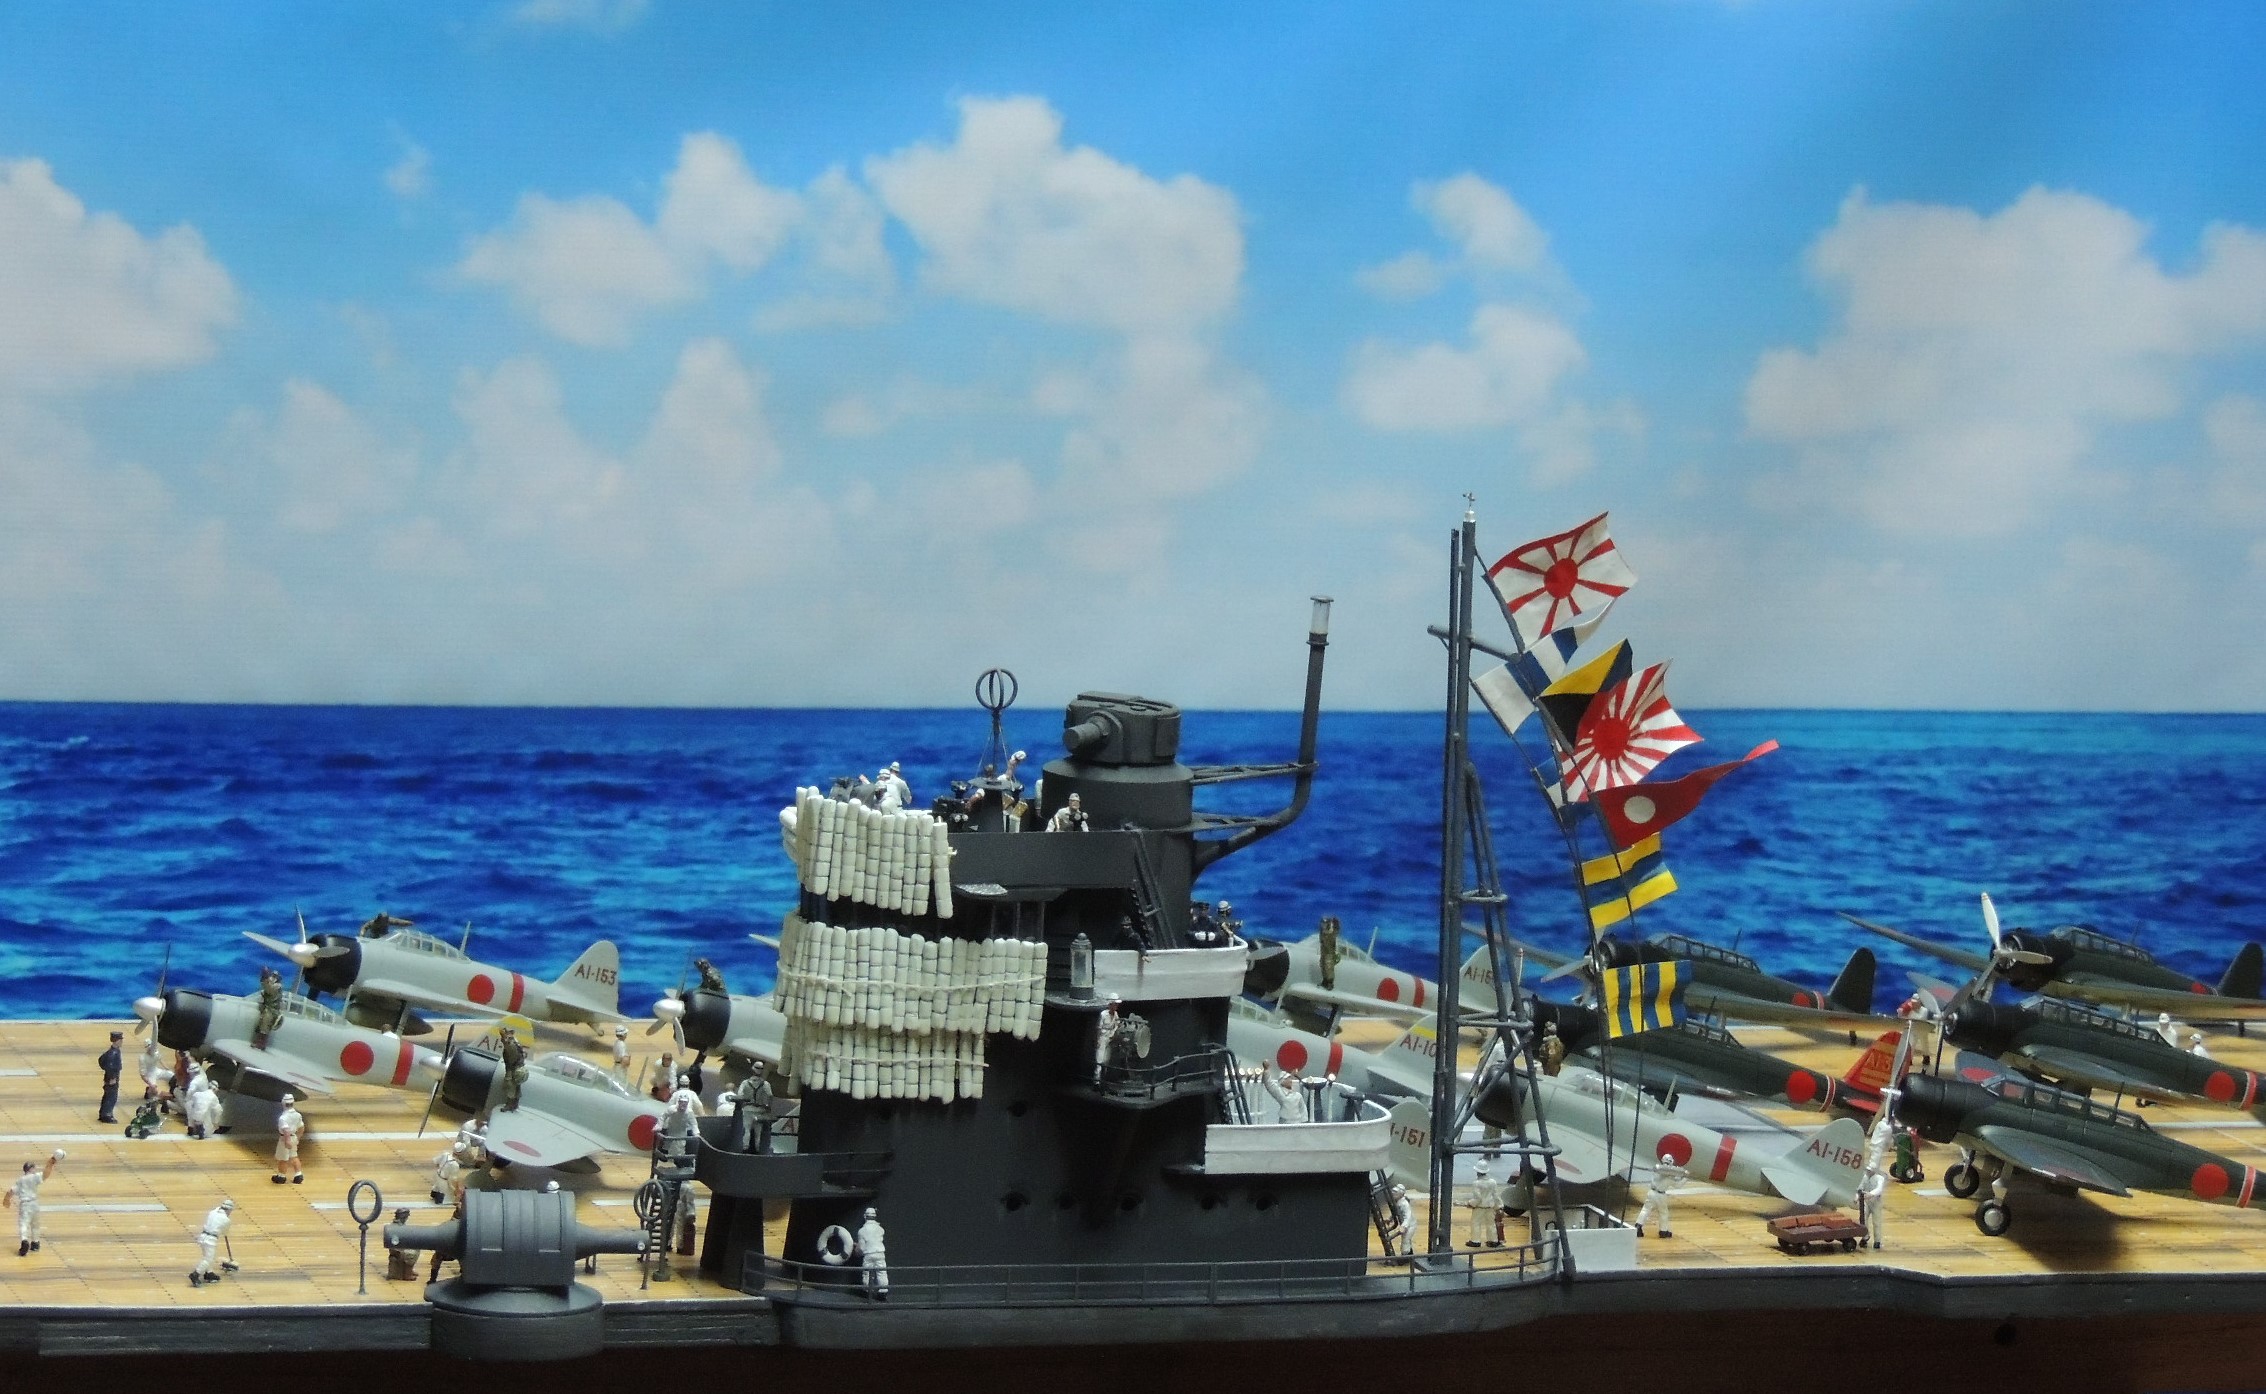
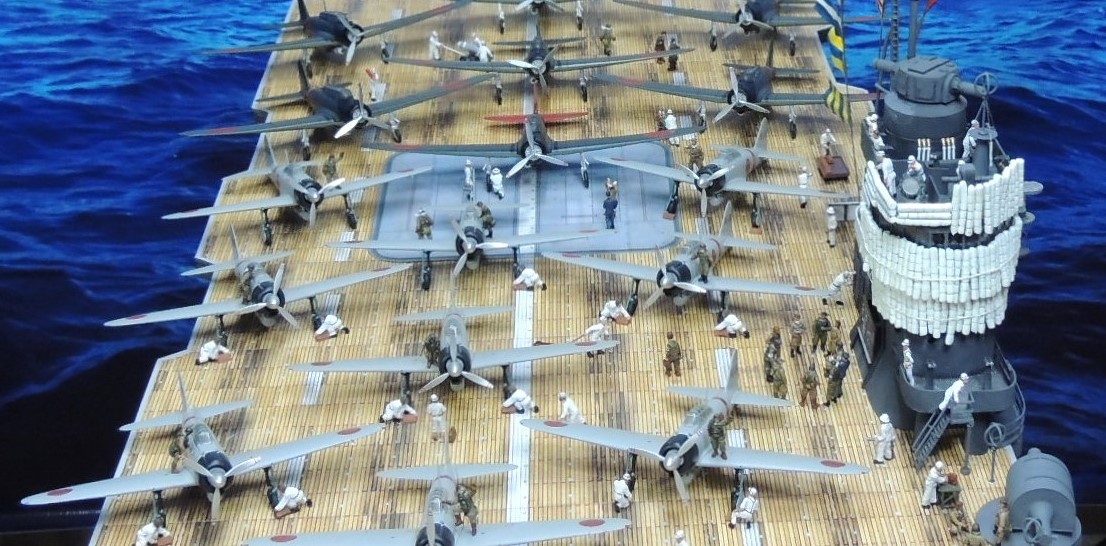
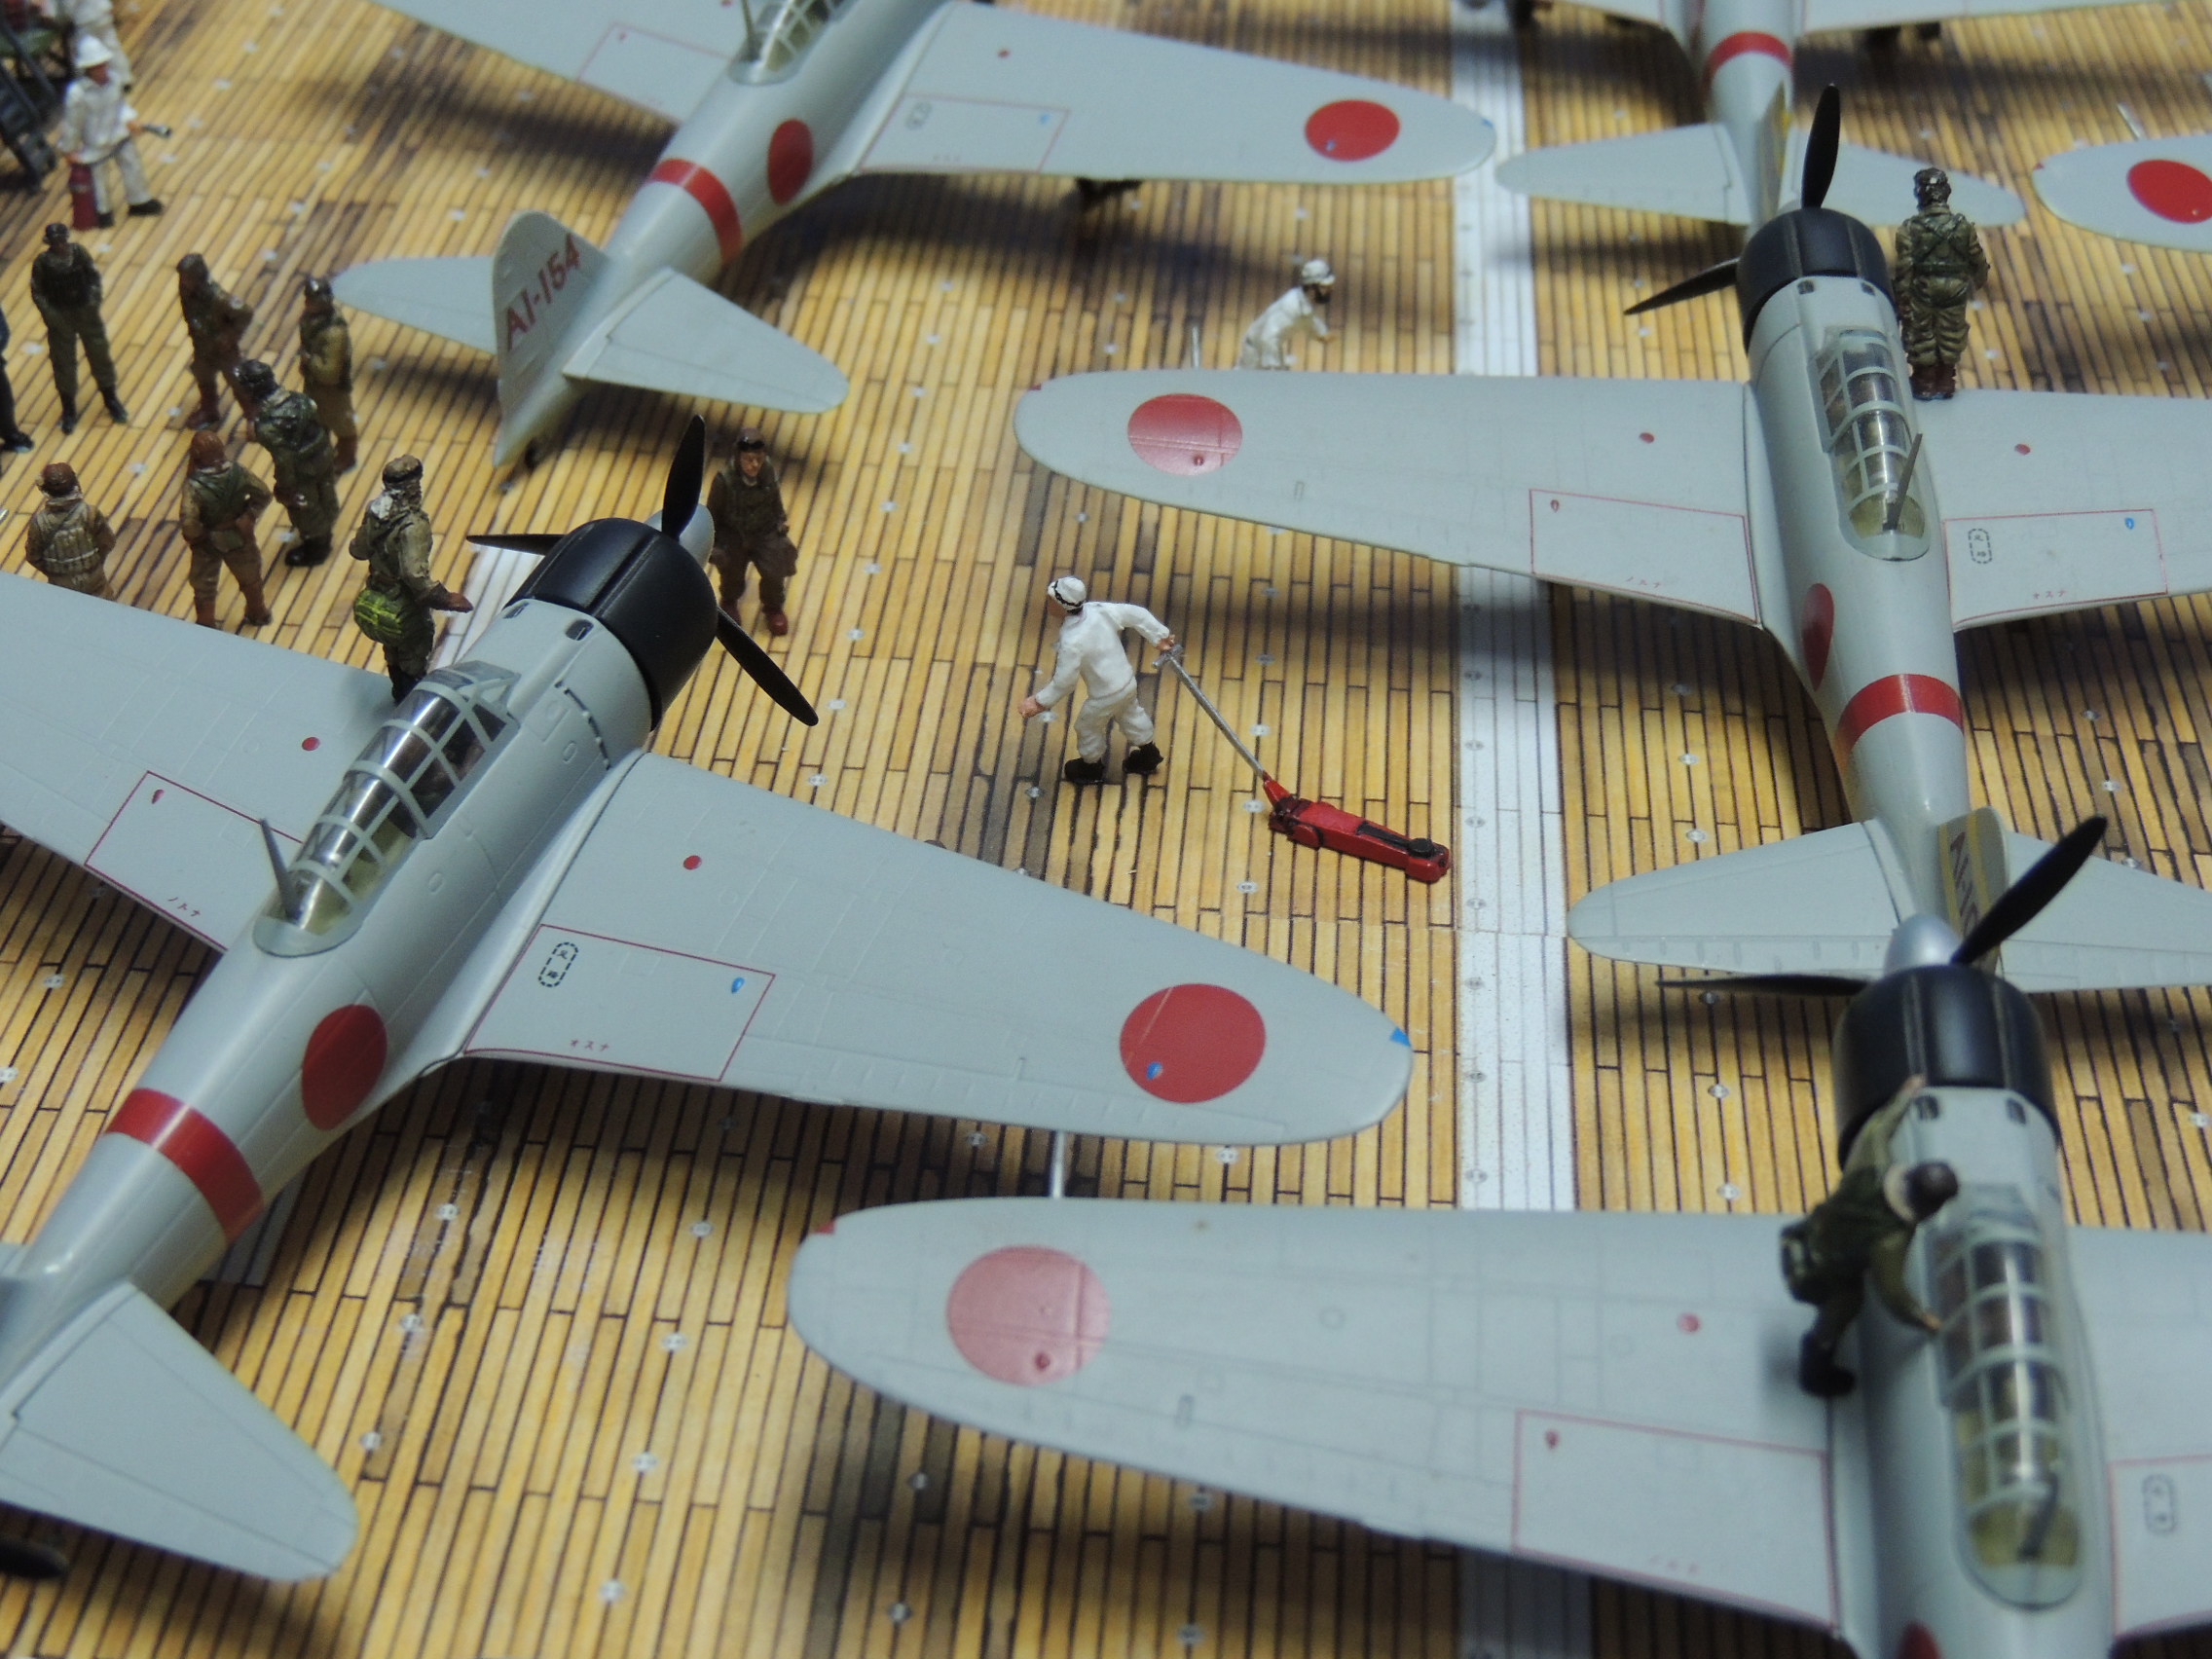
This is Part 3.3 of a series of posts on the construction of a diorama depicting the Zeros of the Imperial Japanese Navy’s Akagi aircraft carrier preparing to take off as part of the first wave attack on Pearl Harbor. This post concerns only the 1/72 pilots and crew to be used in the diorama. To view the finished diorama, please click here.
I. Plastic 1/72 Japanese Pilot Sets
As recently as five years ago, modelers would have been hard-pressed to build a diorama using 1/72 plastic Japanese pilots. The only figures available were the two pilots included in the 1998 Hasegawa WWII Pilot Figures set. Fortunately, with the explosion of 1/72 plastic figure manufacturing in recent years, modelers have significantly more choices. Below is a brief survey of the various plastic Japanese pilot sets. Resin and metal figures are covered in a separate section.
Although I generally paint my own figures, my skills are mediocre at best. As I’ve said before, I’m a dilettante — I dabble in everything and master nothing. Thus, as I have in the past, I turned to a genuine hobbyist with real expertise for help. The results of his skill and patience follow. These are the figures I intend to use in the diorama, obviously clipping the bases.
A. The Hasegawa Set: The Two Lone Japanese Pilots
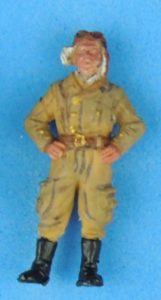
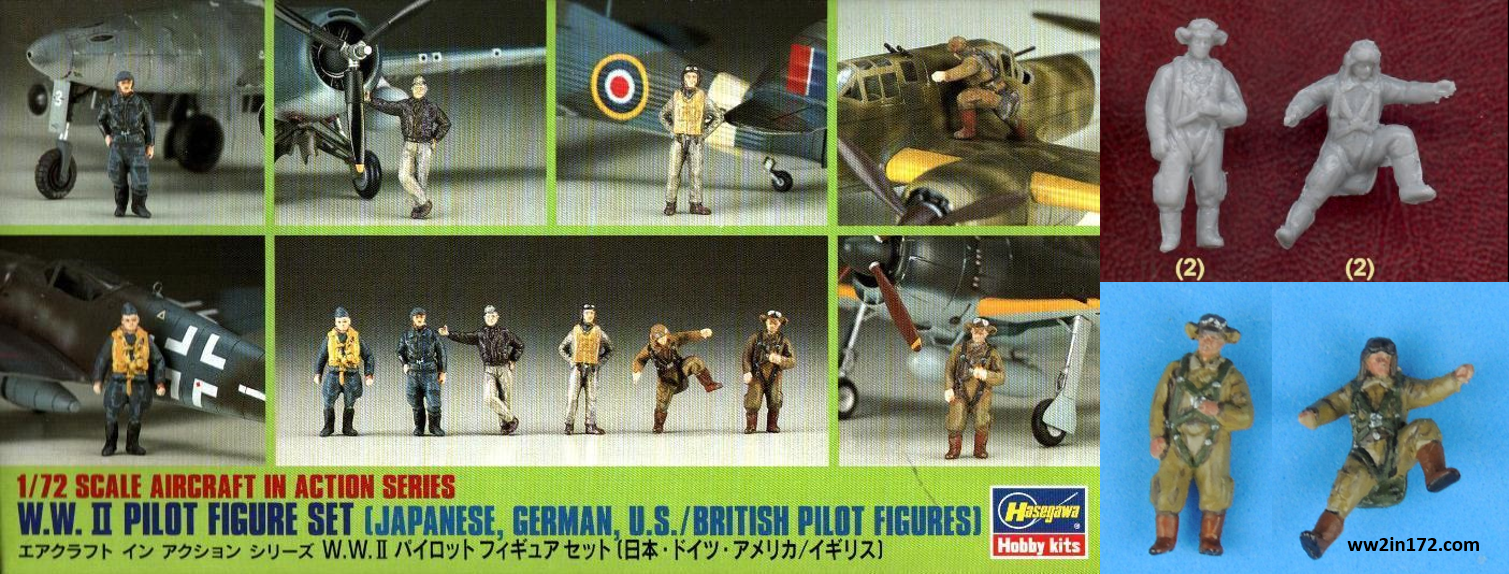
Issued in 1998, the only Japanese pilots available to modelers until 2013 were the two figures in the Hasegawa 35008 WWII Pilot Figures, a hard plastic set that included two Allied, two German, and two Japanese pilots. Plastic Soldier Review (PSR) described these figures as “realistic” with “fair but not particularly sharp” detail. As can be seen in the photo below, the two Japanese poses are traditional fare and, being made of hard plastic, are easy to clean up the seams and take paint very well. I intend to use the two painted figures in the bottom right of the composite photo below.
Hasegawa 35008 WWII Pilot Figures

B. RedBox Fills the Vacuum
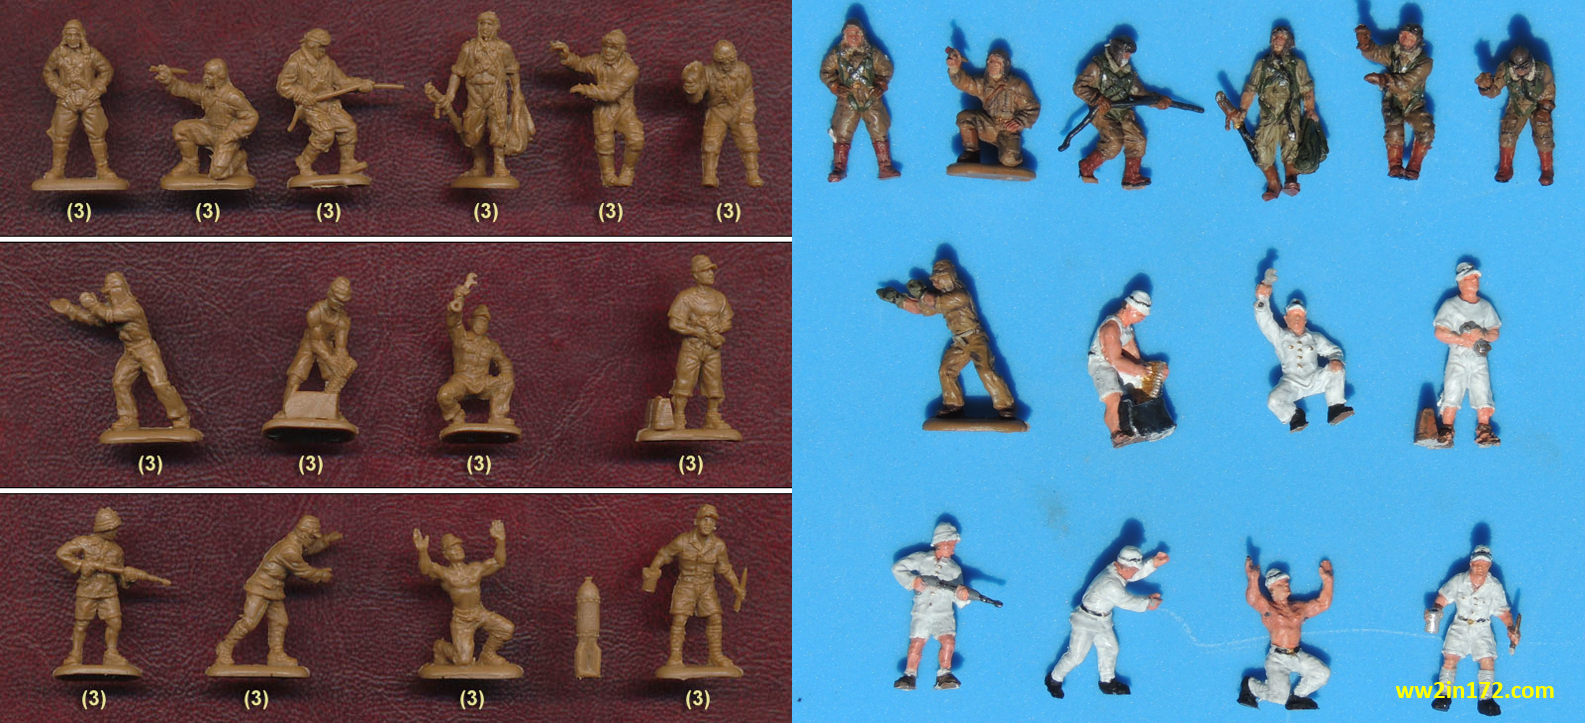
The vacuum was finally filled in 2013, when RedBox, a Ukrainian company, released three sets of Japanese WWII pilots: 72048 Japanese Kamikaze; 72052 Japanese Army Aviation Pilots and Ground Crew; and 72053 IJN Pilots and Ground Crew. Modelers could not have asked for more to end the 15-year famine as RedBox produced three superb sets, each with 6 to 8 different pilots. PSR gave all three sets 10/10 for historical accuracy and 10/10 for sculpting — quite an achievement given PSR’s notoriously exacting standards. PSR described the sculpting of the three sets, respectively, as having “good proportions and excellent detail,” “completely natural look throughout, expressive faces and good detail,” and “excellent [with] good detail in all the areas where it is needed.” Below are side-by-side photos of the three sets with the PSR unpainted figures on the left and my painted figures on the right (photos used with permission from PSR).
RedBox 72048 Japanese Kamikaze
RedBox 72052 Japanese Army Aviation Pilots and Ground Crew
RedBox 72053 IJN Pilots and Ground Crew
C. The Modelkasten Tainan Pilots
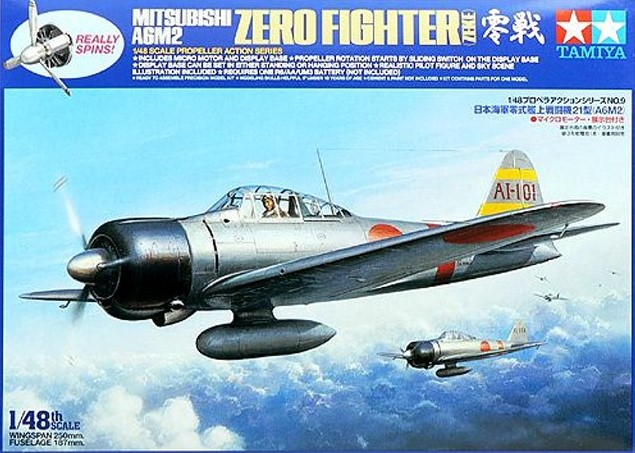
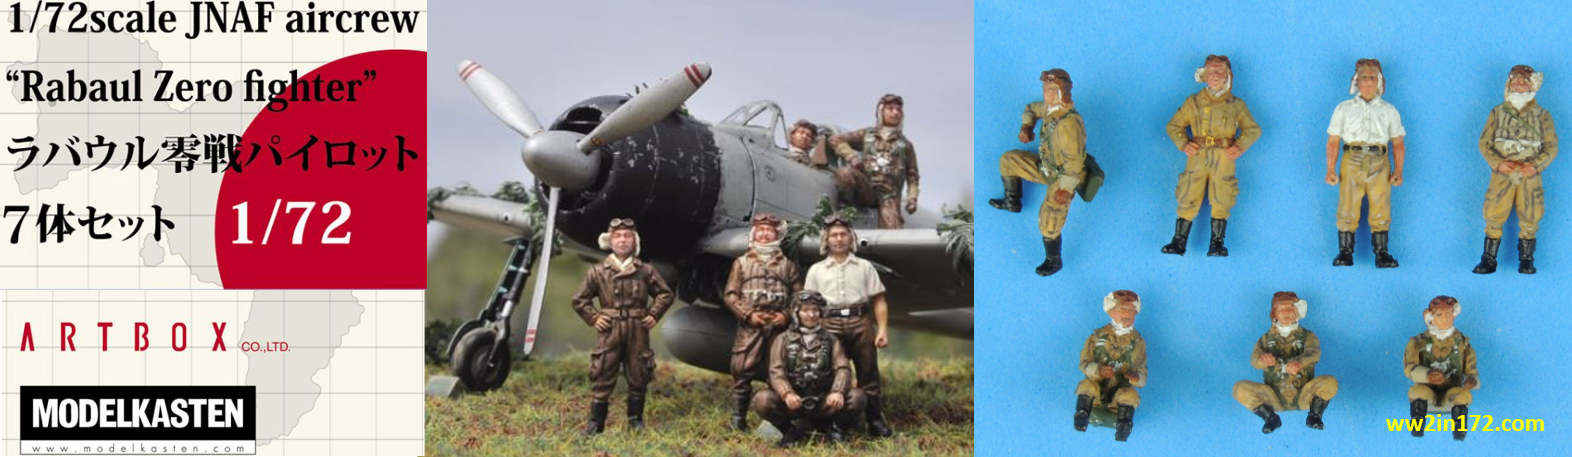
A superb but not widely available Japanese pilot set is the Modelkasten 1800 JNAF Aircrew “Rabaul Zero Fighter,” a hard plastic set depicting a wartime photo of the famous Tainan Air Group. Released in Japan in 2016, the seven-figure set, which was previously released in 2013 by Modelkasten in 1/48 scale, is considerably more expensive and offers far fewer figures than other sets. The figures are standing or squatting, apparently posing for a photo. Saburo Sakai, arguably Japan’s most famous ace, is presumably in the group. While there are seven figures in the box, there are only six poses in the set as one of the seated figures is duplicated. Note that the box photo is of the 1/48 figures. For some unknown reason, the set is not listed on the PSR website.
Modelkasten 1800 JNAF Aircrew
D. Hasegawa Returns
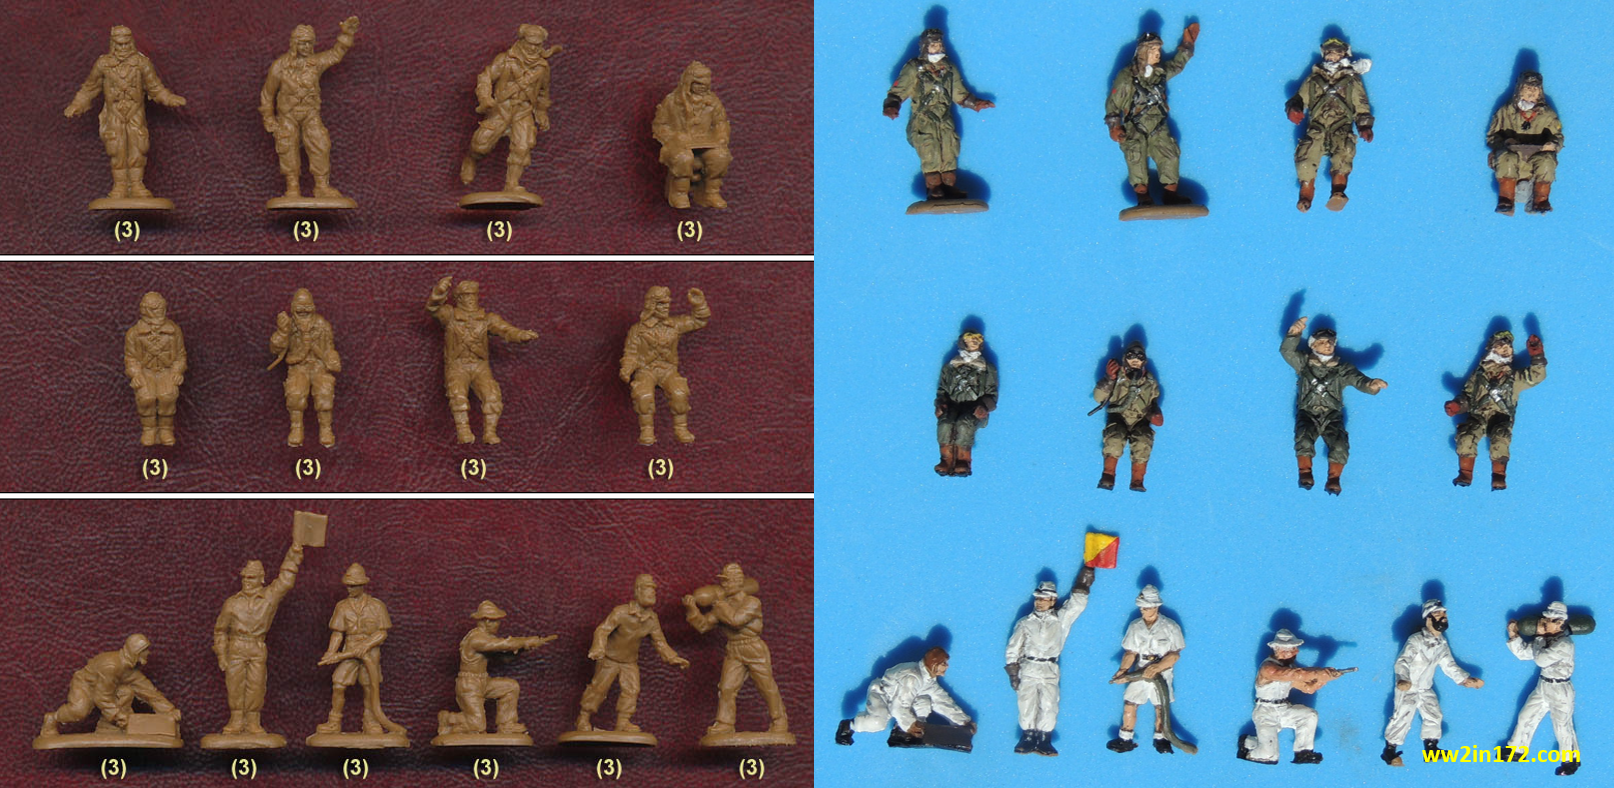
In 2018, modelers were treated to yet another Japanese aviation set, the Hasegawa 35116 Japanese Navy Airmen set, a hard plastic kit of bomber plane crews that requires assembly of body parts. PSR rated this set 10/10 in every single category, describing it as “a terrific set which delivers everything it promises . . . all are very well sculpted and can be posed in a variety of useful and realistic positions.”
Like Modelkasten, Hasegawa appears to have scaled down the figures to take advantage of the ever-growing 1/72 scale market. The photo on the box cover below is almost certainly of a scale larger than 1/72. My guess given the “35116” stock number is that they were originally sculpted in 1/35 scale but this is merely speculation. The PSR photo below of the actual assembled figures shows that an interesting characteristic of the set is the distinctly Asian features of the figures.
Hasegawa 35116 Japanese Navy Airmen 
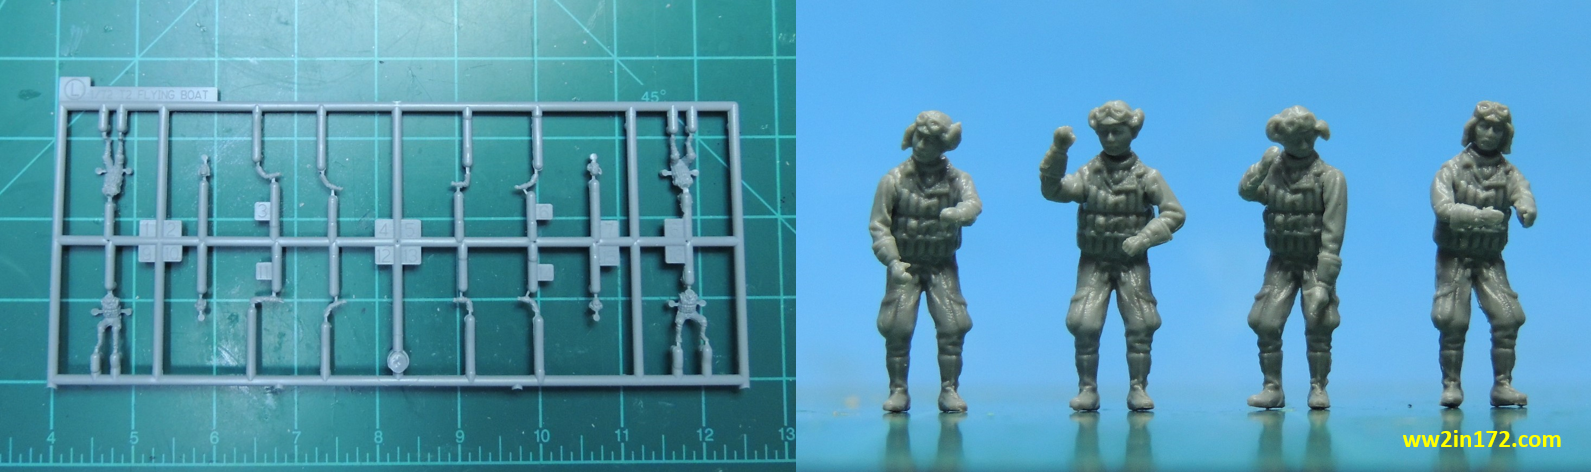
The kit contains four identical sprues, each with four different torsos, four different heads, and four different sets of arms that, as mentioned, require assembly. See photo of sprue below. Thus, it is possible to mix and match and create up to 16 different figures — 12 slightly different seated figures and four different standing figures. I assembled the four standing figures to give a sense of the flexibility afforded in creating different poses. See photo of standing figures below. While the four torsos are the same, they have four different heads and four different sets of arms, resulting in four very different figures.
I found the figures quite pleasing, with great proportions and no overscaled heads — a common problem in 1/72 scale. Being made of hard plastic, I also found it easy to clean up the seams. (Note that I didn’t assemble the sitting figures as I couldn’t think of a use for the Akagi diorama. Note also that the four standing figures will be painted for the diorama but I didn’t want to delay the post.)

II. Resin and Metal 1/72 Japanese Pilots
A. CMK Figures
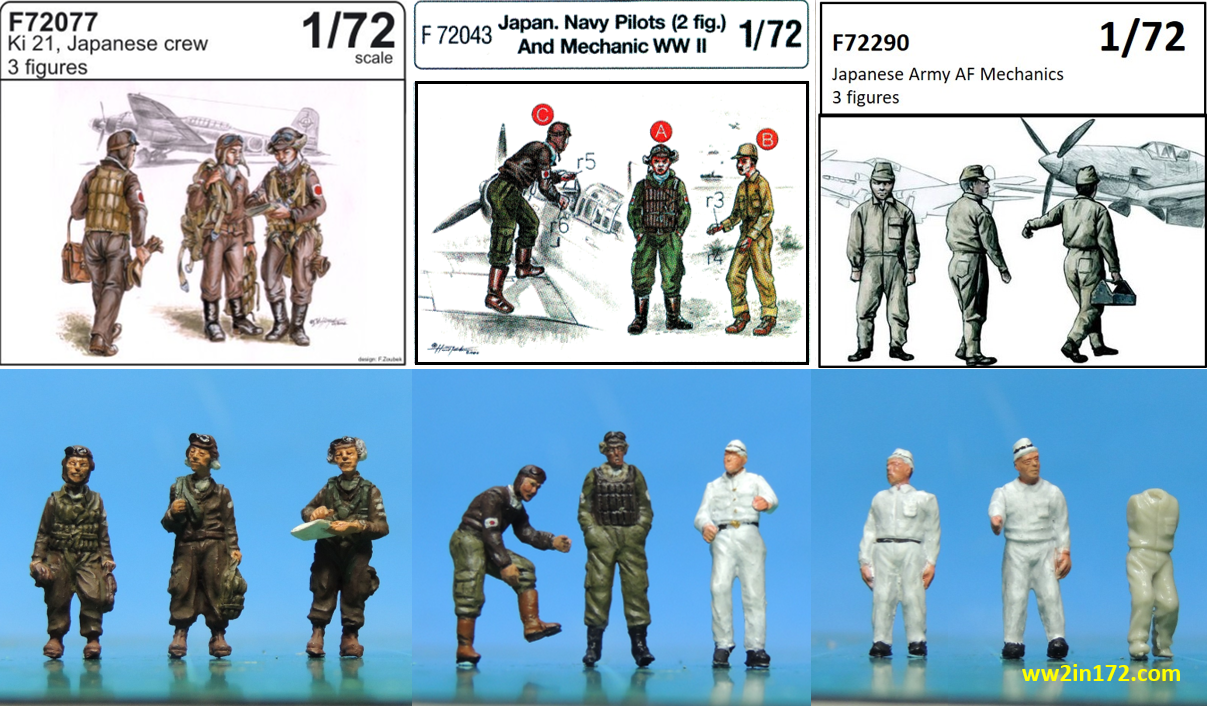
There are several small resin sets available to modelers, primarily from Czech Master Kits (CMK), a Czech company that makes resin figures and accessories in various scales. I know of five CMK Japanese aviation-related sets — three that I will use for the diorama. The other two sets have pilots wearing two-piece uniforms inappropriate for Pearl Harbor. The photo below shows the three relevant sets: CMK F72077 Ki 21 Japanese Crew; CMK F72043 Japan Navy Pilots and Mechanic; and CMK F72290 Japanese Army AF Mechanics. Though the Ki 21 was a Japanese Army bomber plane, the three pilots in the F72077 are dressed like naval pilots, including the kapok life vests, clearly indicating they’re flying above water. As can be seen on the right side of the composite photo below, the three army mechanics wear essentially the same uniform as the navy mechanic to the left. (Note: Again the third figure will be painted for the diorama but I didn’t want to delay this post.)
CMK Japanese Aviation Figures
CMK also produced at least a couple of Japanese Army sets: F72042 Japan Army Pilots and F72113 Japanese Kamikaze Pilots. I couldn’t use these for the Akagi diorama because their two-piece uniform is noticeably different from the naval uniform used at Pearl Harbor.
B. RedBox Resin Figures
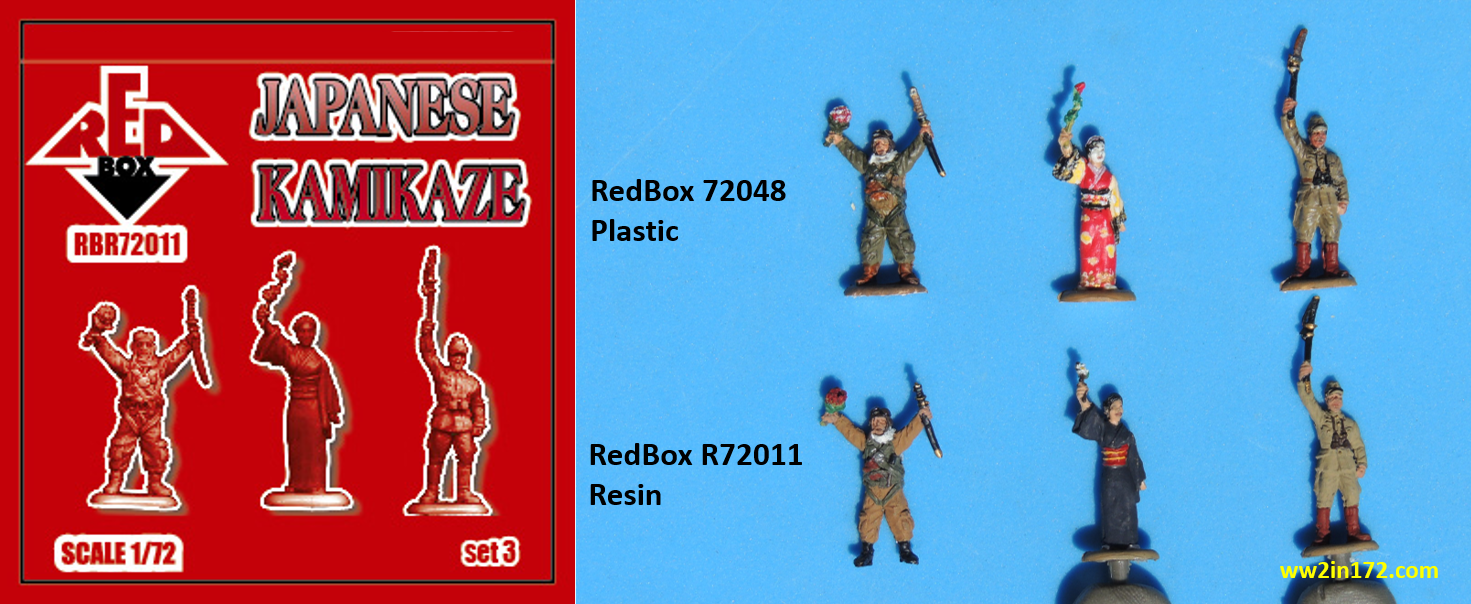
RedBox had previously released its plastic Japanese aviation sets in resin three-figure packages. Because the plastic sets are already pictured above, there is no reason to cover the resin sets here. However, to give a sense for the quality of the resin figures, below is a side-by-side picture of one of the Kamikaze resin sets and its plastic counterparts. While the appreciably more expensive resin figures are generally more realistic and have crisper, better-defined detail, that is not the case here. RedBox’s plastic figures are virtually identical to the resin ones. If anything, one of the shortcomings of resin — its brittleness — is shown here, with the geisha’s handheld flower bouquet being broken off.
RedBox R72011 Japanese Kamikaze
C. Orion Resin Figures
Orion, another Ukrainian company that is somehow affiliated with RedBox, released at least one Japanese aviation three-figure resin set, the 72010R WII Japanese Army Aviation Tropical Set 1. Very likely the only Orion Japanese resin set, it was never released in their plastic line. I will not be using these figures in the Akagi diorama since, as the photo below shows, two of the figures are in tropical short sleeve uniform. They’re included here simply to alert the reader to their existence. Perhaps Orion will release these figures in plastic in the future.
Orion 72010R WII Japanese Army Aviation Tropical Set 1
D. Hecker & Goros Metal Figures
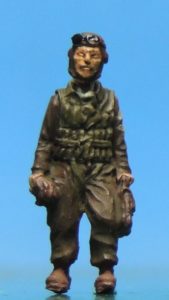
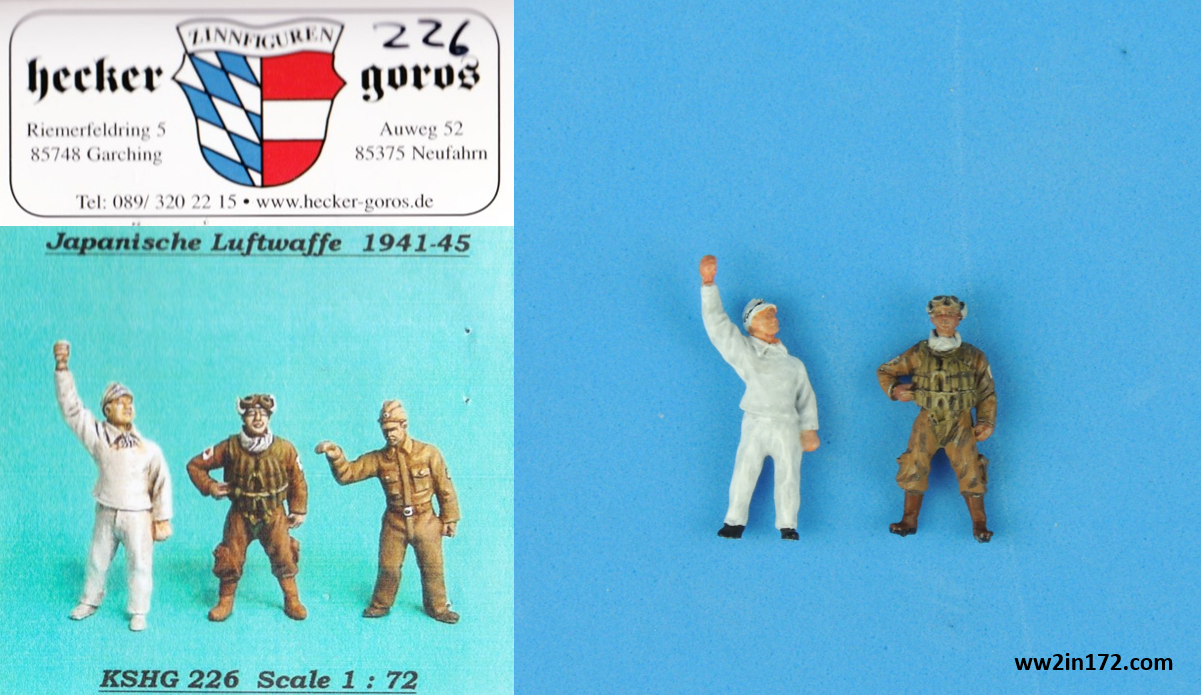
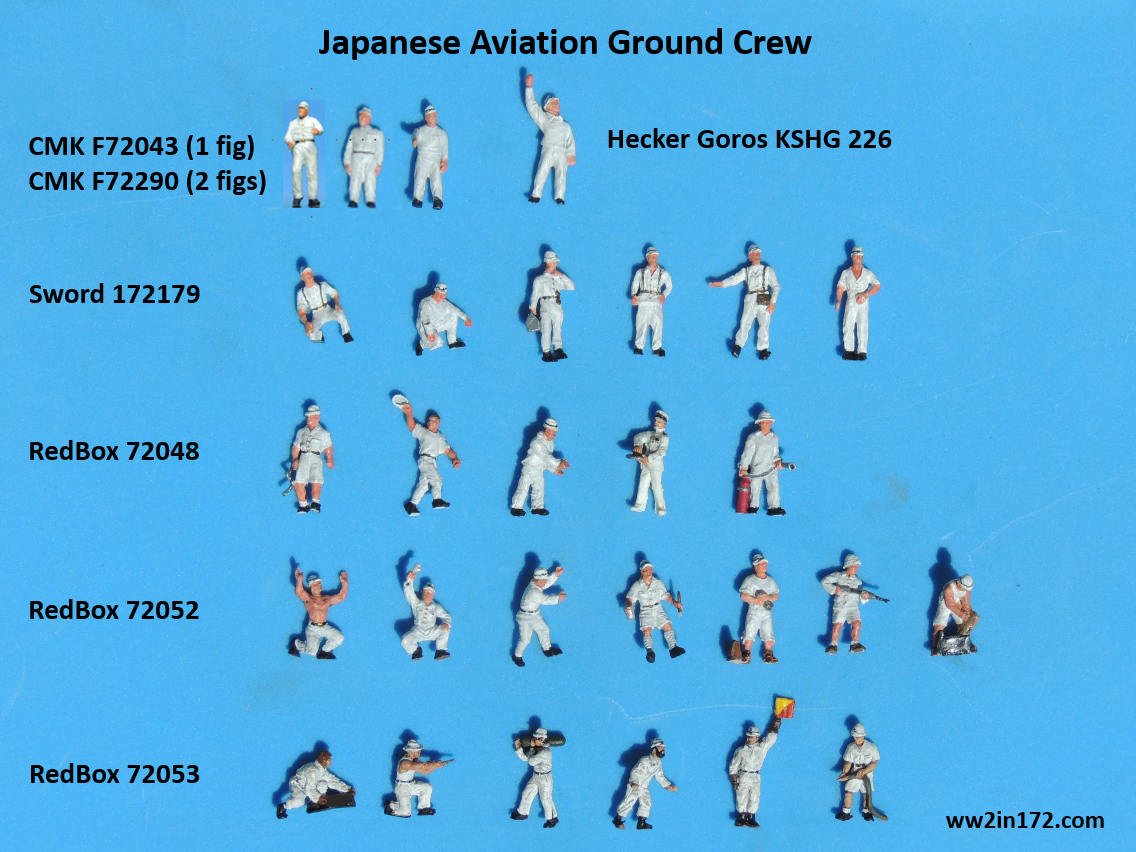
The only metal Japanese aviation set I’m aware of is the Hecker & Goros 226 Japanische Luftwaffe 1941-45, which includes one crewmember, one pilot, and one mechanic. Although the figures may be just slightly overscaled, the detail is rather fine and, being metal, paints quite well. The photo below of the painted figures does not show the mechanic figure, which I will not use in the diorama.
Hecker & Goros 226 Japanische Luftwaffe
III. Relative Pilot Sizes
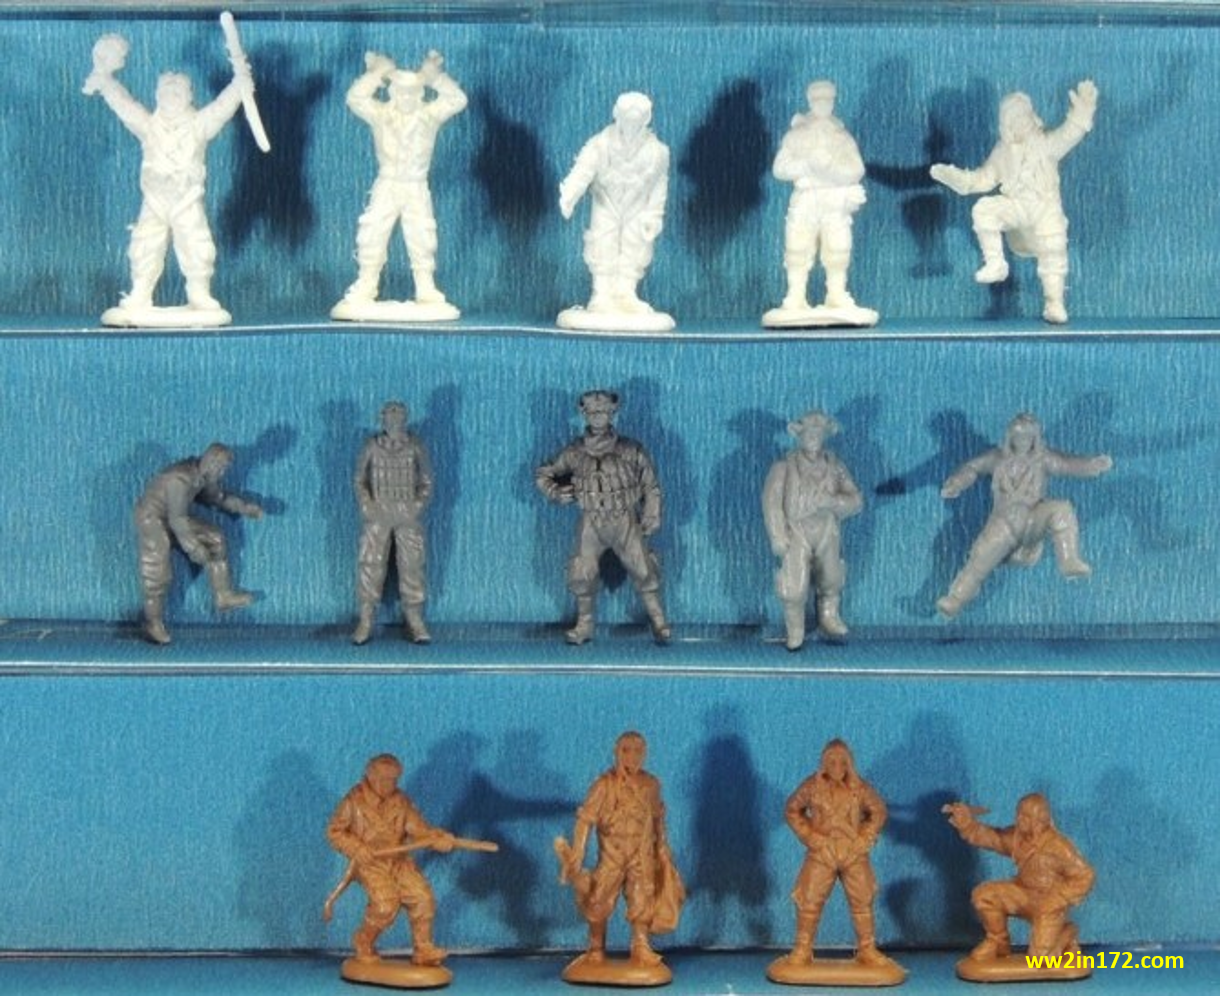
The relative size of the figures from different companies is important to many readers. The best way to get a sense for those differences is by displaying the figures from different companies side by side. See photo below. The white figures in the top row are from the RedBox Kamikaze set. The figures in the middle row, from left to right, are CMK (2), Hecker & Goros (1), and Hasegawa (2). Finally, the figures in the third row are from the RedBox Army Aviation set.
As the photo below shows, the CMK figures (second row, far left) have tiny heads but look realistic. The Hecker & Goros figures (second row, middle) are larger but, as the final diorama will show, look just fine when displayed separately from their counterparts from other companies. In my opinion, the Hasegawa figures (second row, far right) are spot-on in terms of proportions. Anyhow, I leave it to readers to come to their own conclusions.

IV. Japanese Cockpit Pilots
Though I don’t intend to use seated cockpit pilots in the diorama, included here for the sake of completeness are two such sets: HobbyMaster HP0004 WWII Pilots Set; and JP Productions 721114 Japanese Pilots. The HM set includes two Japanese, two German, and two British pilots that have been factory painted. While there was very likely a difference in the size of real German and Japanese pilots, HM has greatly exaggerated that difference, as the left half of the photo below clearly shows. The PJ pilots, on the other hand, are beautiful little figures with realistic proportions. Of course, they’re correspondingly more expensive and require painting. Nonetheless, the PJ figures make their HM counterparts look like trolls.
HobbyMaster HP0004 & PJ Productions 721114
Japanese Cockpit Pilots
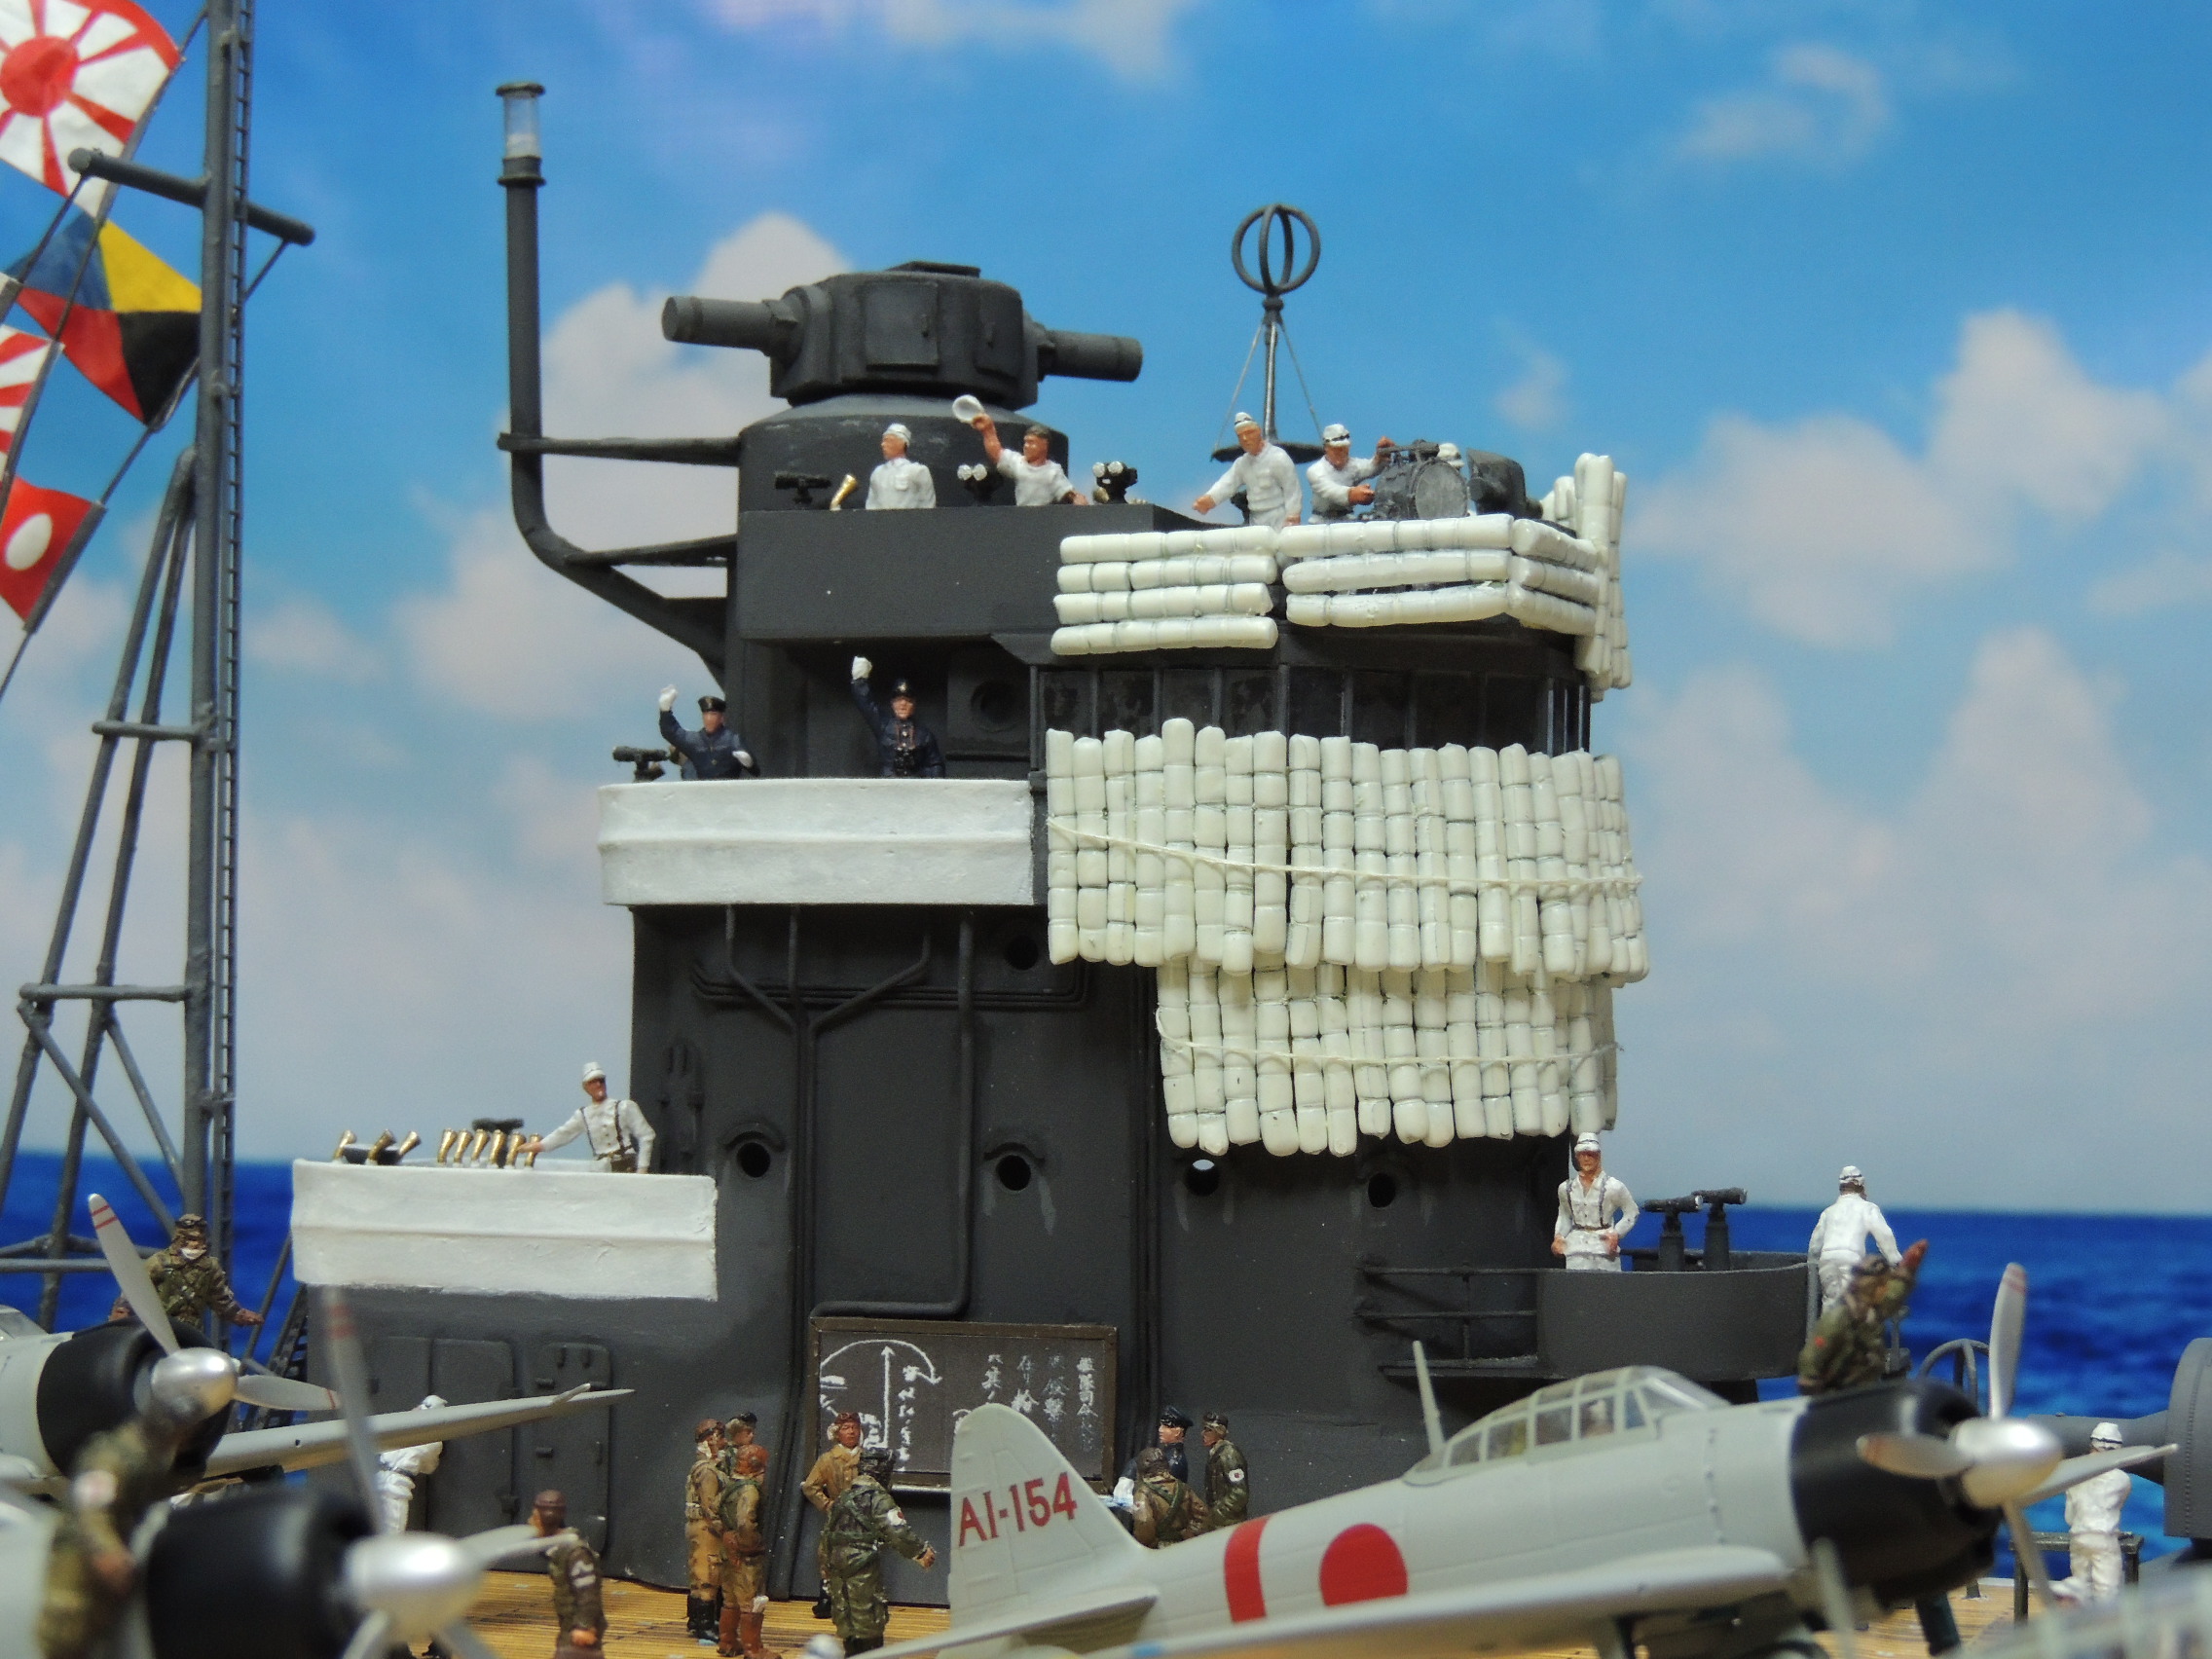
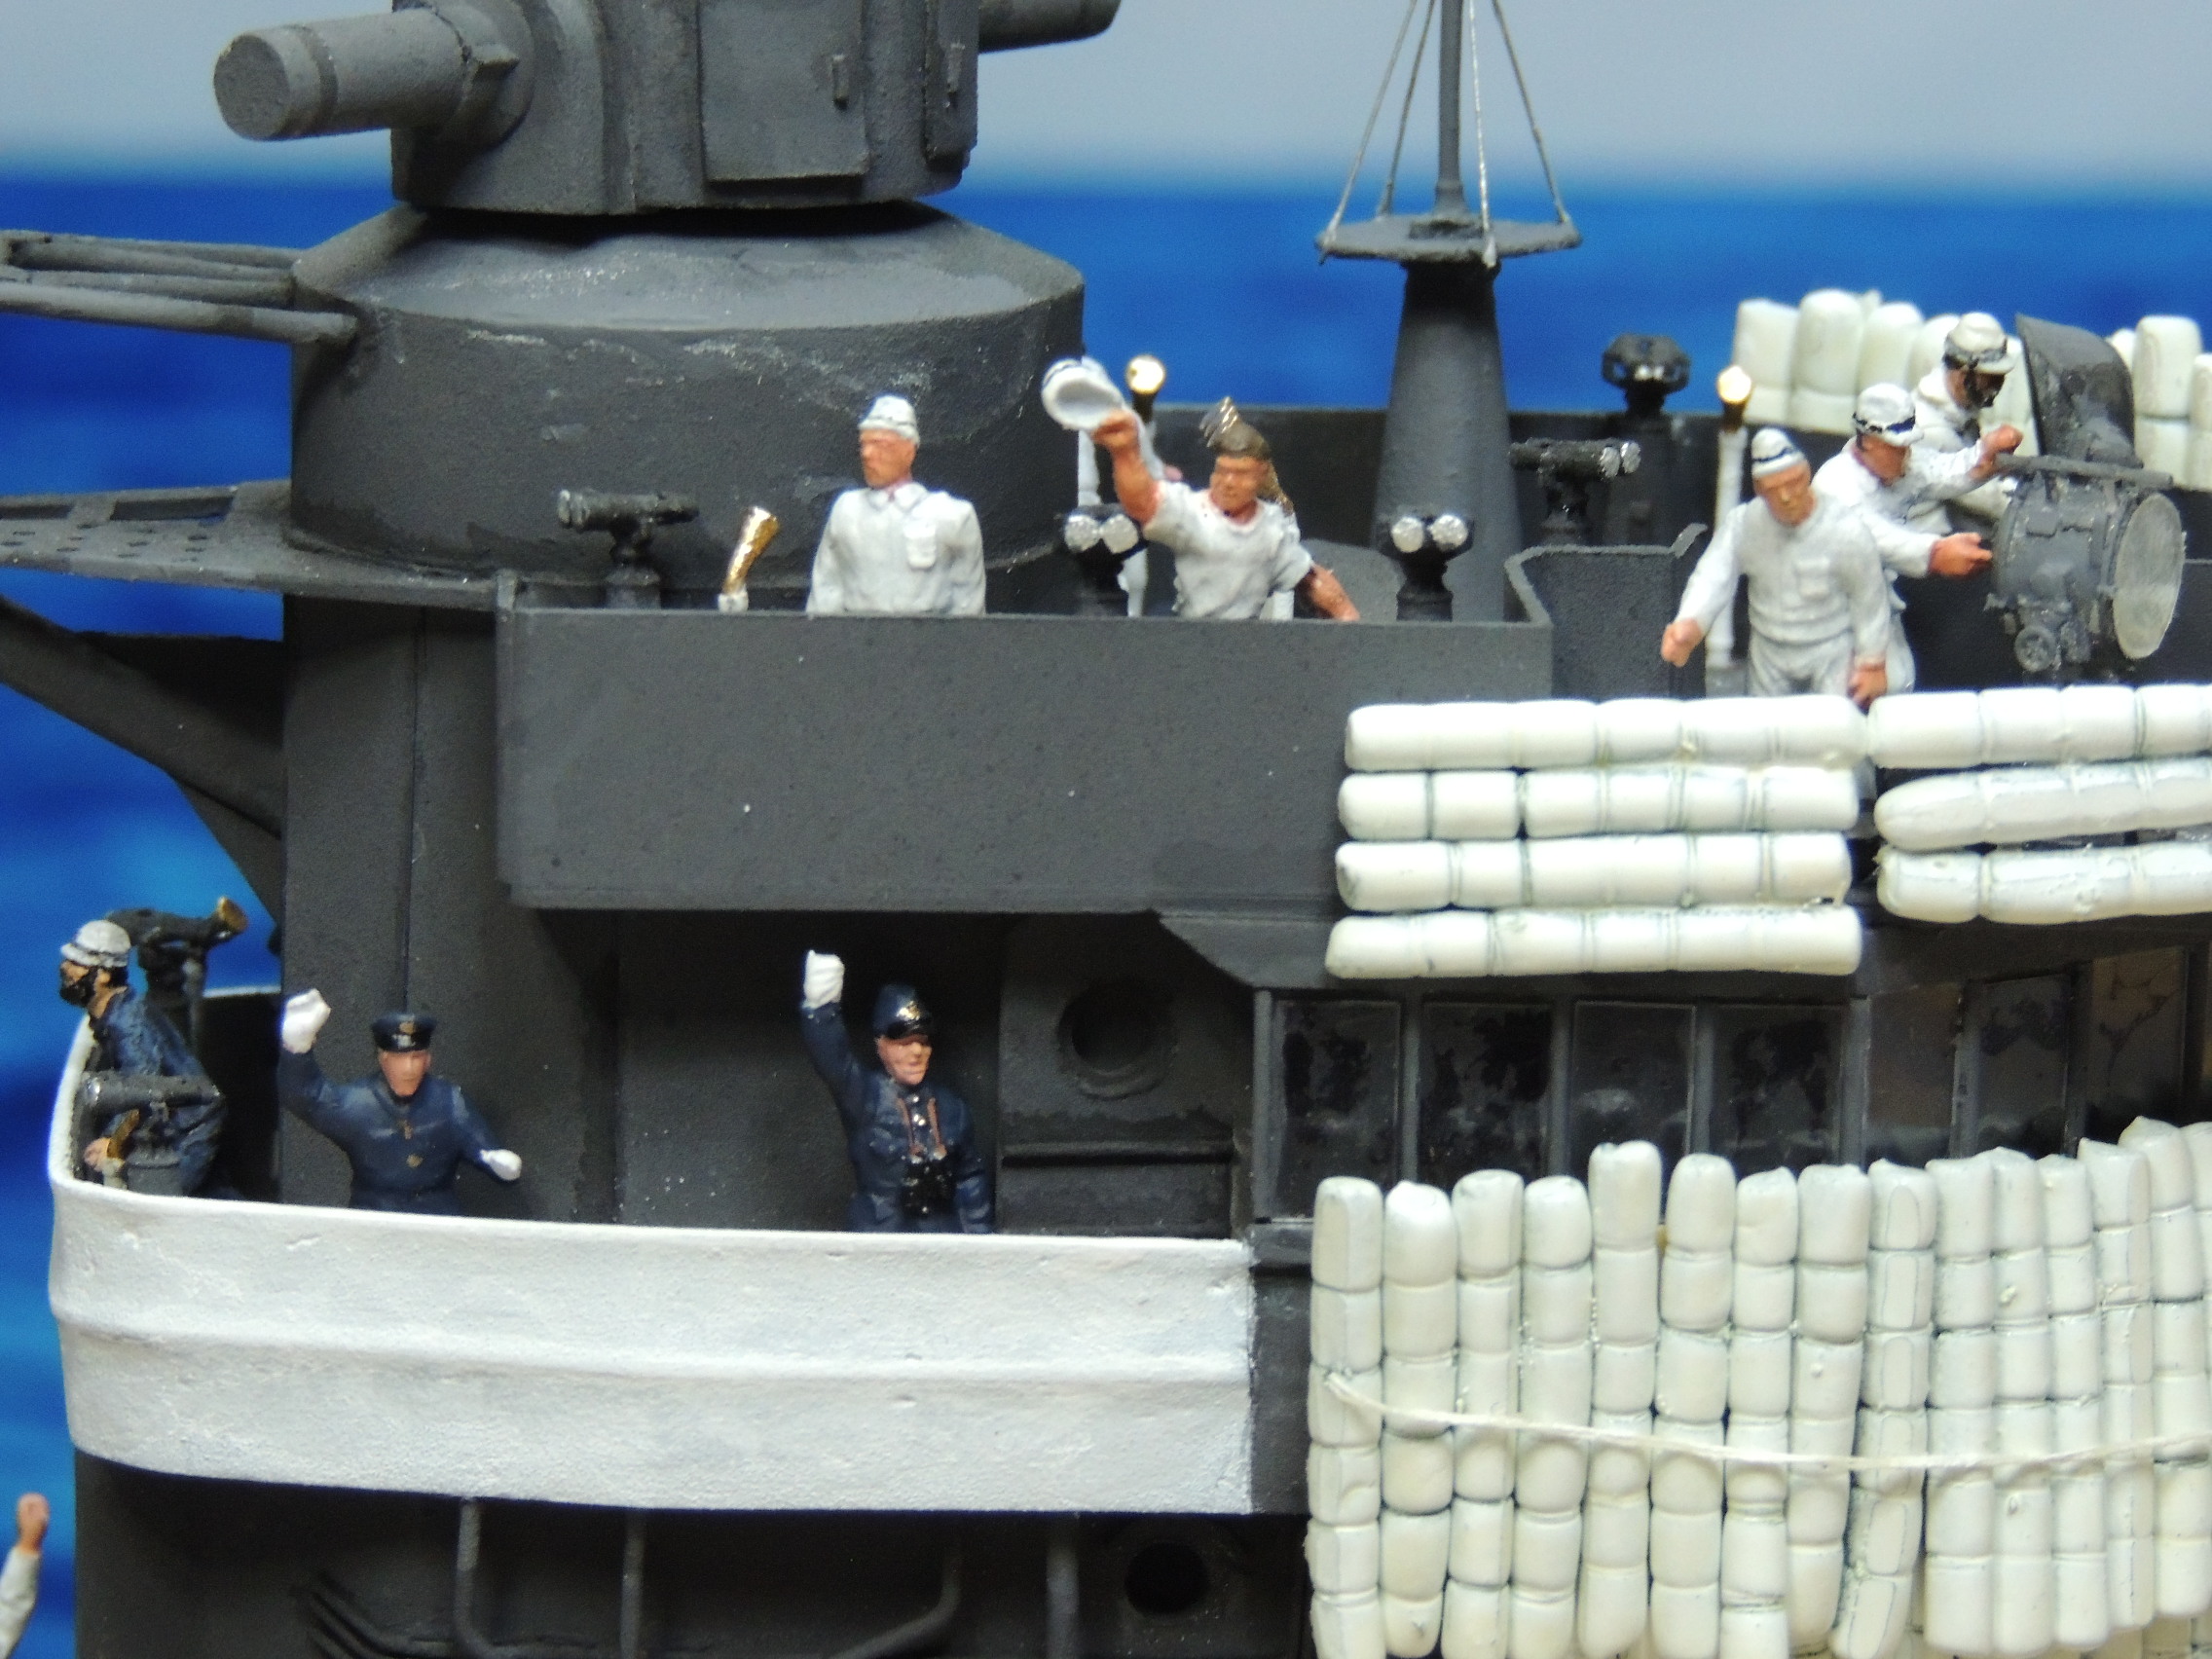
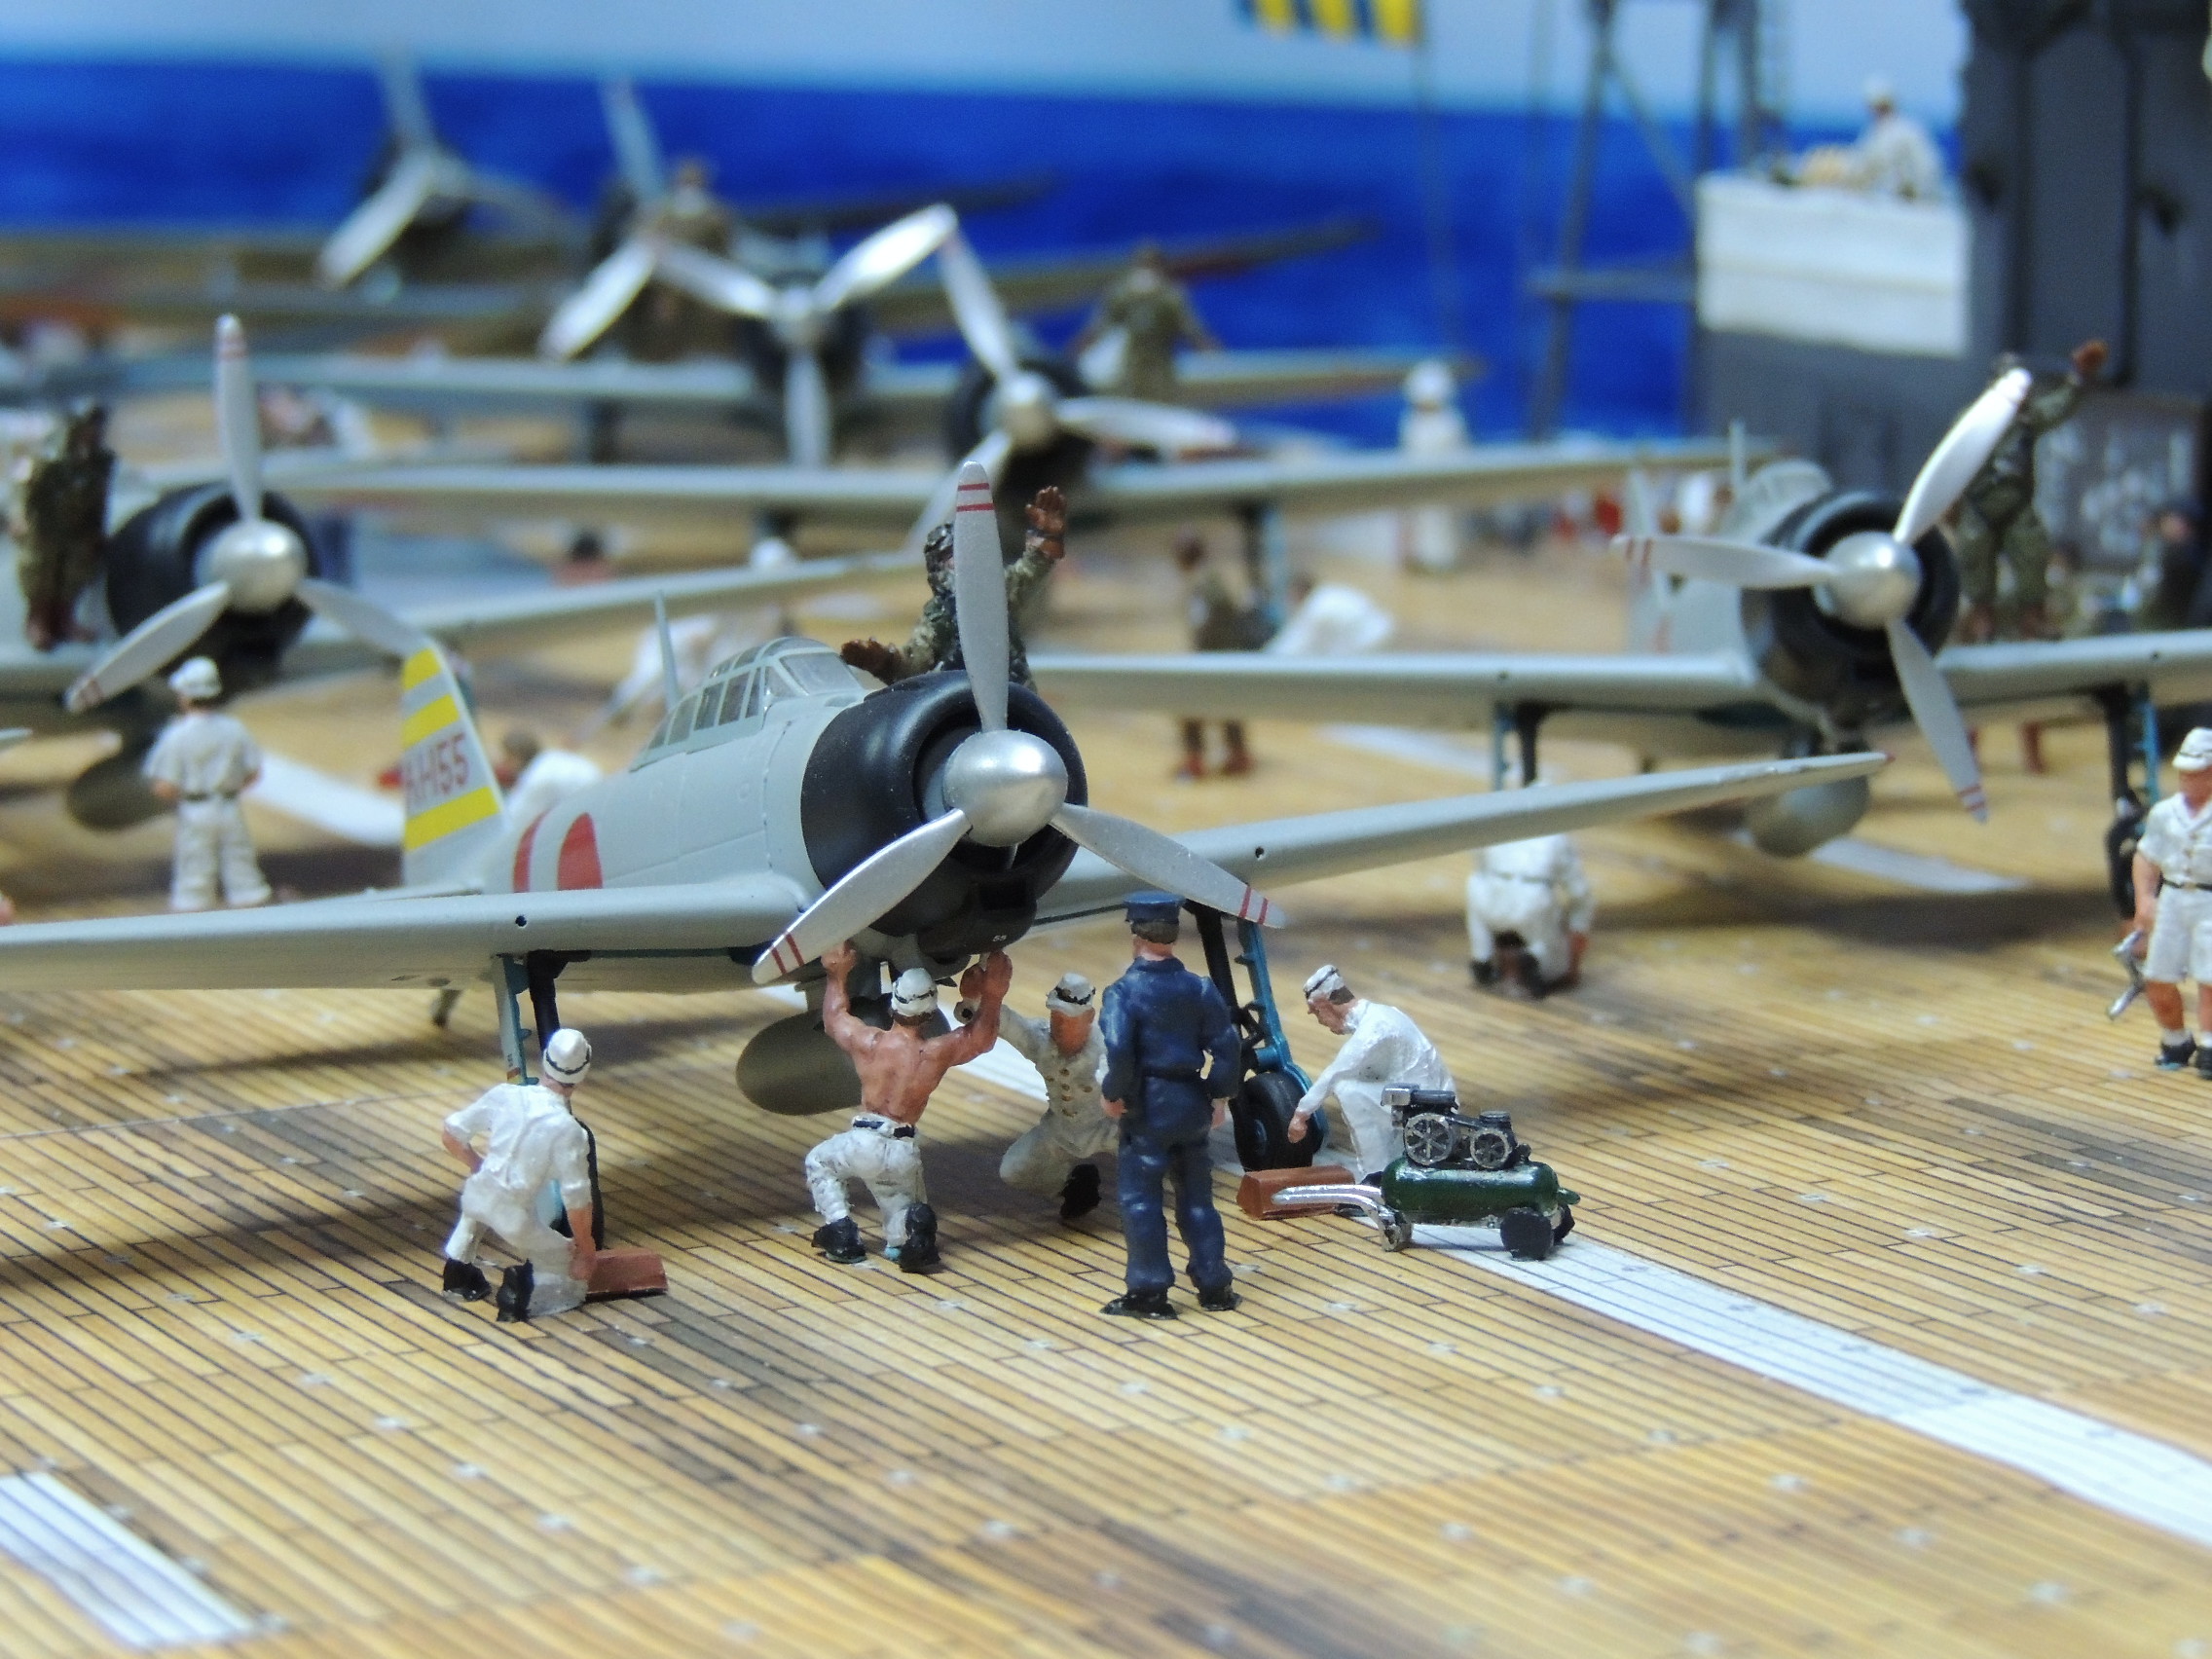
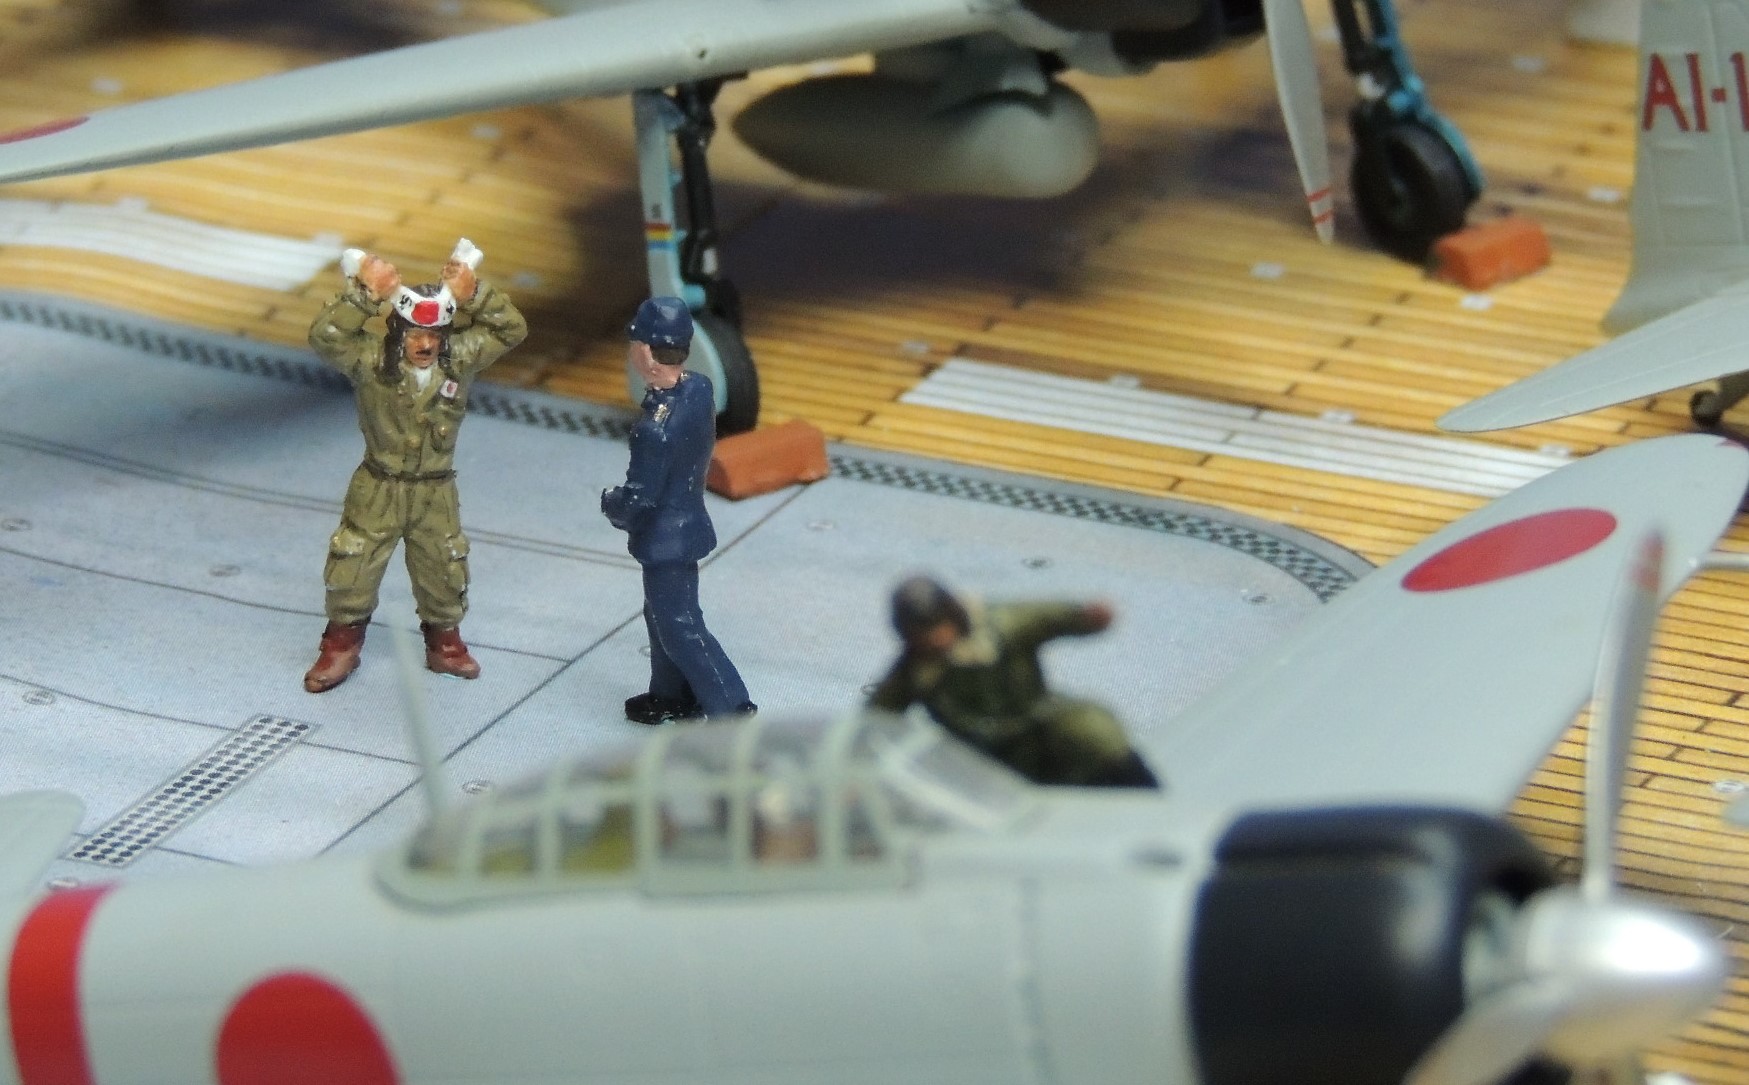
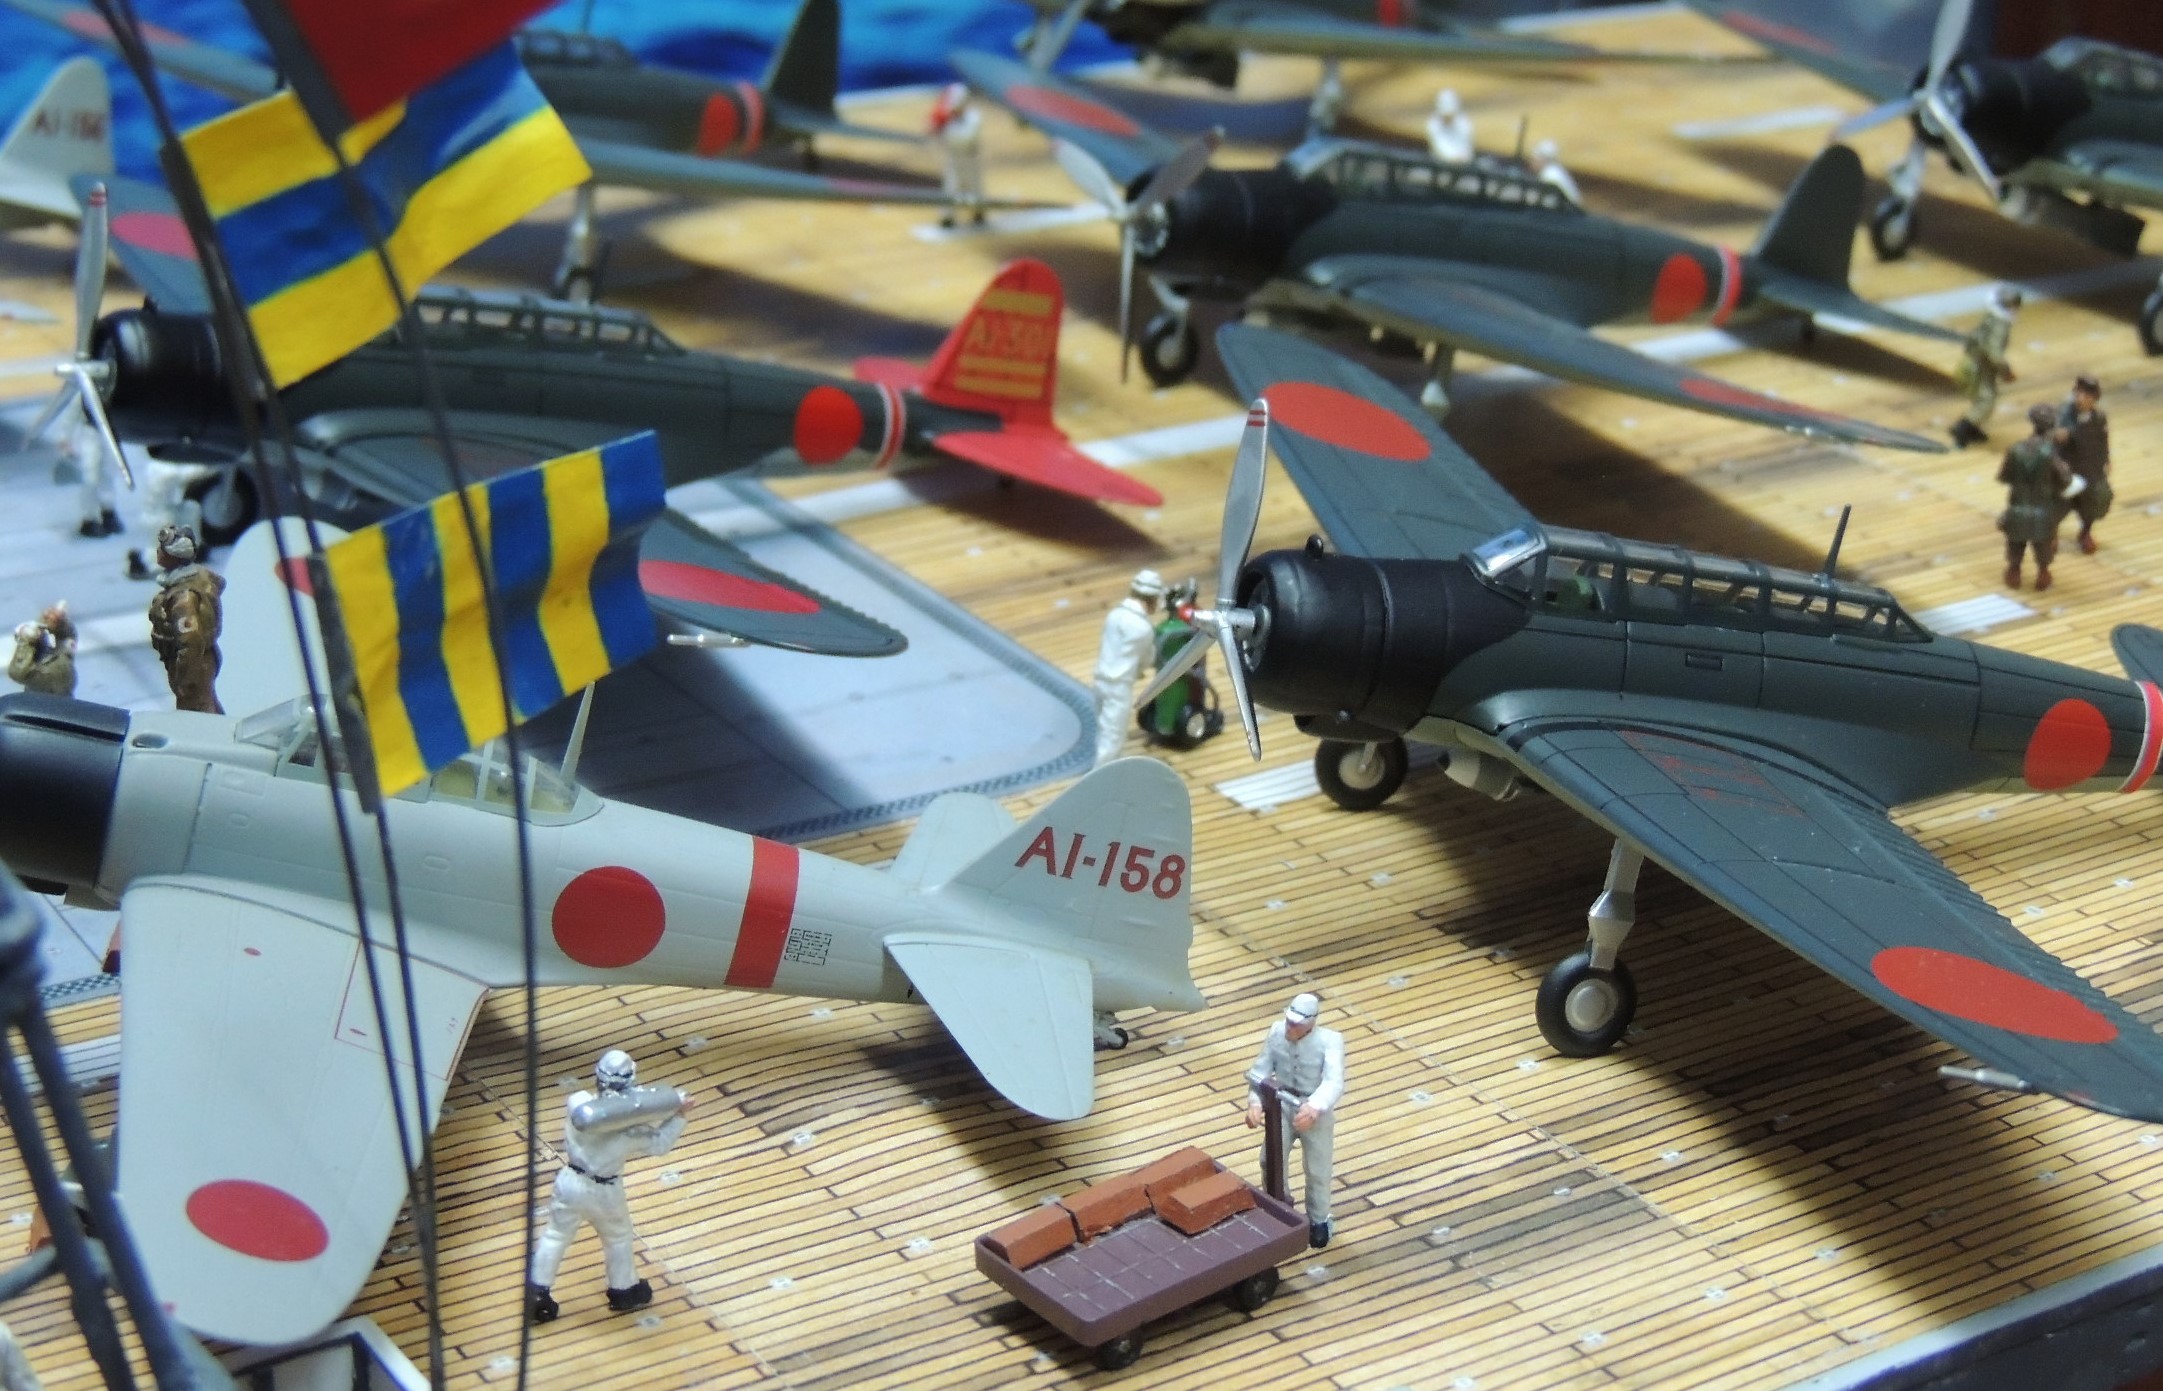
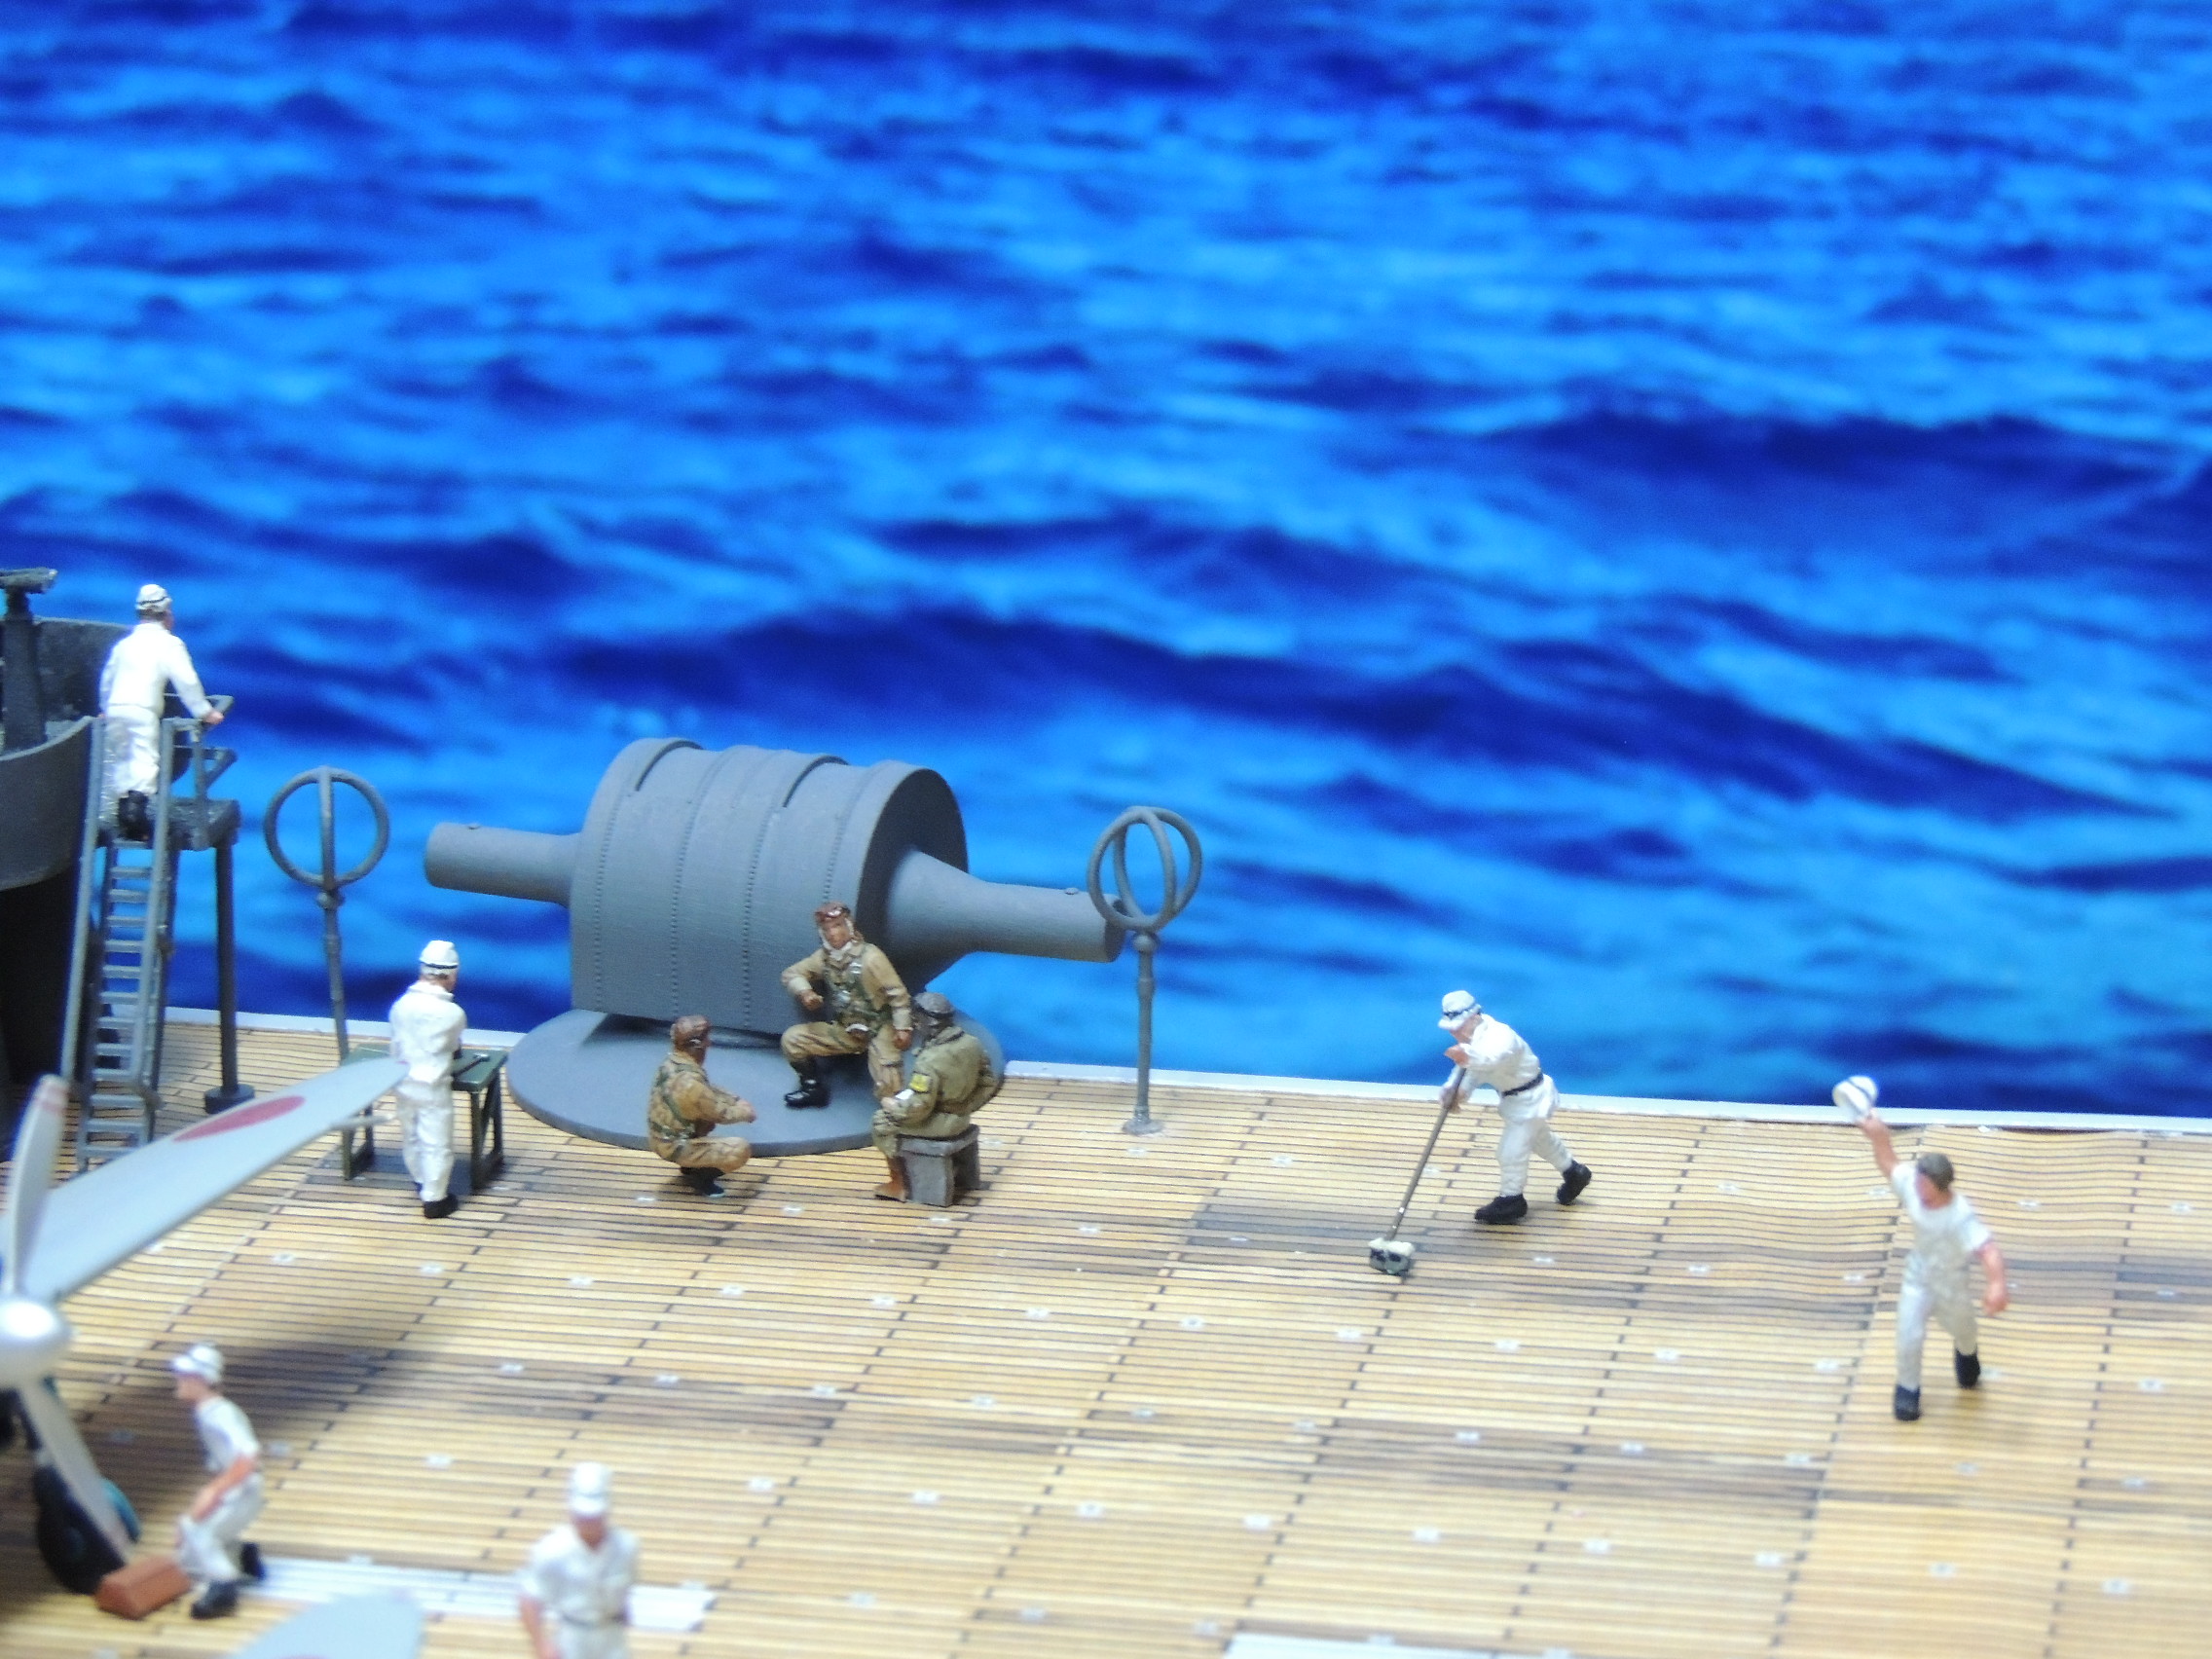
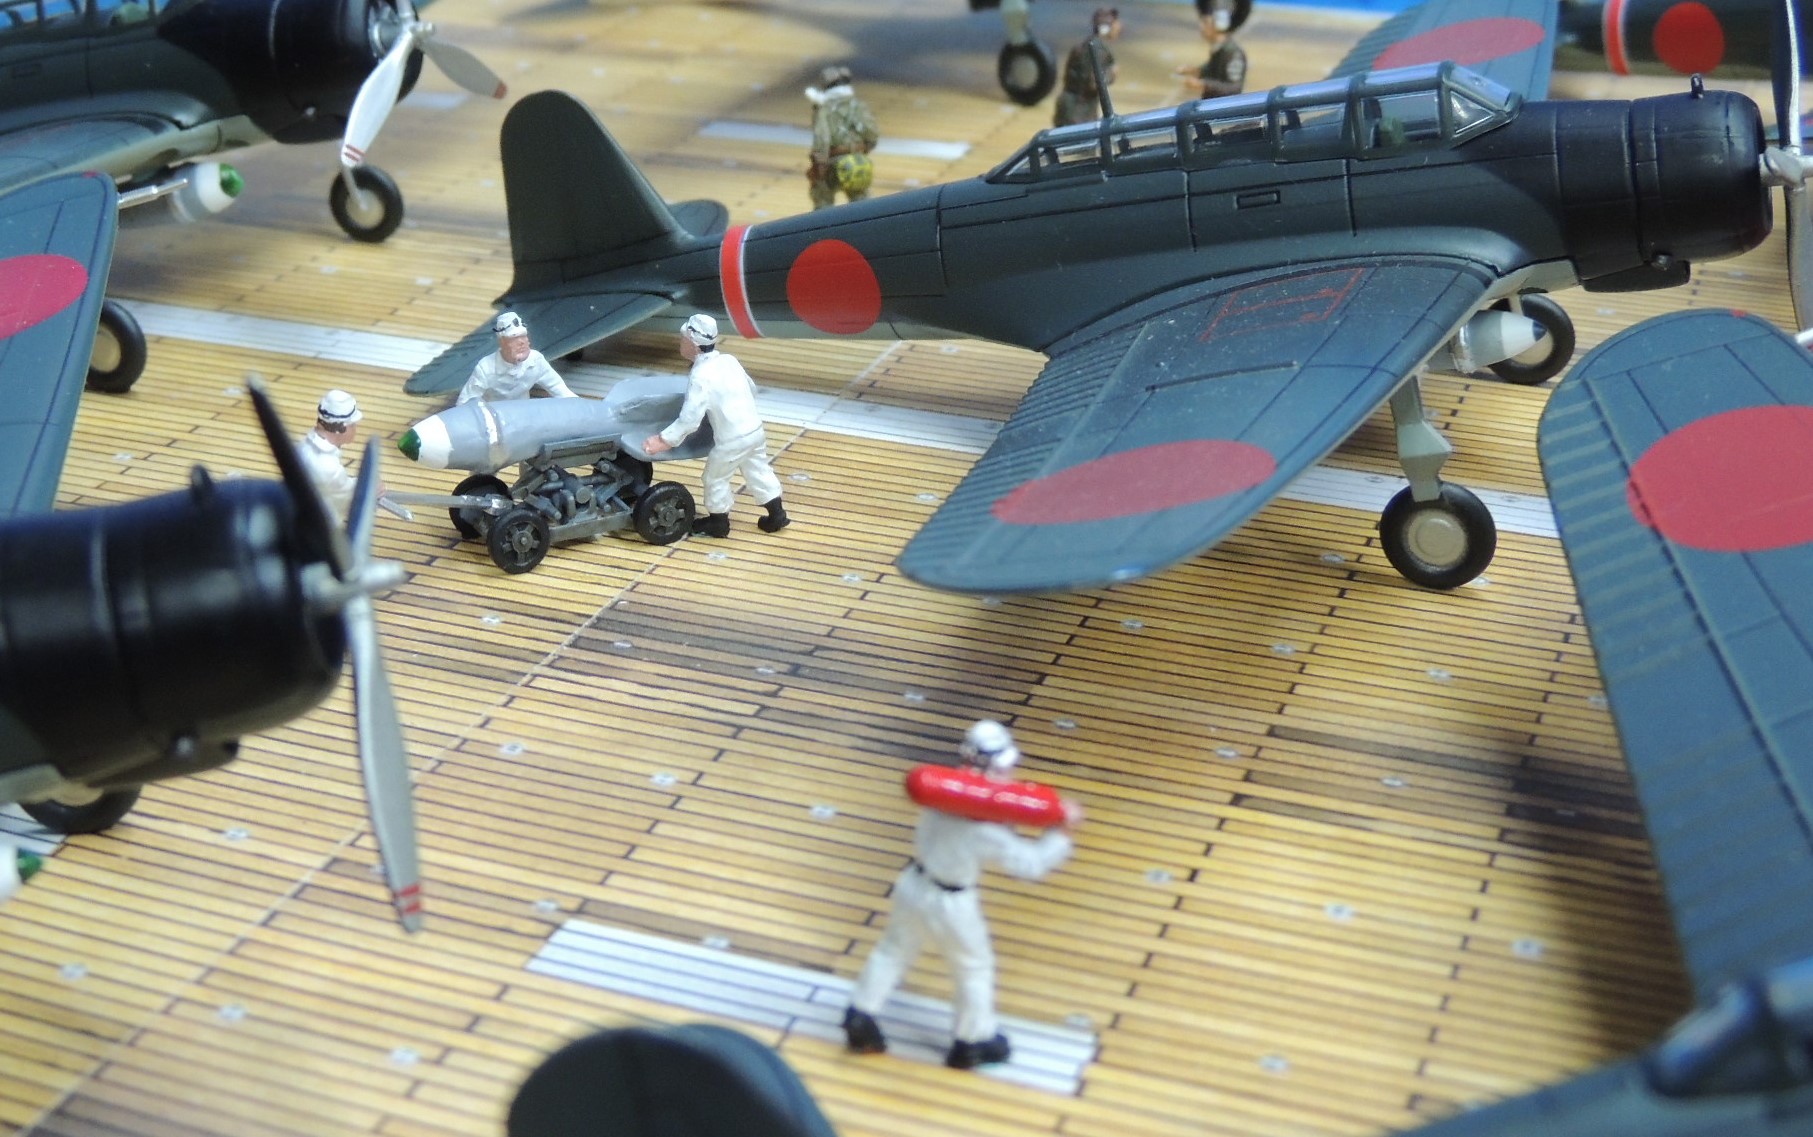
V. Deck Crew
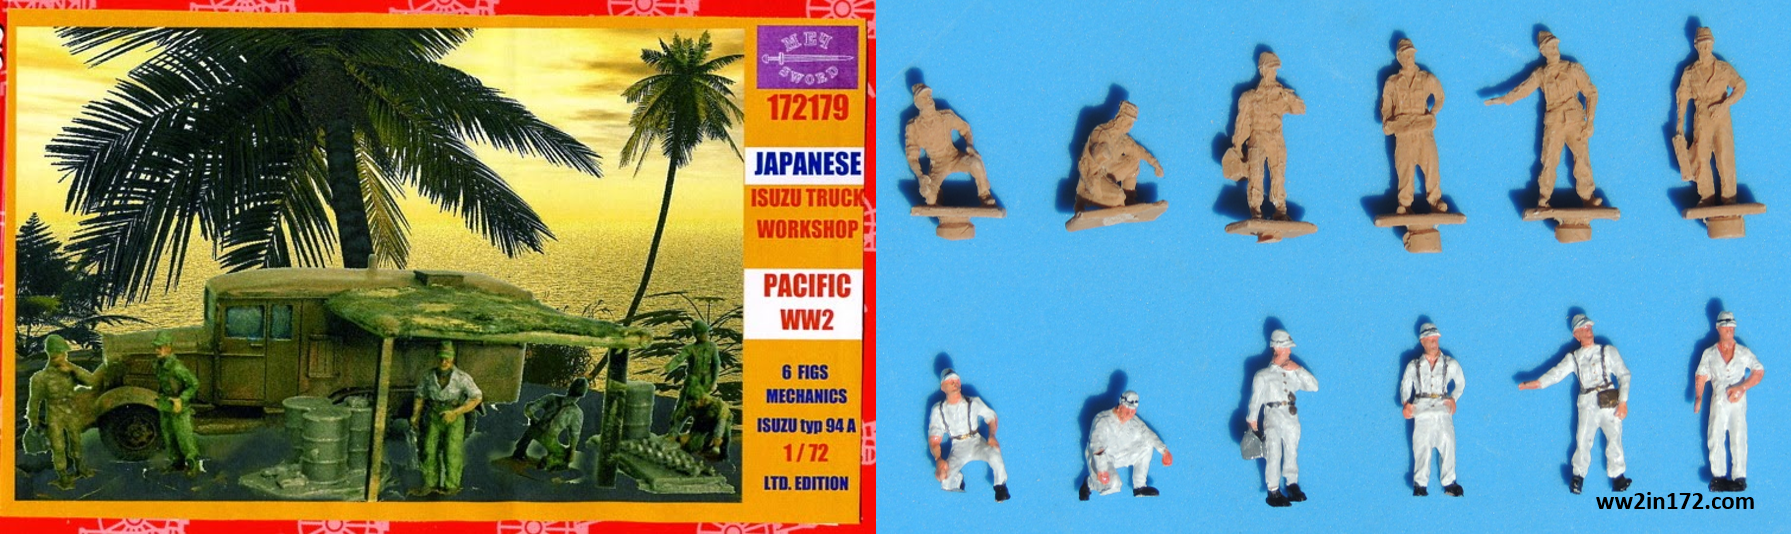
It is impossible to build a diorama of the Akagi deck without crew. While pilot figures were scarce, deck crew figures were even more so. As the sections on RedBox and CMK above show, there is now a decent number of options. However, I still needed more deck crew for my project, so I scrounged around and eventually found that Spanish company Barcelona Universal Models (BUM), which releases kits under various labels, had included Japanese crew figures in several of its Sword tank and vehicle kits. They’re made of an awful spongy plastic-like material that breaks easily but, in the end, they paint well. As mentioned, they’re included in at least five different Sword sets: Sword 172179 Isuzu Truck Workshop (pictured below); 172130 Chi-Ro Tank; 172131 Sumida Armored Car; 172138 Isuzu Fuel Truck; and 172211 Chiyoda Staff Car.
Sword 172179 Isuzu Truck Workshop
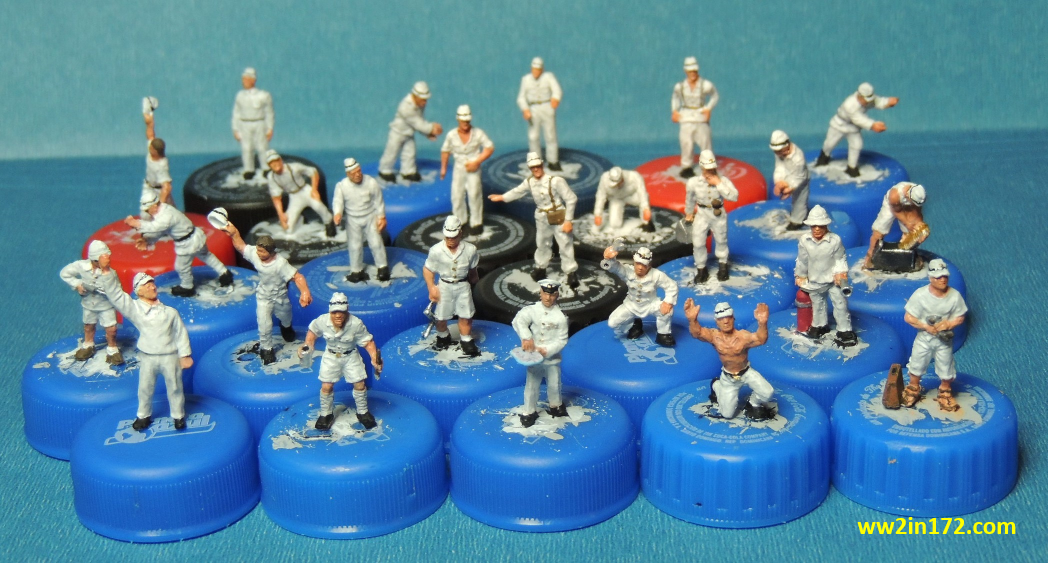
To be sure, modelers can never have enough support figures. But, as the photo below hopefully shows, diorama builders now have a fair number of Japanese crew figure options.

VI. Japanese Naval Uniforms
The basic question every modeler faces when painting soldiers is what colors to use on their uniforms and other accoutrements. Alas, the subject of WWII Japanese naval uniforms is expansive enough that several books have been written specifically on it. I found Gary Nila’s Japanese Naval Aviation Uniforms and Equipment (Osprey, 2002) and Osamu Tagaya’s Imperial Japanese Naval Aviator (Osprey, 1988) particularly useful. The reader is directed to those sources as it is beyond the scope of this article to try to cover such a broad topic.
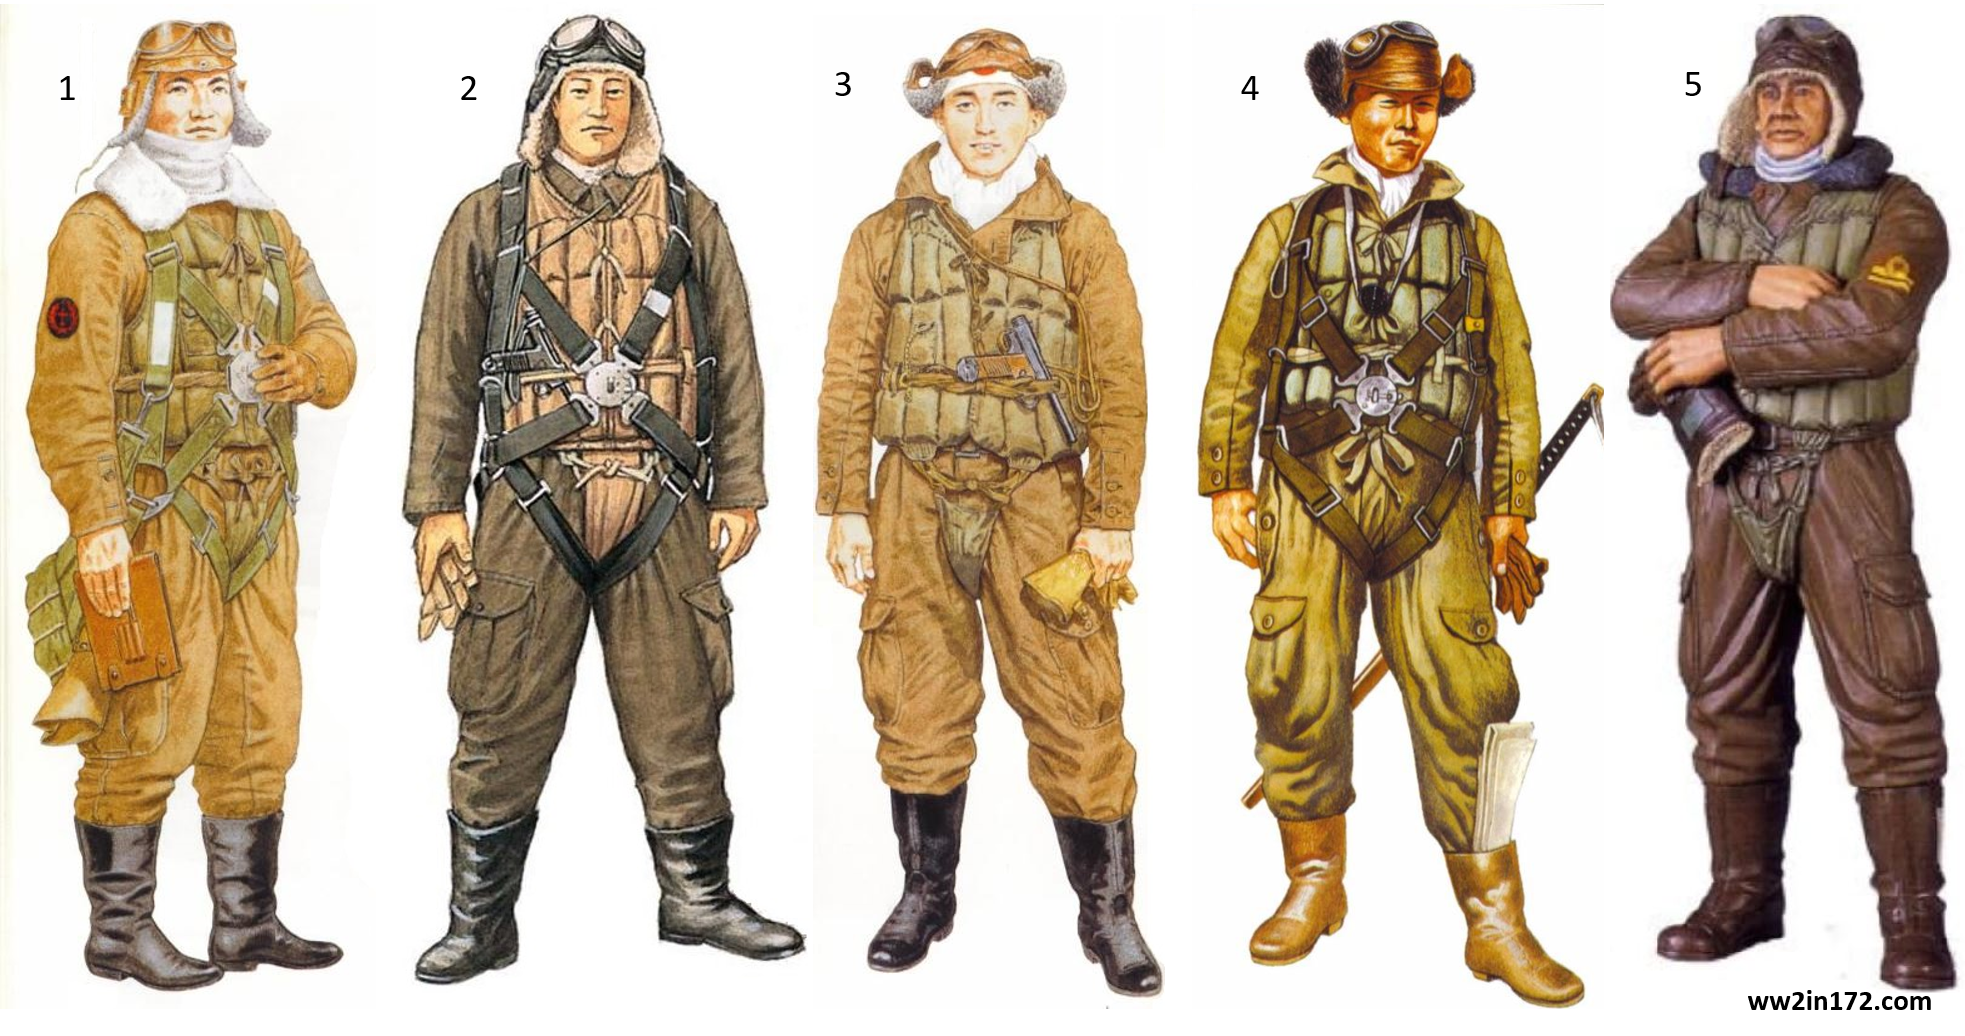
However, I do want to offer some brief but possibly useful observations. Descriptions of the colors of any uniform and kit are generally helpful but rarely specific. When it comes to painting guides, illustrations are inarguably more effective than descriptions. The composite photo below shows several illustrations of Japanese navy pilots that I gathered from various sources. I chose these because they were the most representative of a Japanese naval pilot around the time of Pearl Harbor. It is immediately evident that interpretations of the colors of the uniform and kit vary considerably. Thus, modelers have a certain degree of latitude in the tint of the colors that they use.
Japanese Naval Pilot Uniforms
Source of each illustration:
1. Sakaida, Henry. Imperial Japanese Navy Aces 1937-45. Osprey, 1998, p.76 (artist Mike Chappell);
2. Tagaya, Osamu. Imperial Japanese Naval Aviator. Osprey, 1988, p.35 (artist John White);
3. Sakaida, p.76 (artist Mike Chappell);
4. Healy, Mark. Midway 1942: Turning Point in the Pacific. Osprey, 1993, p.14 (artist Chris Warner); and
5. Tamiya box art for its 1/16 Japanese Navy Fighter Pilot (artist unknown).
All are used under the Fair Use exception to the copyright laws.
Below are a few more brief observations on some common characteristics
 of naval aviators that I believe merit attention and readers may find useful:
Helmet – Although there were three types of helmets used by Japanese aviators during WWII, the differences between them are indiscernible at this scale. Suffice it to say that they were made of dark brown leather, fur-lined, usually with rabbit fur. It was fashionable for the right flap to be turned upwards.
Headband – In a tradition that dated back to the samurai, many IJN pilots used a white or red headband called Hachimaki — literally “helmet scarf” — both for good luck and to keep the sweat off their eyes. These were often adorned with inspirational slogans or mottoes. The hachimaki given to Commander Mitsuo Fuchida just before the Pearl Harbor attack, for example, bore the motto “Certain Victory.” See illustration 3 above.
Scarf – It was also common for pilots to wear a white scarf usually made from parachute silk around the neck. A white wool muffler was also used. See illustrations 3 and 4 above.
Uniform – The Japanese naval uniform is most often described as “brown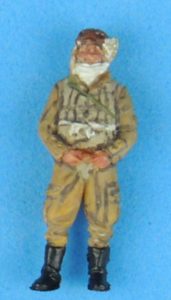 gabardine.” Tagaya, for example, states that “all IJN airmen, regardless of rank, wore a one-piece dark brown gabardine flight suit with a large breast pocket located on the left side of the chest, as well as pockets on both trouser legs.” Nila is slightly more helpful with regards to color, describing the uniform as “a heavy, tight-weave wool gabardine material that ranged in color from a dark-chocolate brown to dark brown with a dark green tint.” Again, the description is helpful but not specific enough without an accompanying illustration.
Life Vest – When flying over water, Japanese 
 pilots — Army and Navy — wore life jackets filled with kapok, a light cotton-like fiber from the pods of the tropical Ceiba tree that is inherently buoyant and resistant to water. The kapok life vest was flexible and comfortable and also provided a certain degree of protection from shrapnel. Note that all the pilots in the illustrations wear kapok life vests, essentially a hallmark of IJN pilots.
Gloves – Japanese pilots wore gauntlets with long loose wrists made of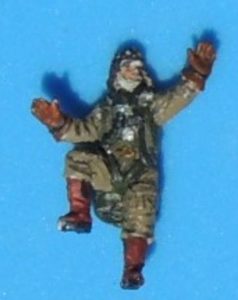 deerskin leather thin enough that it afforded freedom of finger movement to use instruments. Note that four of the five pilots in the illustrations have their gauntlets in hand.
Parachute – It has become conventional wisdom that IJN pilots did not use parachutes. The notion probably originated with Gordon W. Prange’s incomparable Tora! Tora! Tora! (Readers Digest, 1963) (p. 85), where he writes: “Like all the fliers, Takahashi carried a map of Oahu, a pistol, a knife, and waterproof cork jacket, the latter to give a slim chance of survival in case he had to ditch at sea, for these men wore no parachutes” 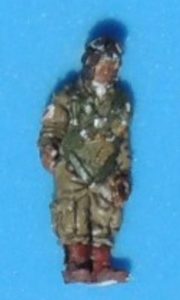 (emphasis mine). Professor Prange was most probably right about the pilots at Pearl Harbor. However, many post-Pearl Harbor photographs show IJN pilots using their parachutes.
In an interview with Military History (December 2002), Saburo Sakai, Japan’s legendary Zero ace, was asked whether it was true that Japanese pilots were not allowed to carry parachutes. He responded: “That was never true. Some commanders ordered pilots to take them, although most of our battles were over enemy territory, and we would never have considered being captured. I flew with the thing as a seat cushion, if at all, since the straps reduced range of motion in the cockpit.” See illustrations 1, 2, and 4 above.
Boots – Early in the war, IJN pilots wore brown boots made of cowhide leather taken from China with a lambskin lining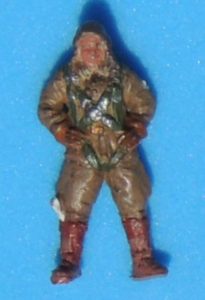 and black rubber heels and soles. However, as the war continued and the Japanese empire expanded, the need to produce equipment faster meant that boots were only made in black leather with a white canvas lining. By war’s end, as materials became progressively more scarce, naval flight boots were made of natural untanned pigskin. Thus, the modeling guideline is straightforward. For the early part of the war, such as Pearl Harbor, only brown boots are appropriate. From 1943 on, either black or brown boots will work. See illustrations 4 and 5 above.
Map – Naval aviators flew over vast distances and often carried a map that they sometimes tucked into the boot or into a trouser pocket. See illustration 4 above.
Sword – Naval pilots above the rank of lieutenant commander or higher were allowed to carry their swords into action. However, most declined to do so as they flew vast distances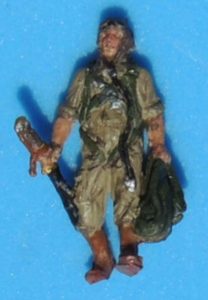 over the ocean where there were no landmarks and the metal sword could throw off their navigational instruments. See illustration 4 above.
Gun – IJN pilots often carried a side arm, though it was not intended for self defense but to commit suicide rather than be captured. Probably the most popular pistol was the Nambu, whose appearance closely resembled the German-made Luger. The pistol was tied to a lanyard that hung from the pilot’s neck, and was then tucked into the flight suit or one of the trouser pockets. See illustrations 2 and 3 above.
Timepiece – Some INJ pilots often wore a pocket watch suspended from their 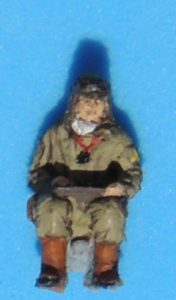 necks with a silk parachute cord. The timepieces, usually made by Seikosha (Seiko’s predecessor), were luxury items bought by the pilots themselves. See illustration 4 above. Note that several of the RedBox IJN Pilots wear just such a watch. See inset thumbnail at right.
VII. List of 1/72 Japanese Pilots and Crew
Below is a list of all the 1/72 Japanese aviation figures I could find. Although I included PSR photos above, I’m also including links, where available, for anyone who wants to read the PSR reviews.
As the list makes clear, there are plenty of options for anyone wanting to create a diorama involving Japanese Navy pilots. Hasegawa has the distinction of making excellent figures and being the first and — to date — the last company to produce 1/72 scale Japanese pilots.
Lagniappe Photos
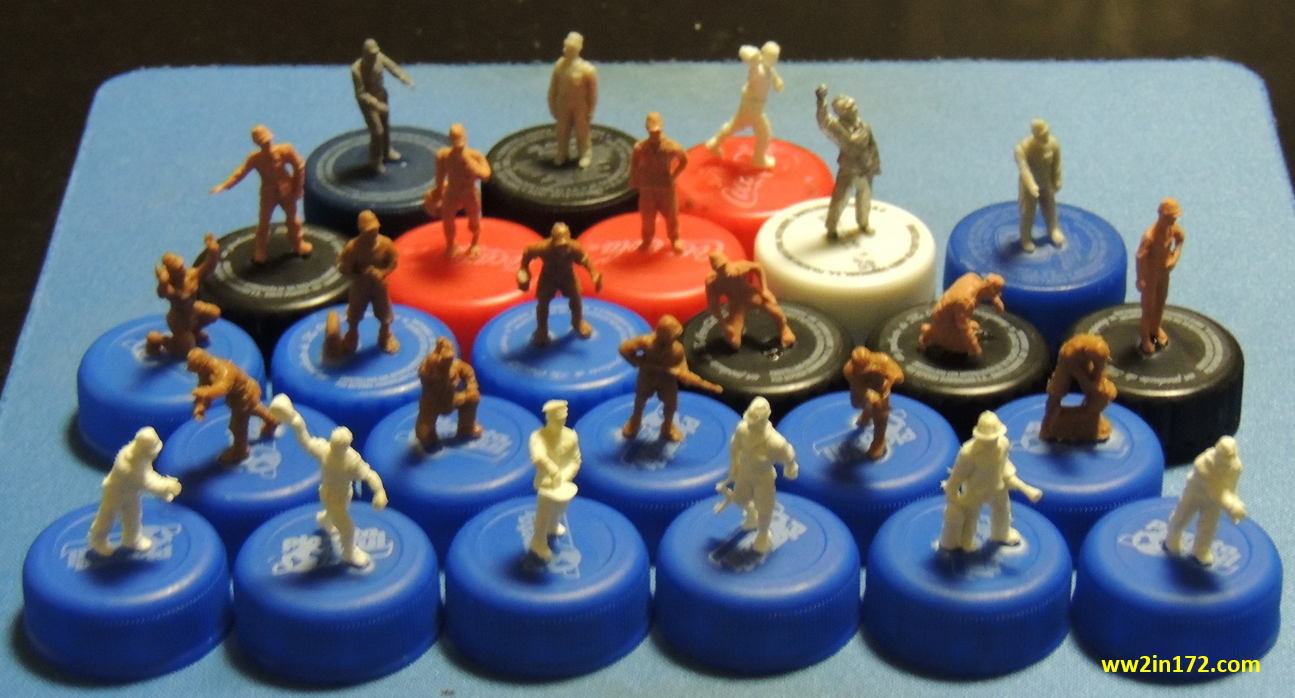
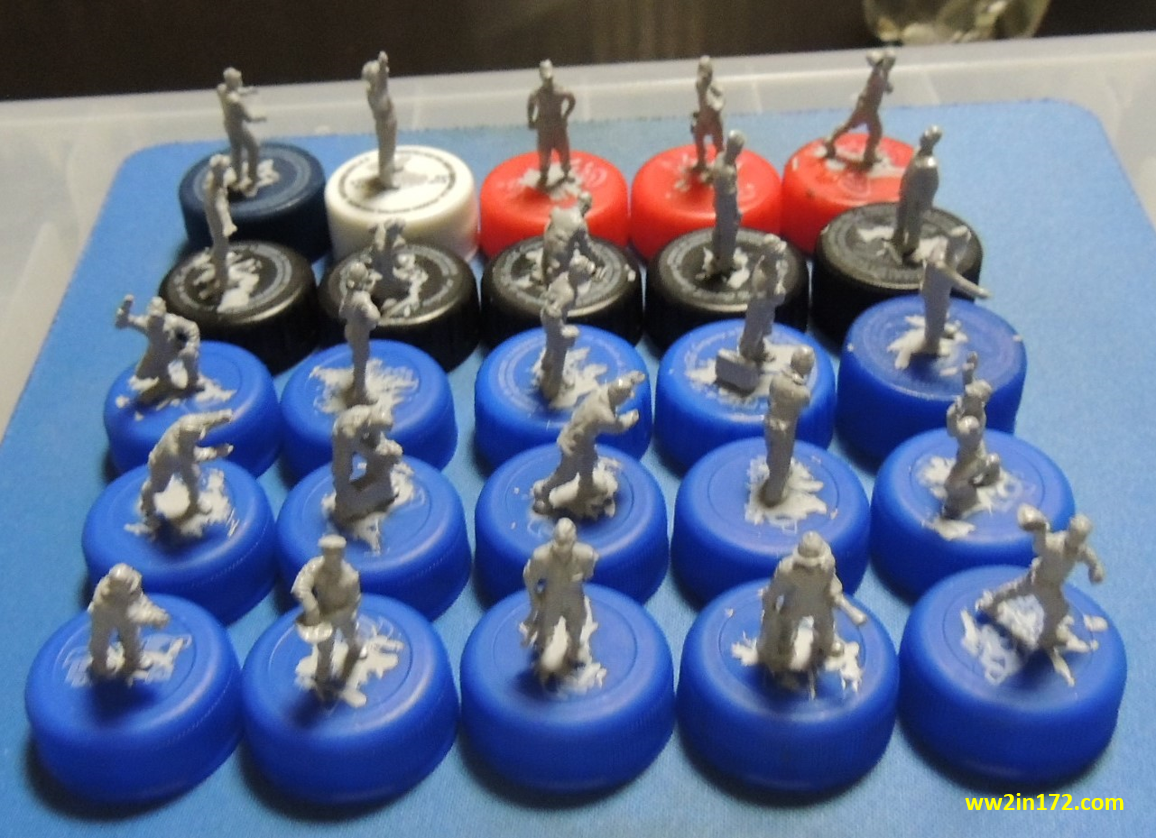
While working on the diorama, I realized I would need more deck crew than I had anticipated. While painting is not my forte, I resigned myself and began preparing 25 figures. The photo below shows the deck figures from various companies in plastic, resin, and metal with their bases clipped off, seams cleaned up, glued to bottle caps, and ready for priming.
The photo below shows the figures after they had been primed using a brush with Tamiya Surface Primer.
And finally, the photo below shows the figures after painting with Vallejo acrylic paints. I apologize again for my meager painting skills but I hope these figures will at least look the part.
As I had mentioned in a recent post, my intention going forward was to include more photos and less text. With over 20 photos and a lot less text than previous posts, I hope I succeeded.
Thank you for your indulgence and I hope you enjoyed the post. If something looks amiss, please let me know. I would be delighted to correct inaccurate information so that this may be useful to other 1/72 scale collectors and wargamers. As always, comments, questions, corrections, and observations are welcome. Following the plan for this diorama that I set nearly two years ago, stay tuned for the construction of a section of the deck of the Akagi in 1/72 scale in the next post.
Once again I want to thank my friend and fellow collector Joe Buccellato, of NY, whose workmanship and patience far exceed mine. He again enthusiastically painted most of these figures and to the extent they succeed the credit is all his.


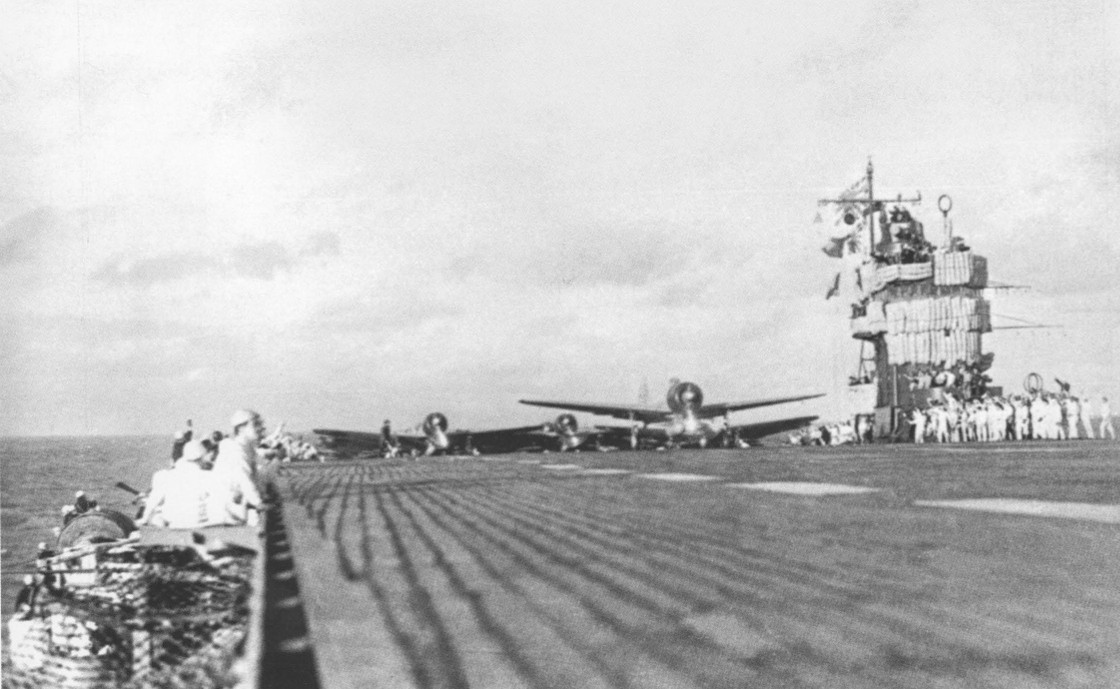
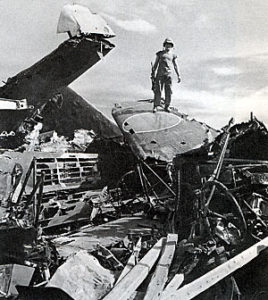
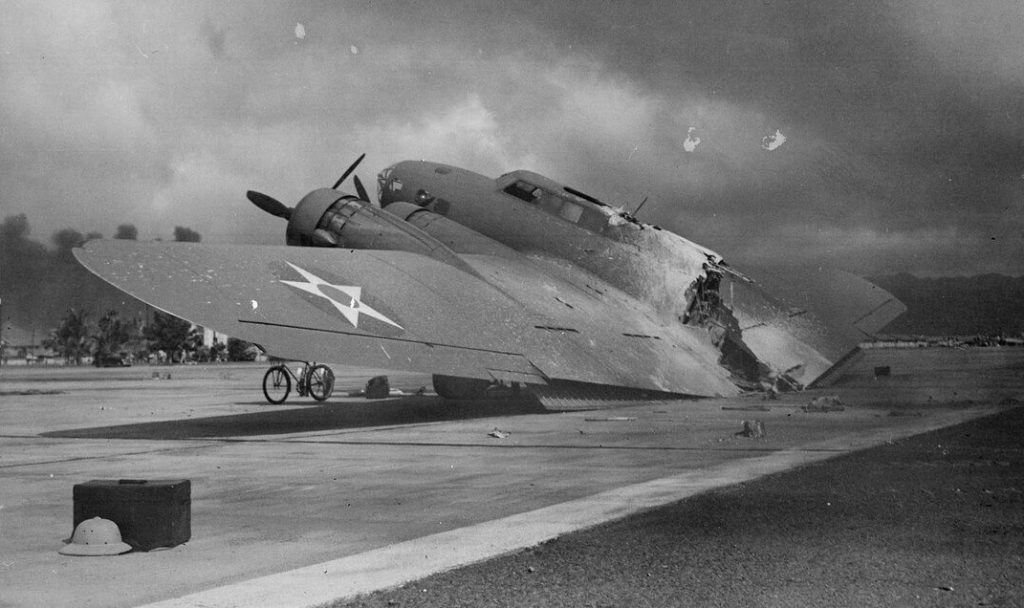 The panoramic photo below was created by friend and fellow hobbyist Ara Hagopian by merging and enhancing three separate screen captures from color film taken by Sgt. Harold Oberg just three hours after the attack. The wreckage of the B-17’s fuselage can be seen on the far left. The severed tail can be seen on the far right of the photo.
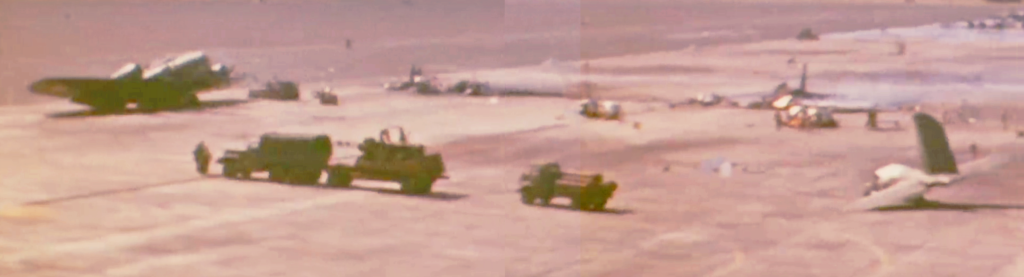
 Cheating Death at Midway
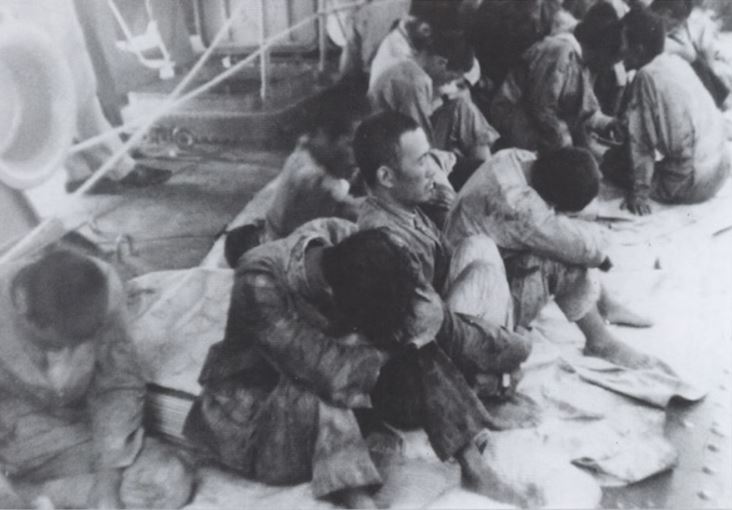
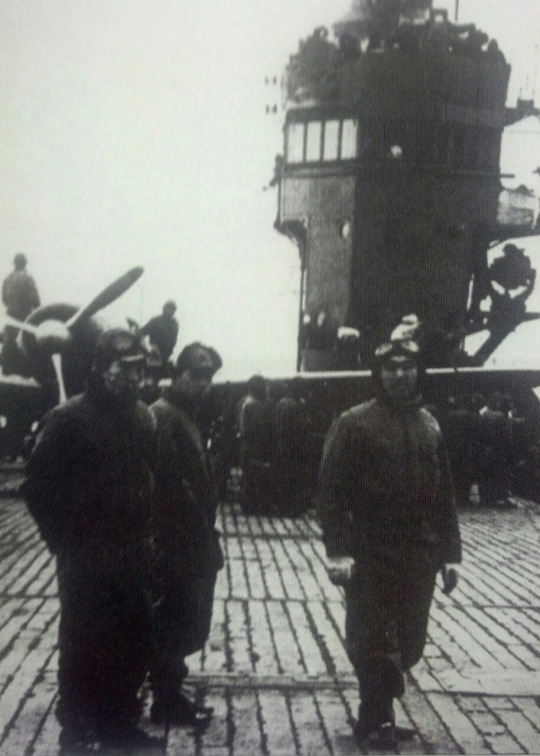
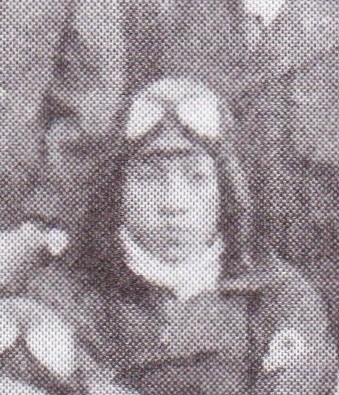
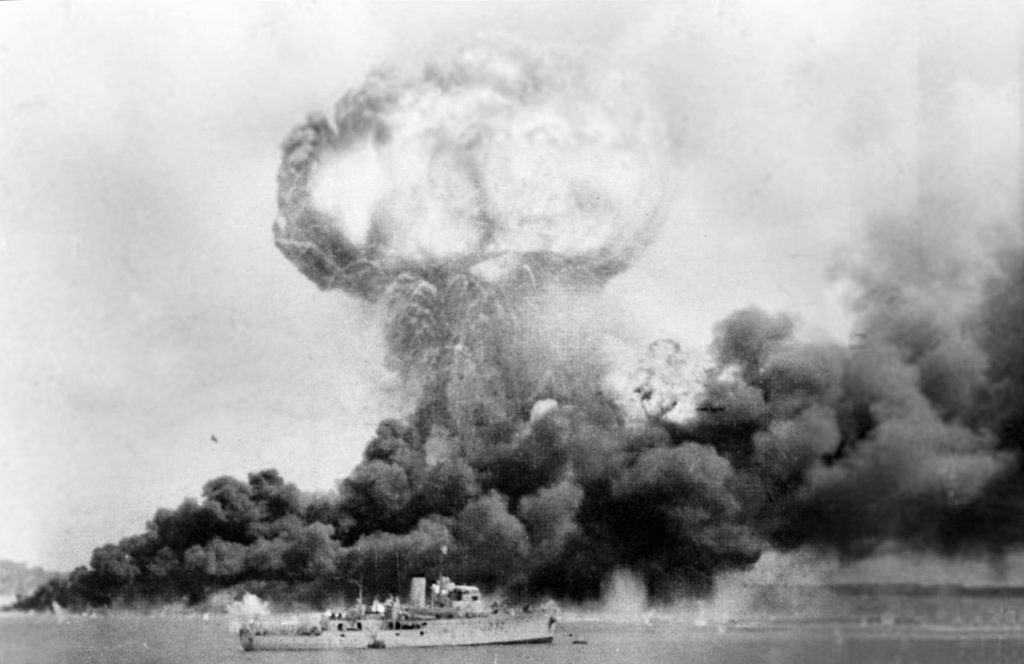
 The photo at left is a graphic symbol of the destruction suffered by the IJN. While Ibusuki survived the battle, his unit was decimated. In July 1944, only a month after the Turkey Shoot, Air Group 261 was disbanded and what remained of its personnel was reassigned to Air Group 201, yet another prestigious land-based fighter unit operating out of the Philippines.
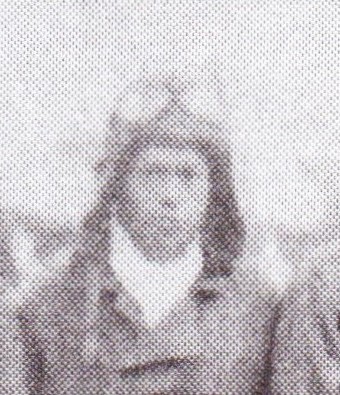
 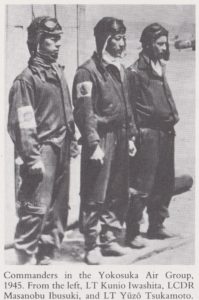 In February 1944, as the IJN became desperate for pilots following Japanese heavy losses, the Yoko Ku was forced to become a fighting unit. Ibusuki must have joined the Yoko Ku in early 1945, after Air Group 201 was dissolved. According to Hata, in mid-February 1945, a group of 10 Zeros, Shiden-Kai, and Raiden aircraft led by Ibusuki shot down 19 American F6Fs and F4Us operating from aircraft carriers over Atsugi, Japan, about 25 miles southwest of Tokyo. The photo at left from Ikuhiko Hata et al’s Japanese Naval Fighter Aces shows Ibusuki while with the Yoko Ku.
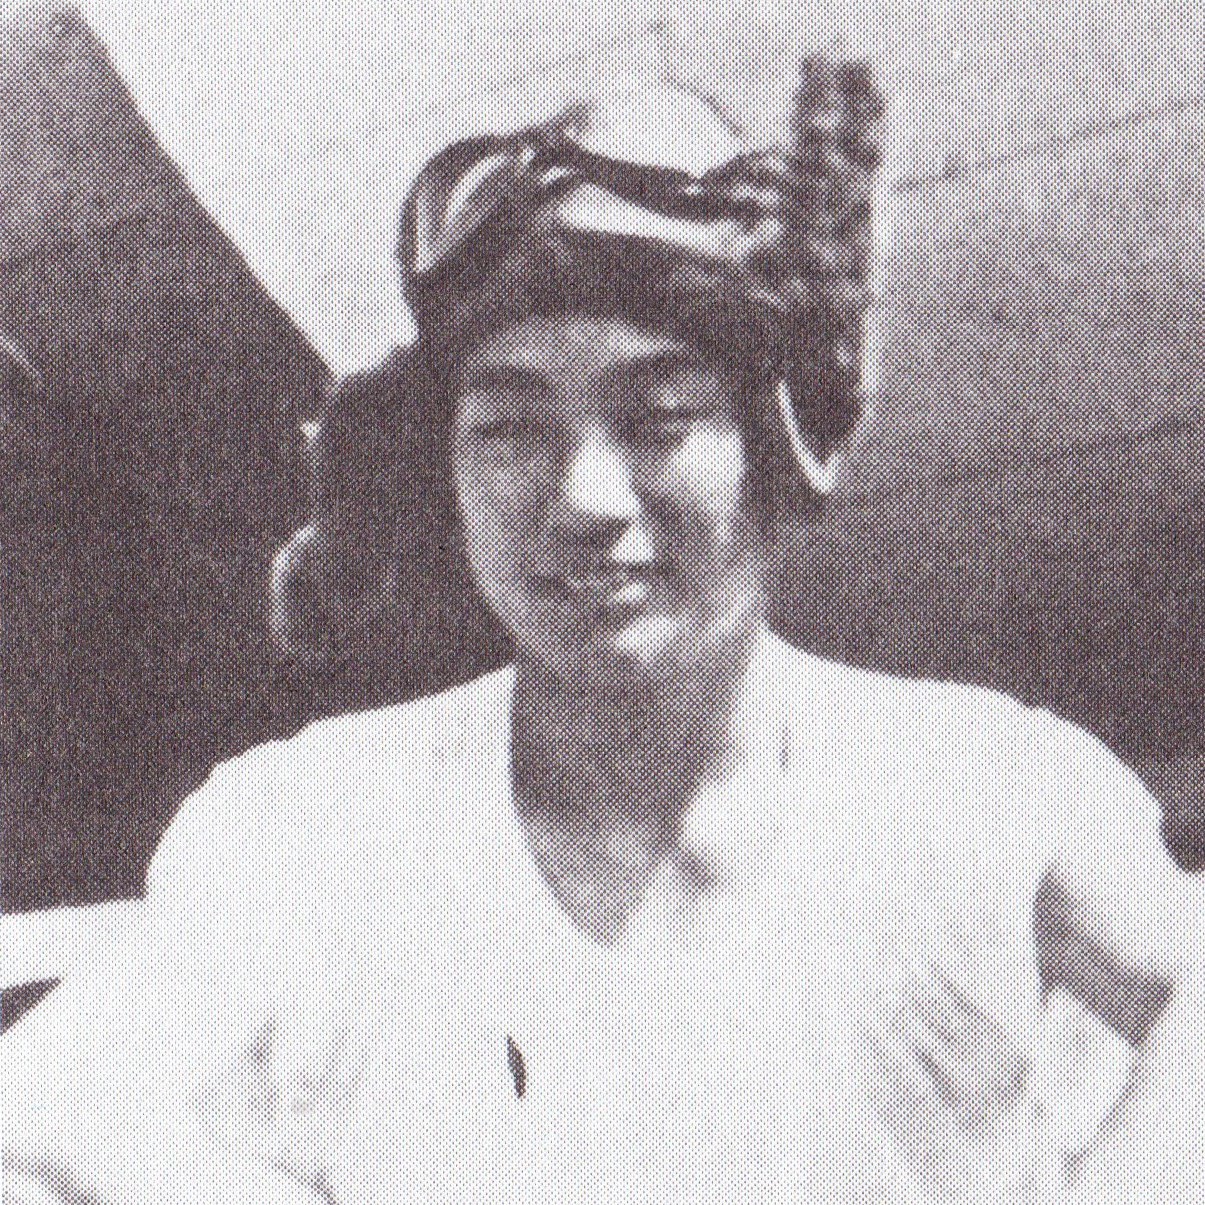
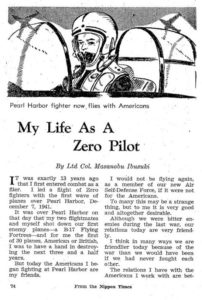 But he had indeed survived the war and was fortunate not to have been wounded, particularly as he had participated in the bloodiest fighting of the war. However, he had several brushes with death, including once ditching his plane at Midway, as previously discussed, and twice crash-landing after suffering battle damage at Guadalcanal and Peleliu. As I had surmised, he had indeed made ace – six times over – having shot down 30 planes (25 American and five British) during the war, including five in just one battle off the coast of Ceylon (two Hurricanes, two Spitfires, and a Swordfish torpedo bomber), according to his account.
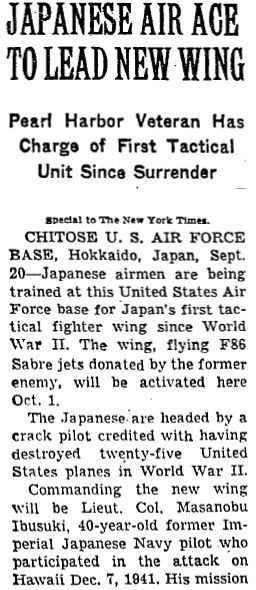
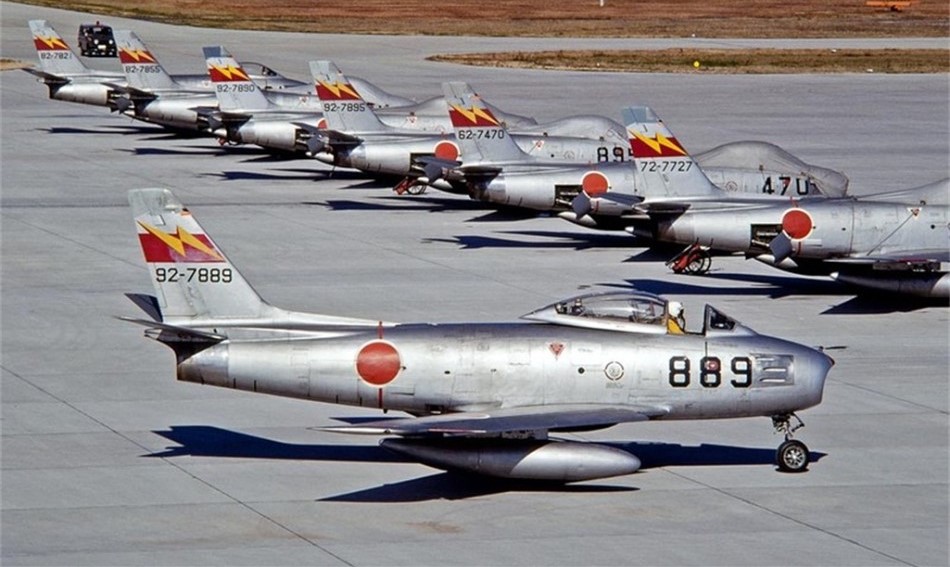 Encouraged by the Japan Digest article, and armed with more information, it became easier to locate additional articles. In March 1956, several U.S. dailies carried a brief article, similar to the one below from the San Rafael Daily Independent Journal dated March 1, 1956, detailing Ibusuki’s participation in joint U.S.-Japan training exercises in Japan. (The article is brief and mostly factual, and I felt comfortable posting it under the theory that facts cannot be copyrighted.)
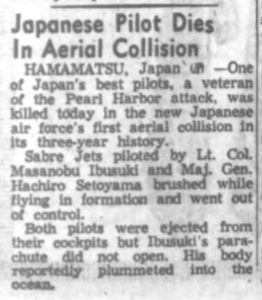 . If death was unavoidable, Ibusuki could not have chosen a more suitable end, particularly given his dedication to duty as a Japanese pilot steeped in the Code of Bushido – “always prepared to die.”
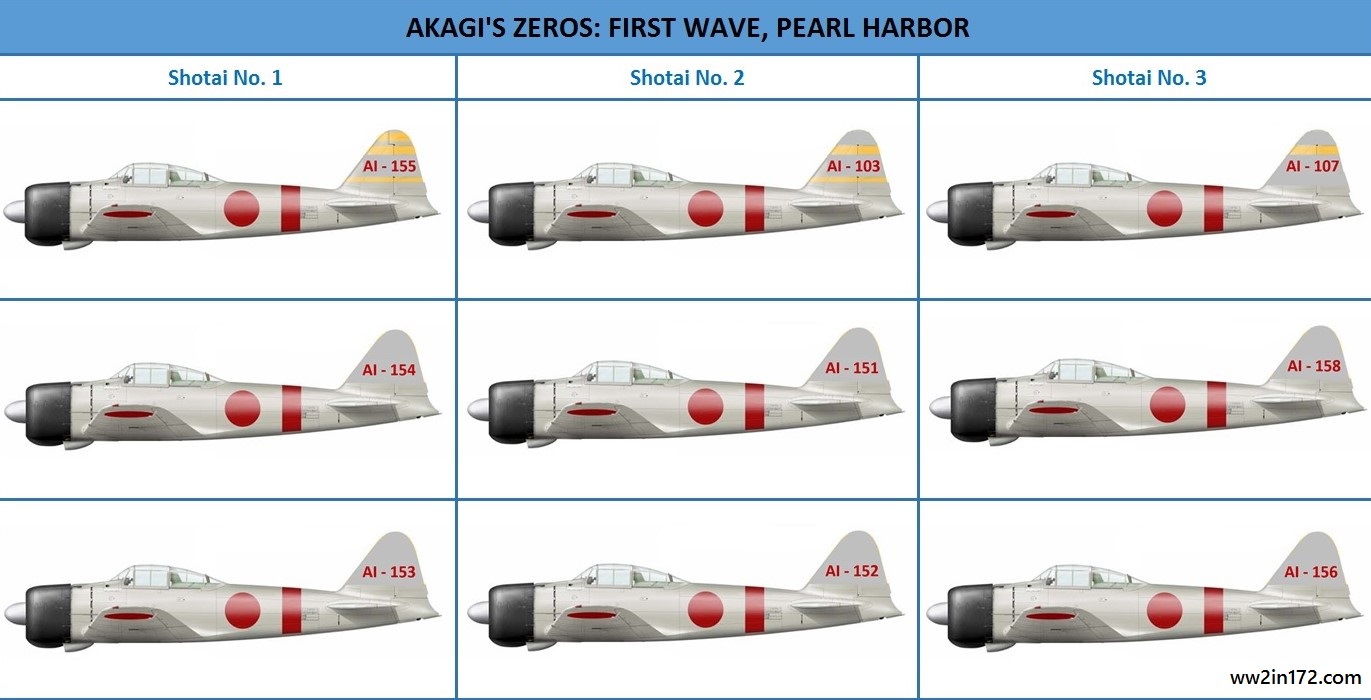
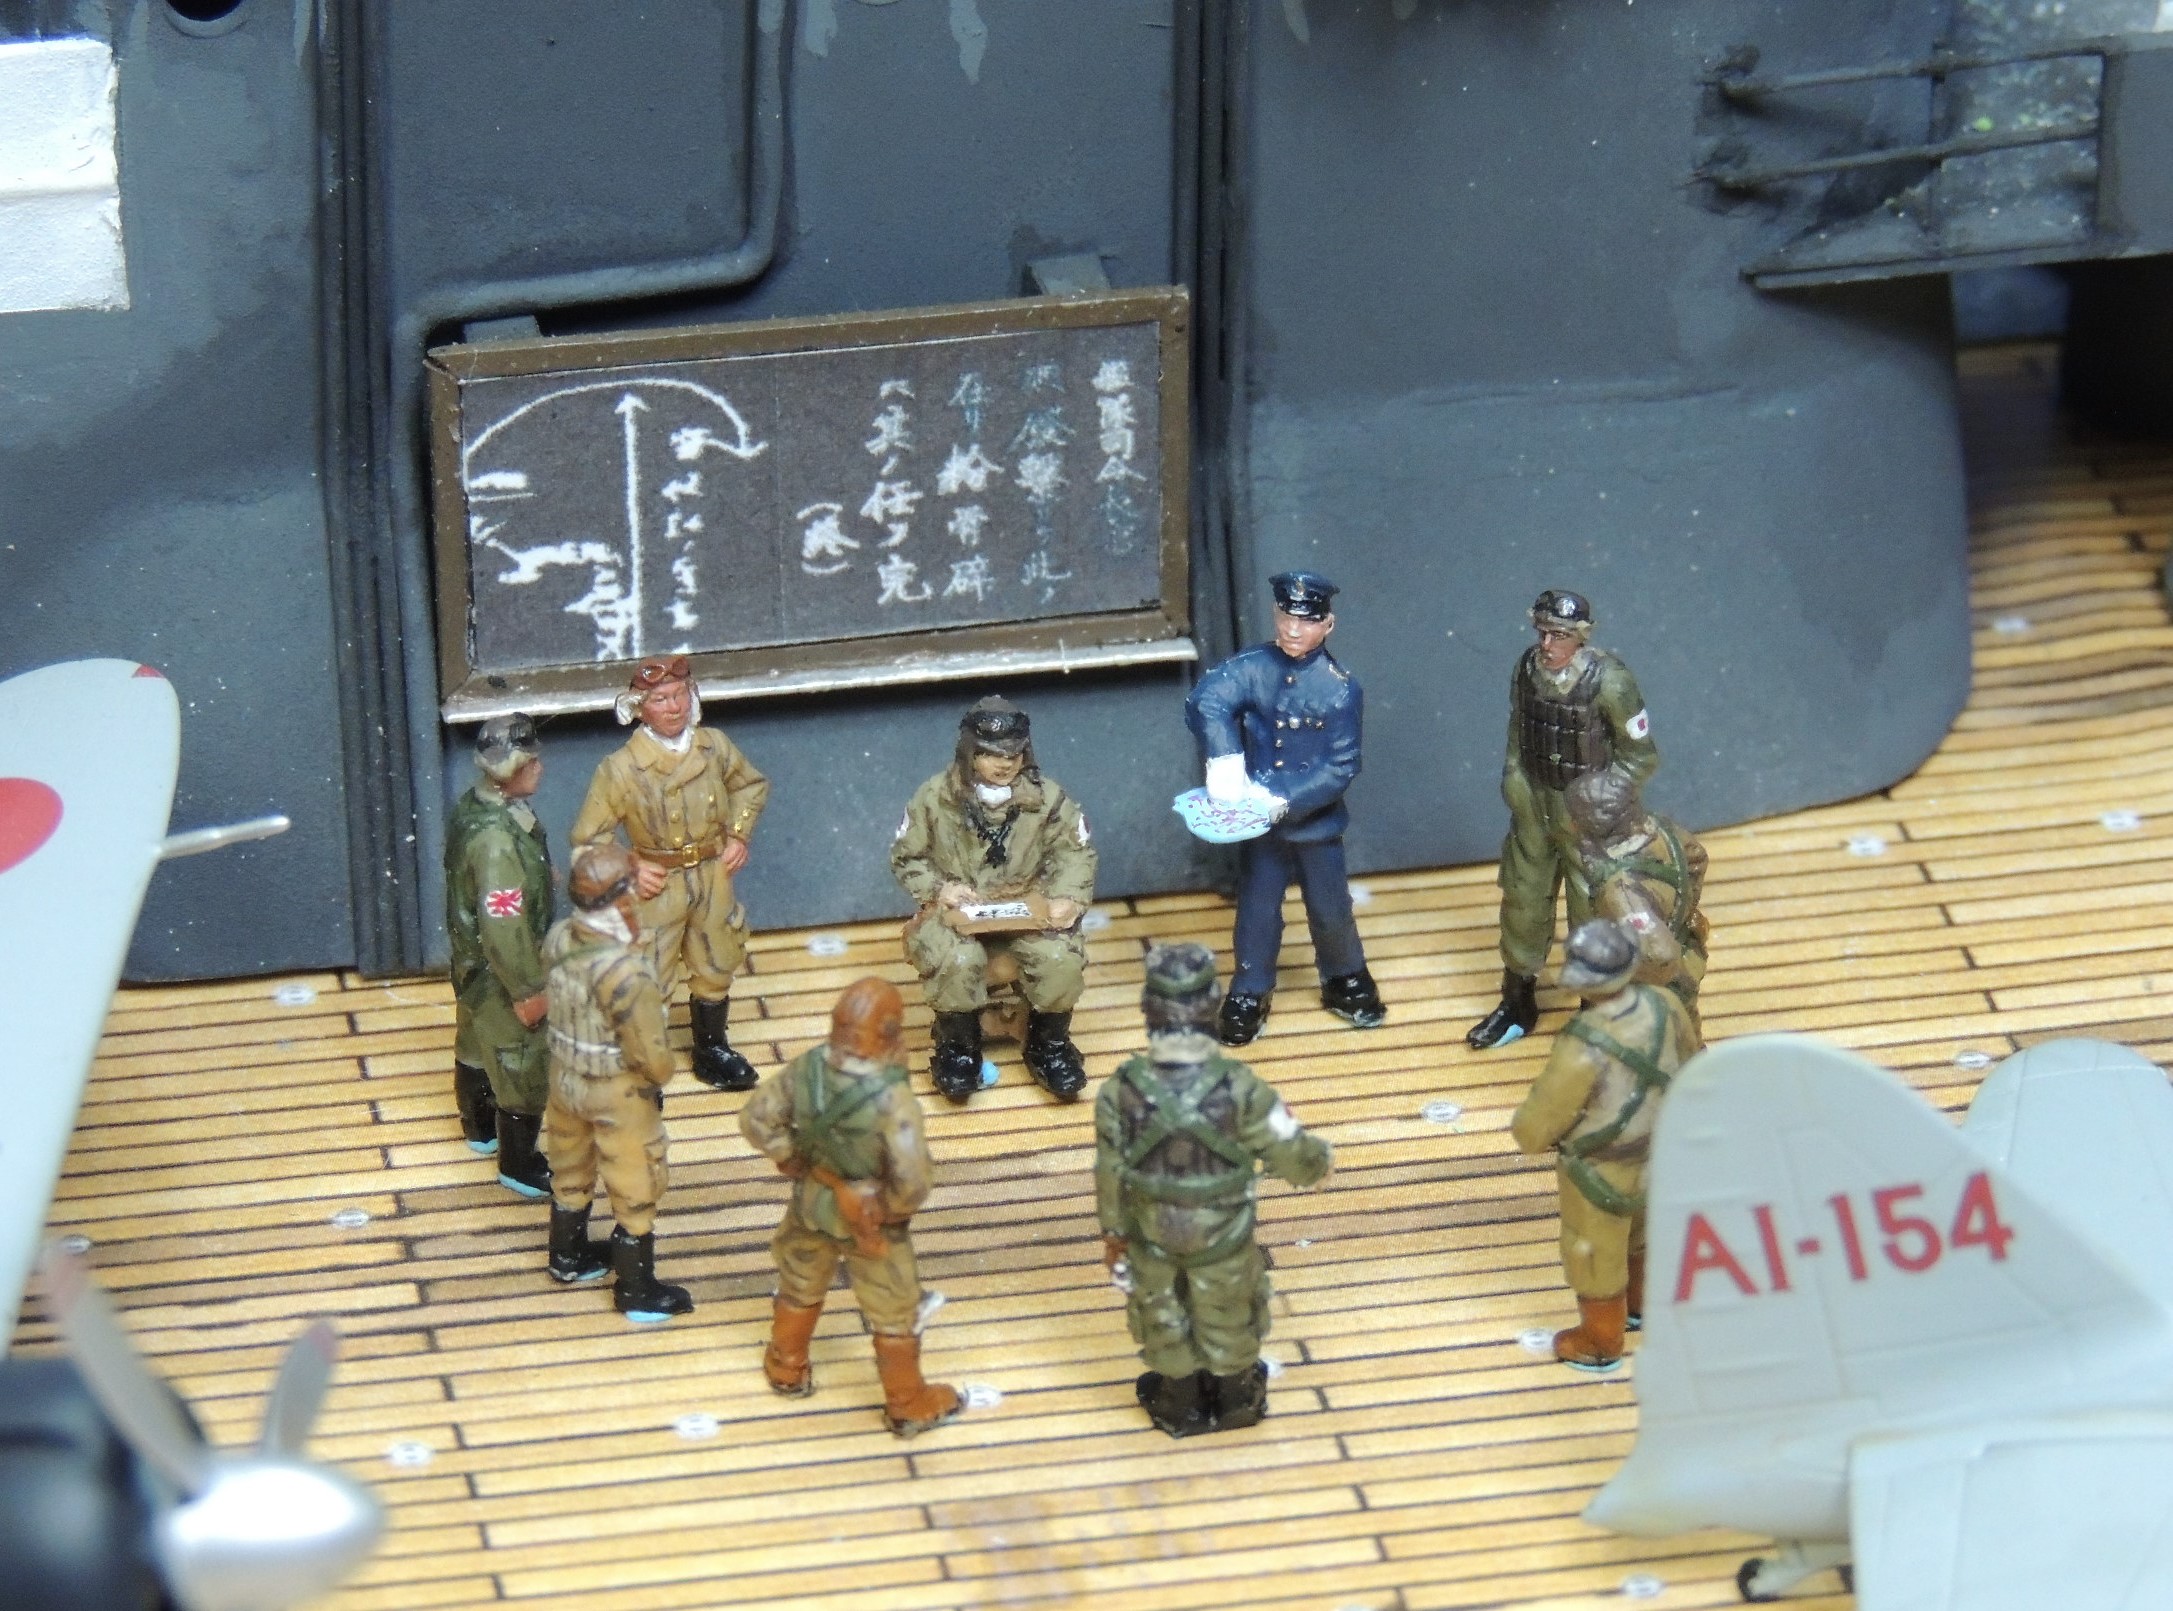
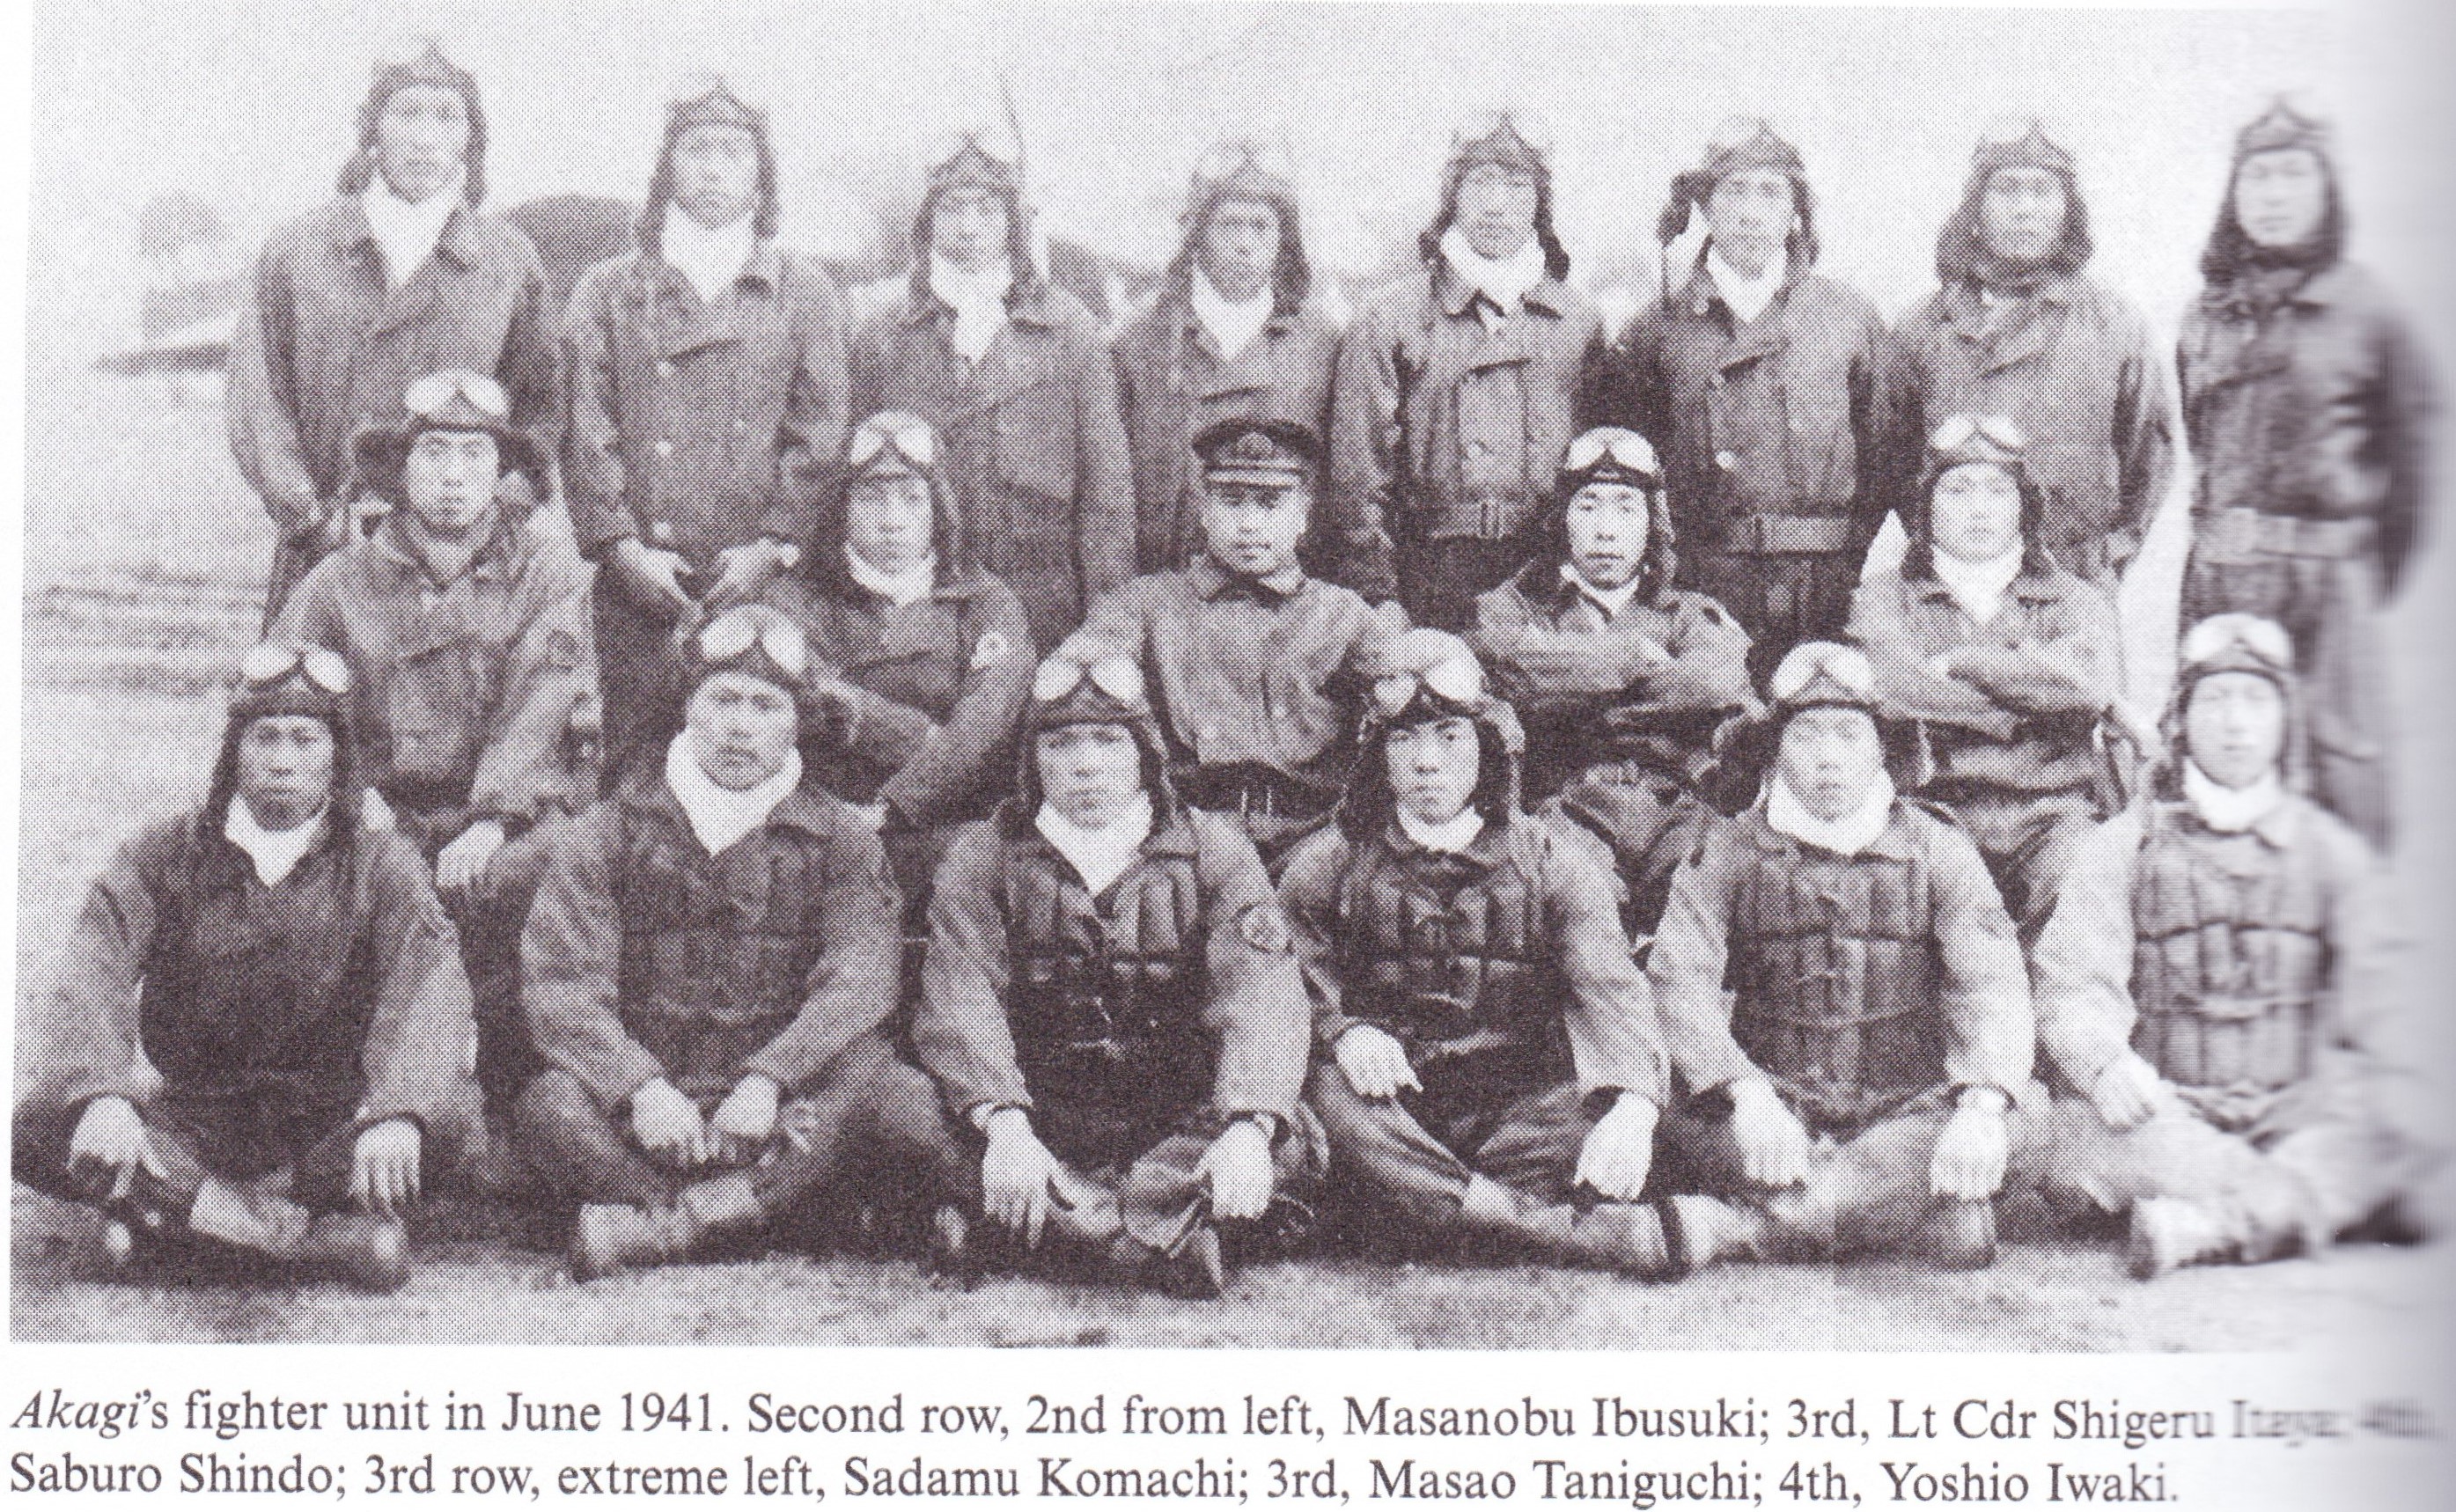 Conveniently for purposes of this post, Peter Smith’s Mitsubishi Zero: Japan’s Legendary Fighter provides a narrative that names all nine Akagi Zero pilots of the first wave: