The A6M Zero in 1/72: Akagi’s Zeros Prepare for Pearl Harbor Diorama, Part 2.4 – The Decaled Zeros

This is Part 2.3 of a series of posts on the construction of a Pearl Harbor diorama. It will depict the Zeros of the Imperial Japanese Navy’s Akagi aircraft carrier preparing to take off during the first wave attack. This post is a follow-up to the previous post and concerns only the pre-built 1/72 scale Zeros to be used in the diorama with renumbered tail markings. To understand the concept of this diorama project, please refer to the previous posts. 

The Actual Akagi Zeros

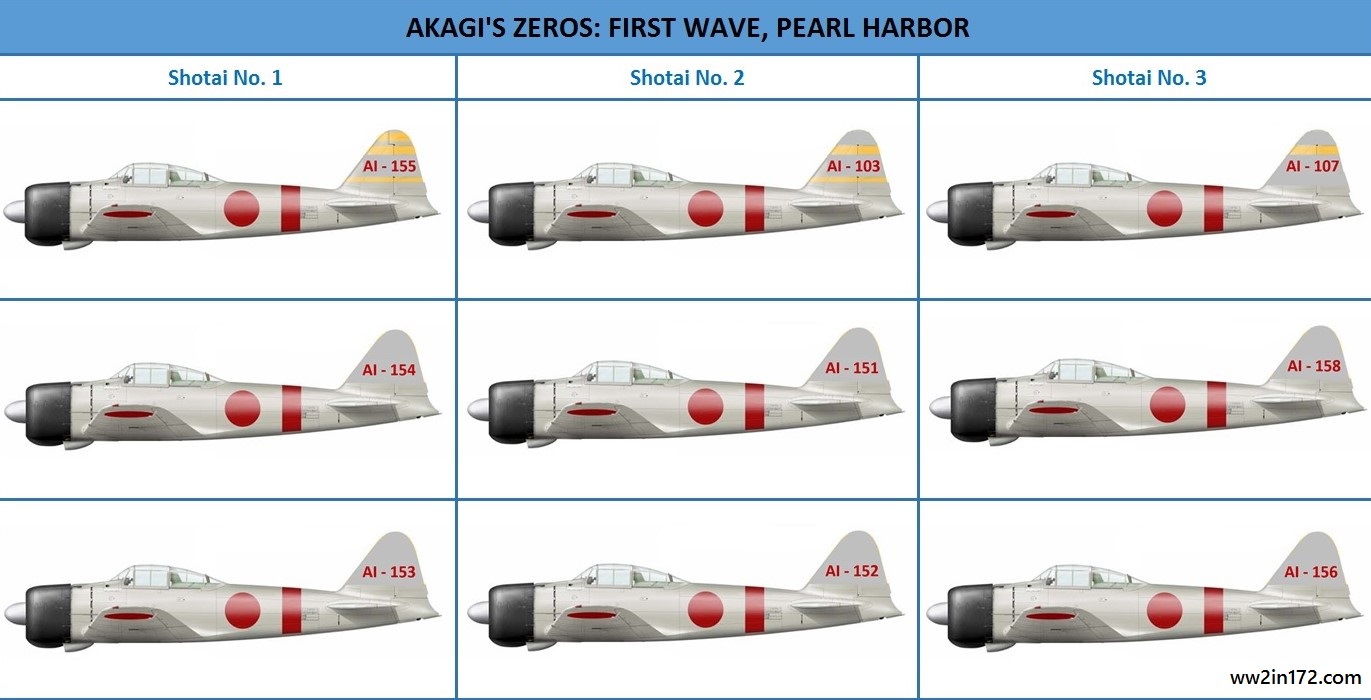
As previously mentioned, the Akagi contributed nine A6M2 Zeros to the first wave attack. As a refresher, below is a table from a previous post of the Zeros that participated in Akagi’s first wave. Akagi's Zeros JPEG from Excel (2) - CopyThe Prebuilt 1/72 Scale Models
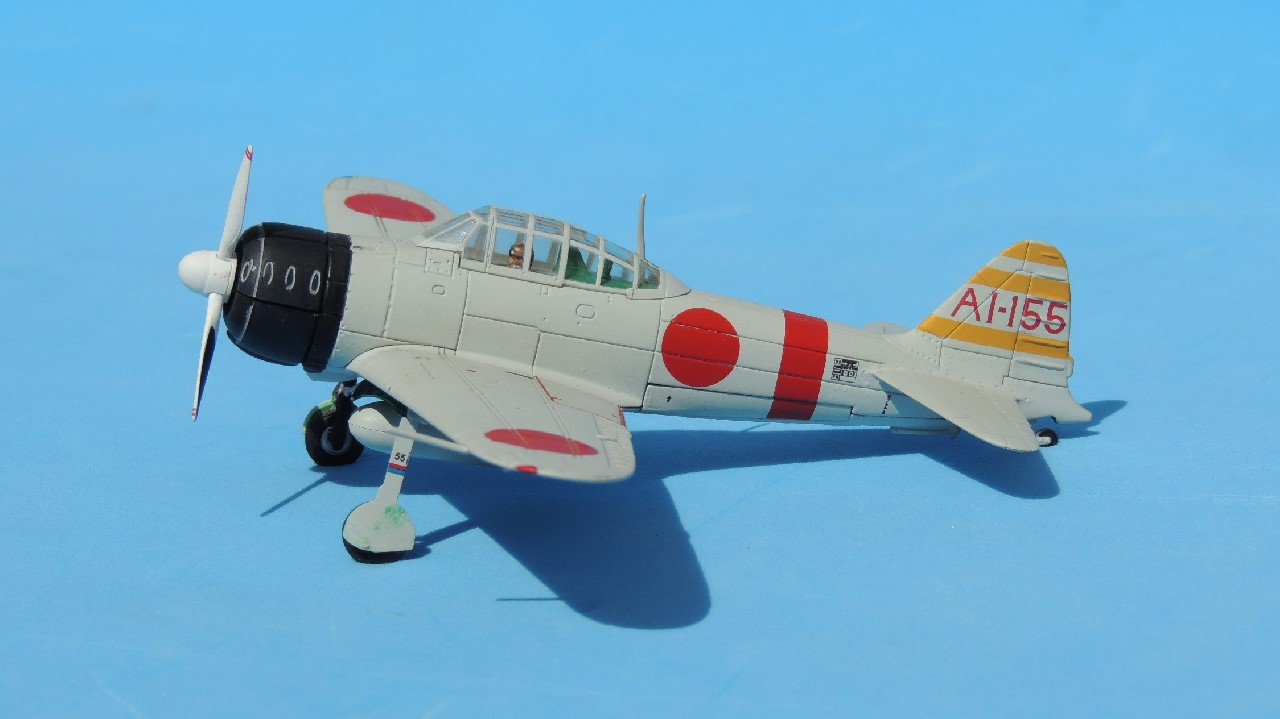
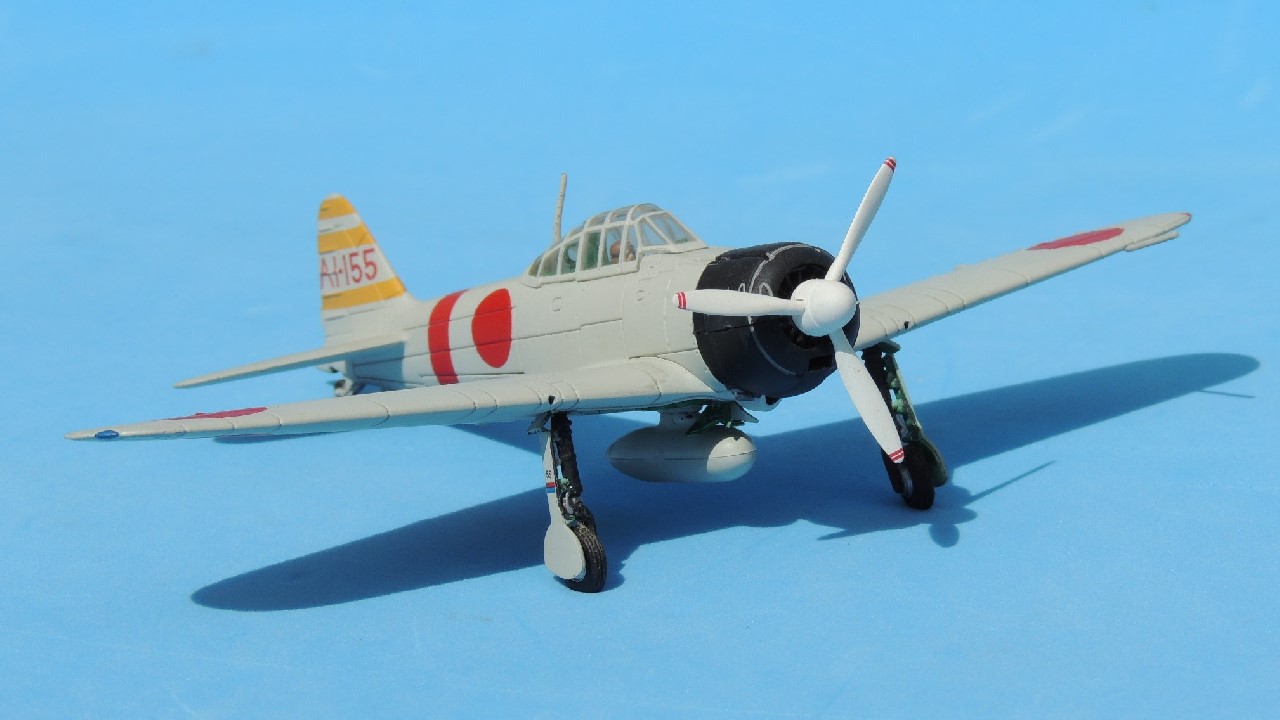
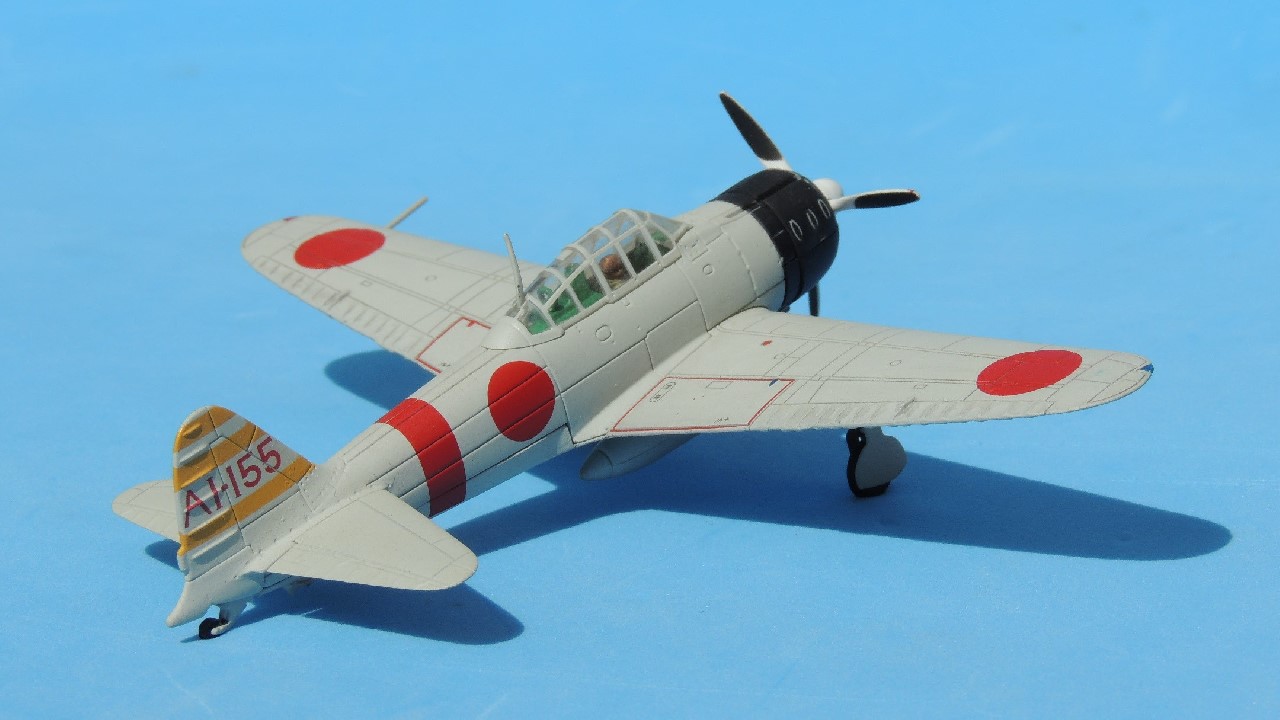
The photo below shows the prebuilt 1/72 scale Akagi Zeros currently available. It is immediately evident that of the nine actual Zeros that participated in Akagi’s first wave, only AI-155 and AI-154 have been produced in diecast. Unfortunately, the Corgi AI-154 is unusable as is, since Corgi used black, rather than red, tail numbers.Zero TailsThe Diorama Zeros
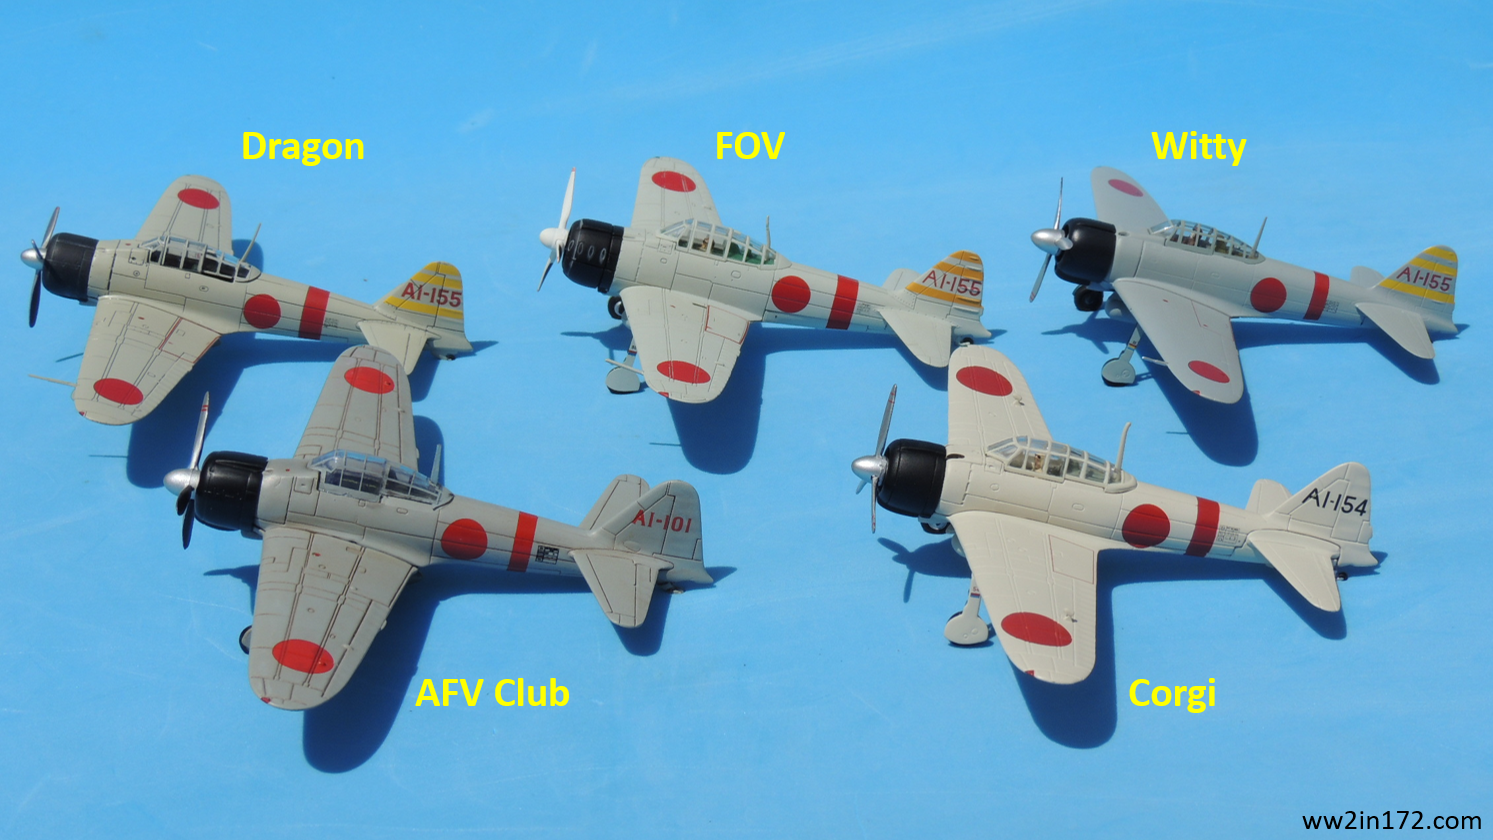
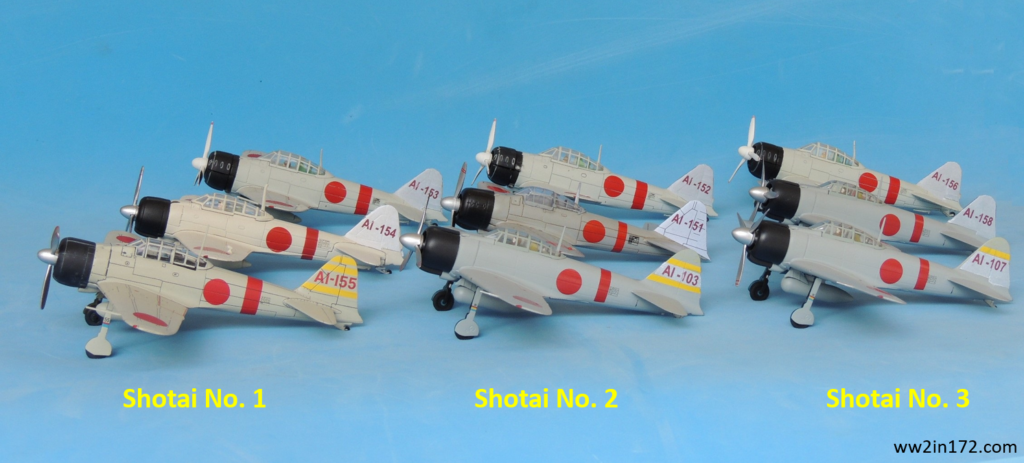
For purposes of the diorama, the goal is to use the five models in the photo above plus four spares — two additional Wittys and two additional FOVs. Only the Dragon AI-155 will be used unmodified; the remaining eight will require new tail numbers as per the chart above. Below is a notional photo of the expected result once the decals are applied. Zeros w New Tails
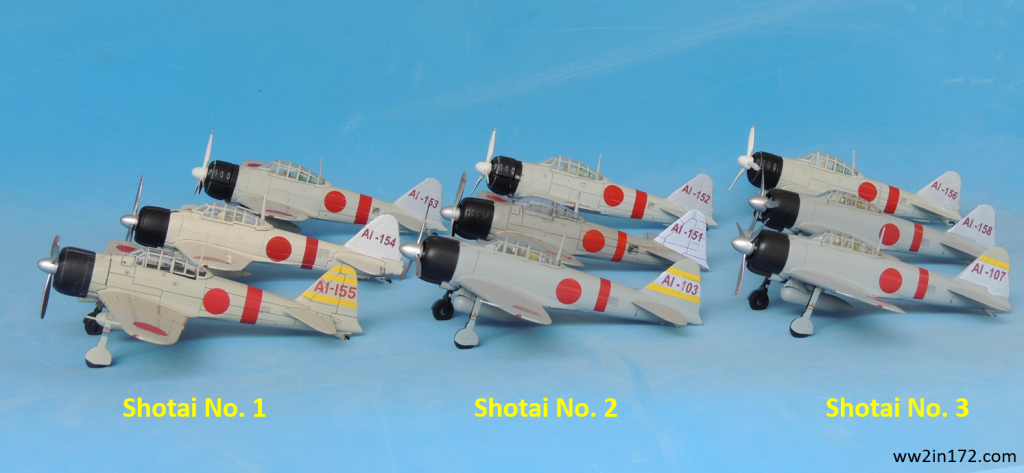
The Decaled Zeros

I searched extensively for MYK Design’s A-72009 Tora! Tora! Tora! Carrier Akagi 1/72 decal sheet (pictured below), since it includes five of the nine necessary tail numbers: AI-103, AI-107, AI-151, AI-155, and AI-158. (The AI-155 decal is unnecessary as I’ll be using the Dragon model that already carries that tail number.)  Alas, I was unsuccessful as the sheet has been out of print for years.
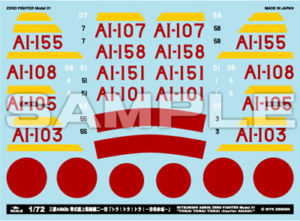
Ultimately, I had no choice but to make the decals myself. I enlarged the image at left, cleaned it up, enhanced the numbers as much as possible, and then reduced it back to 1/72 scale. I then printed the image on Micro-Mark decal paper.

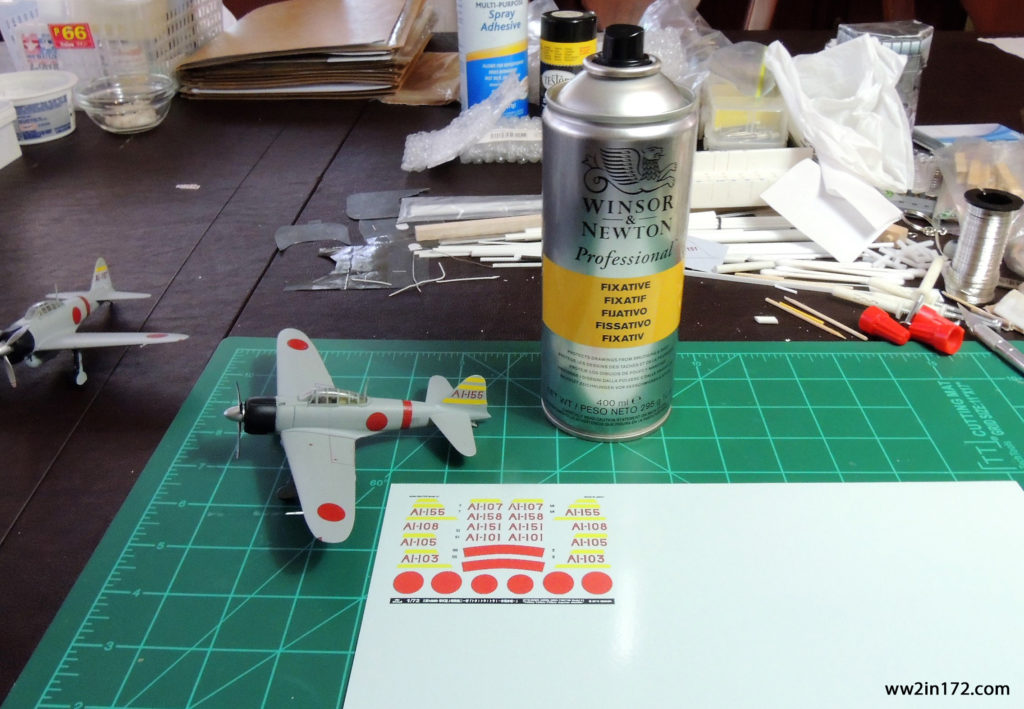
To my dismay, I found that handling the decal sheet resulted in slight smudging. After rereading the decal paper directions, I reprinted the image and “fixed” it onto the sheet with Winsor & Newton fixative. Failure to apply a coat of fixative to protect the image will result in the image smudging like lead on a pencil drawing when touched.

The photo below shows the decal sheet printed on the Micro-Mark decal paper after the fixative had been applied.With decals in hand, I prepared the three Witty models for application of the decals by removing the tail numbers and yellow stripes as necessary — leaving two stripes for the AI-103; one stripe for the AI-107; and no stripes for the AI-158. See photo below.
There are essentially two ways to remove the tampo markings on diecast models: 1) by scraping them off, preferably with an X-Acto #10 curved blade; or 2) by applying some sort of solvent, such as Testors 1148 thinner or standard acetone for nail polish removal. I found that a combination of the two methods worked best for me. (Note: Do not use enamel thinner on plastic models. It will ruin the plastic finish.) Once the original markings were totally removed, I applied a coat of Pledge (Future) floor finish to ensure that the decals found a glossy base that would prevent silvering. (Pledge’s self-leveling properties are amazing!) After waiting a day for the Pledge to cure, I used Micro Set and Micro Sol solutions to apply the decals.
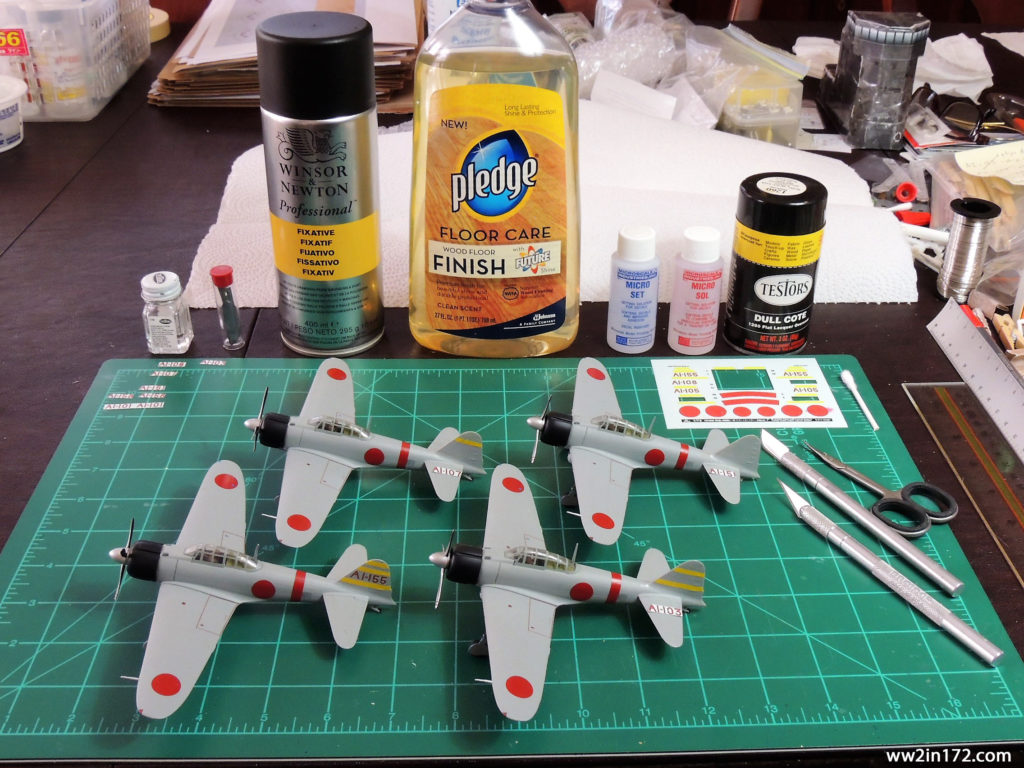
Micro Set prepares the surface where the decal is to be applied by cutting the oils in the paint, thus allowing the decal to slide on the surface, making it easier to reposition the decal as necessary. Micro Sol softens the decal, allowing it to conform to the surface of the model, which is particularly useful on irregular surfaces such as the panel lines and ridges on the Zero tails. Using these two solutions will help make the decals look “painted-on.” 

After waiting another day for the decals to dry, I again applied a coat of Pledge to completely seal the decals between two layers of Pledge. Of course, the Pledge application resulted in a glossy finish. After waiting yet another day, I sprayed the decals with Testors Dull Cote to give the tails a matte finish that matched the rest of the model. The photo below shows the results after the Dull Cote had dried.
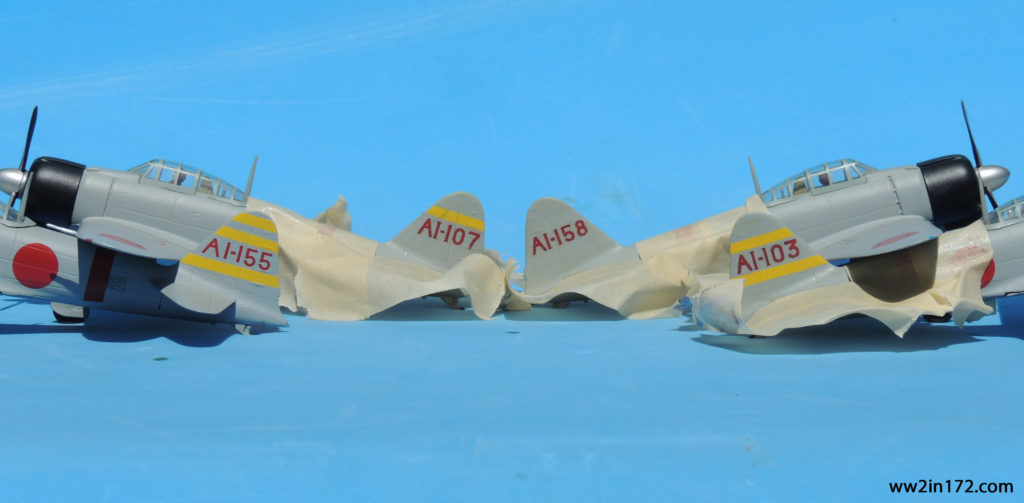
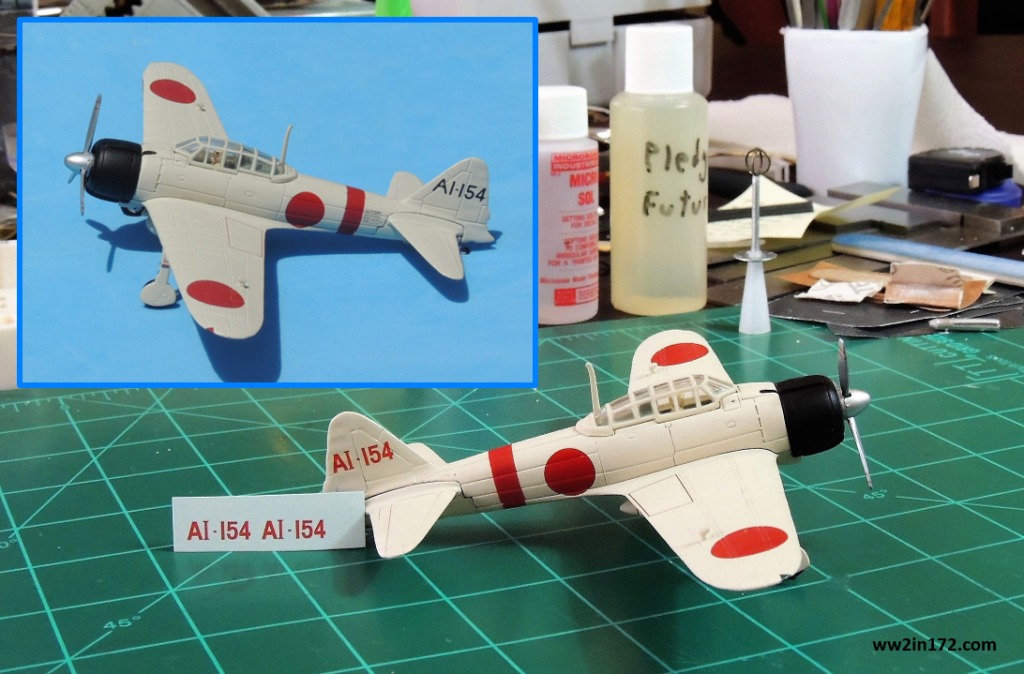
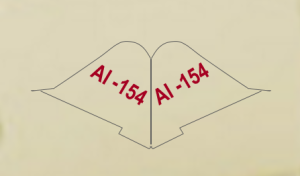
In addition to an unmodified Witty model (AI-155), the photo below shows the three decaled Witty models (AI-103, AI-107, and AI-158), plus one decaled FOV model (AI-151). Note that some paint came off the tail of the FOV when I removed the tampo markings, giving it an unintended — though not totally unwelcome — weathered look. (Yes, I’m accepting that which I cannot change.  🙂  )As previously mentioned, Corgi inexplicably applied black tail numbers to the AI-154 (see inset in the photo below), rather than the well-documented red numbers. I removed the black numbers with Testors thinner and applied a decal with correct red numbers following the process discussed above. Note that the MYK Design A-72009 decal sheet did not include the AI-154 so I made the decals using letters and numbers from different fonts to simulate the MYK Design numbers. The lagniappe photo below shows the result. I made the extra decals standing by the tail in case I botched the first application — a common occurrence, at least for me, when applying decals. To summarize, six models are now ready: the unmodified Dragon AI-155 plus five decaled planes — three Witty models (AI-103, AI-107, and AI-158), one FOV (AI-151), and one Corgi (AI-154). I’ve decided not to decal the last three (AI-152, AI-153, and AI-156) as the FOV model did not respond well to removal of the tampo markings. Instead, I’ll use paper covers using the stencil in the previous post.
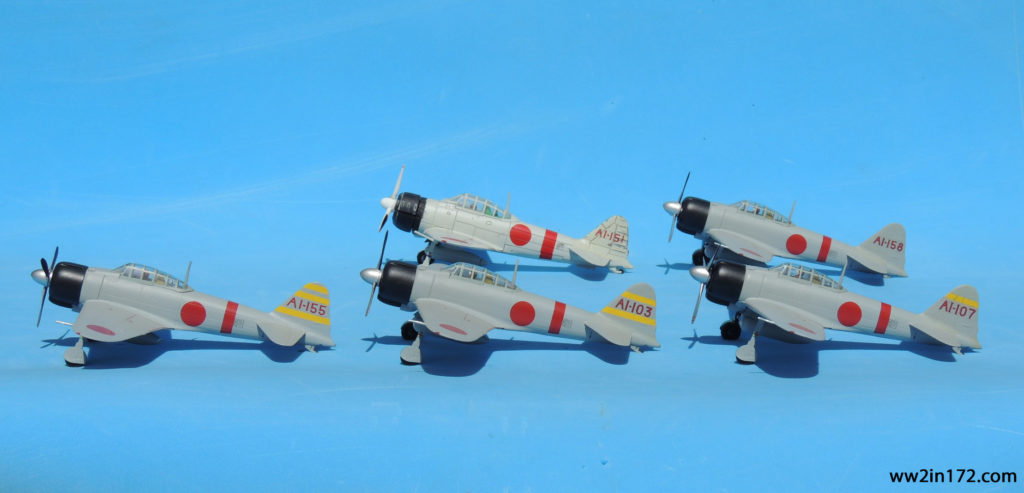
I apologize for such a tedious post. I realize that except for diehard readers, discussion of the tail numbers can get repetitive and confusing. Still, I think the photos by themselves tell the story. 

Again, thank you for your indulgence and I hope at least some of you enjoyed the post. If something looks amiss, please let me know. I would be delighted to correct inaccurate information so that this may be useful to other 1/72 scale collectors and wargamers. As always, comments, questions, corrections, and observations are welcome. Stay tuned for a brief discussion of the Zero pilots who participated in Akagi’s first wave attack in the next post.

The A6M Zero in 1/72: Akagi’s Zeros Prepare for Pearl Harbor Diorama, Part 2.3 – The Diorama Zeros

This is Part 2.2 of a series of posts on the construction of a diorama depicting the Zeros of the Imperial Japanese Navy’s Akagi aircraft carrier preparing to take off as part of the first wave attack on Pearl Harbor. Providing the history of the Zero or its technical details is beyond the scope of this article. This post concerns only the prebuilt 1/72 scale Zeros to be used in the diorama. To understand the concept of this diorama project, please refer to the previous posts. 

The Actual Akagi Zeros

As previously mentioned, the Akagi contributed nine A6M2 Zeros and 27 B5N2 Kates to the first wave attack. As a refresher, below is a table from a previous post of the Zeros that participated in Akagi’s first wave. As is readily apparent, the tail numbers are all in the AI-150’s except for AI-103 and AI-107. Up to this point, I had deliberately avoided discussing the tail numbers as creating the correct numbers will be one of the more difficult parts of this project, as discussed below. Akagi's Zeros JPEG from Excel (2) - CopyThe Prebuilt 1/72 Scale Models

The photo below shows the prebuilt 1/72 scale Akagi Zeros currently available.* It is immediately evident that of the nine actual Zeros that participated in Akagi’s first wave, only AI-155 and AI-154 have been produced in diecast. AI-155 — Shigeru Itaya’s Zero — has been produced by Dragon, Forces of Valor, and Witty. A review of each can be found by clicking on the name of the manufacturer. A short biography of Itaya is also available by clicking on his name. AI-154 has been produced by Corgi. Unfortunately, despite all evidence to the contrary, Corgi inexplicably used black tail numbers rather than red numbers, for which there is abundant proof. AFV Club also produced an Akagi Zero — the AI-101 — that participated in the second wave. For the sake of completeness, it will be used in this project so collectors may compare models from all five manufacturers that have thus far produced an Akagi Zero. Zero TailsThe Diorama Zeros

For purposes of the diorama, the goal is to use the five models in the photo above plus four duplicates. The challenge is to create models with all of Akagi first wave numbers other than AI-155. Even AI-154 will be required as the tail number must be in red. The idea is to scrape off the original painted numbers and replace them with appropriate decals so that they match the table above.Corgi AI-154 As thus far I have been unsuccessful in finding the decals, I made a stencil of the tail to cover the tail numbers in the interim. I then scanned the color of each model and applied it to the tail stencil. Matching base colors proved more difficult than I had anticipated.

For those interested in how the colors of the five manufacturers compare, below is a plate showing a scan of each model’s base color. The color of the Corgi model is actually beige and the inset at left matches the model reasonably well. I’m perplexed, however, by the difference in the color of the Corgi model in the photos and conclude it’s due to the lighting. The FOV and Witty colors look very similar but that’s as close to the models as the scanner could make them. Once I made stencils for all five colors, I covered the tail of each model with a new number.The lagniappe photo below provides a notional idea of the intended result. At this point, the tail numbers appear to be a weak part of the project. That will change, however, once the decals are applied. Zeros w New TailsAgain, thank you for your indulgence and I hope you enjoyed the post. If something looks amiss, please let me know. I would be delighted to correct inaccurate information so that this may be useful to other 1/72 scale collectors and wargamers. As always, comments, questions, corrections, and observations are welcome. Stay tuned for photos of the models once the decals are applied.


* Witty also produced AI-101 and AI-102 but both were used in the second wave and, except for the tail numbers, are identical to the AI-155. While Atlas/Oxford (same casting) also produced aircraft carrier A6M2 Zeros, they did not make an Akagi Zero. Instead, Atlas produced a model from the Kaga while Oxford produced one from the Ryujo. 

The A6M Zero in 1/72: Akagi’s Zeros Prepare for Pearl Harbor Diorama, Part 2.2 – Prebuilt 1/72 Models

This is Part 2.1 of a series of posts on the construction of a diorama depicting the Zeros of the Imperial Japanese Navy’s Akagi aircraft carrier preparing to take off as part of the first wave attack on Pearl Harbor. This post concerns only prebuilt 1/72 scale models depicting Zeros from the Akagi. To understand the concept of this diorama project, please refer to the previous two posts. 

Prebuilt 1/72 Scale Akagi Zeros

As I’ve indicated in the past, I lack the modeling skills to build the aircraft necessary for this diorama. Thus, I’ll be using nine prebuilt diecast 1/72 planes. To my knowledge, five manufacturers — AFV Club, Corgi, Dragon Wings, Forces of Valor, and Witty Wings — have tried their hand at producing models of the A6M2 Zero — the version of the Zero used at Pearl Harbor — specifically representing Zeros from the Akagi.*

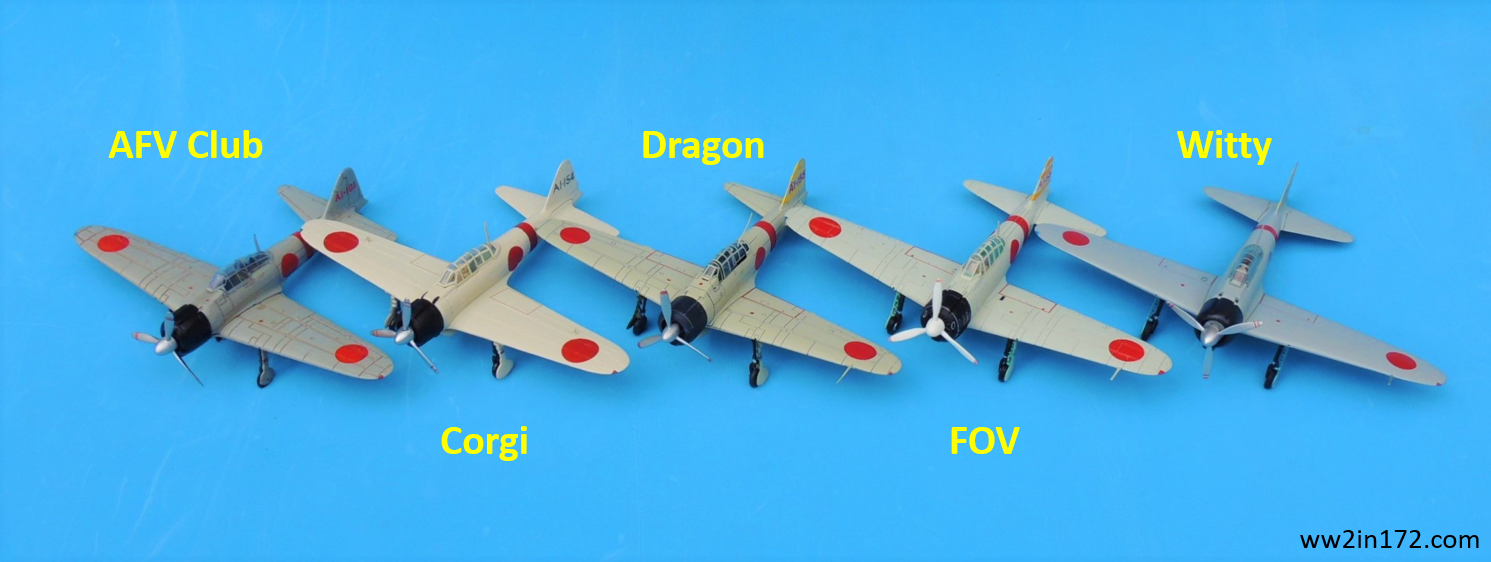
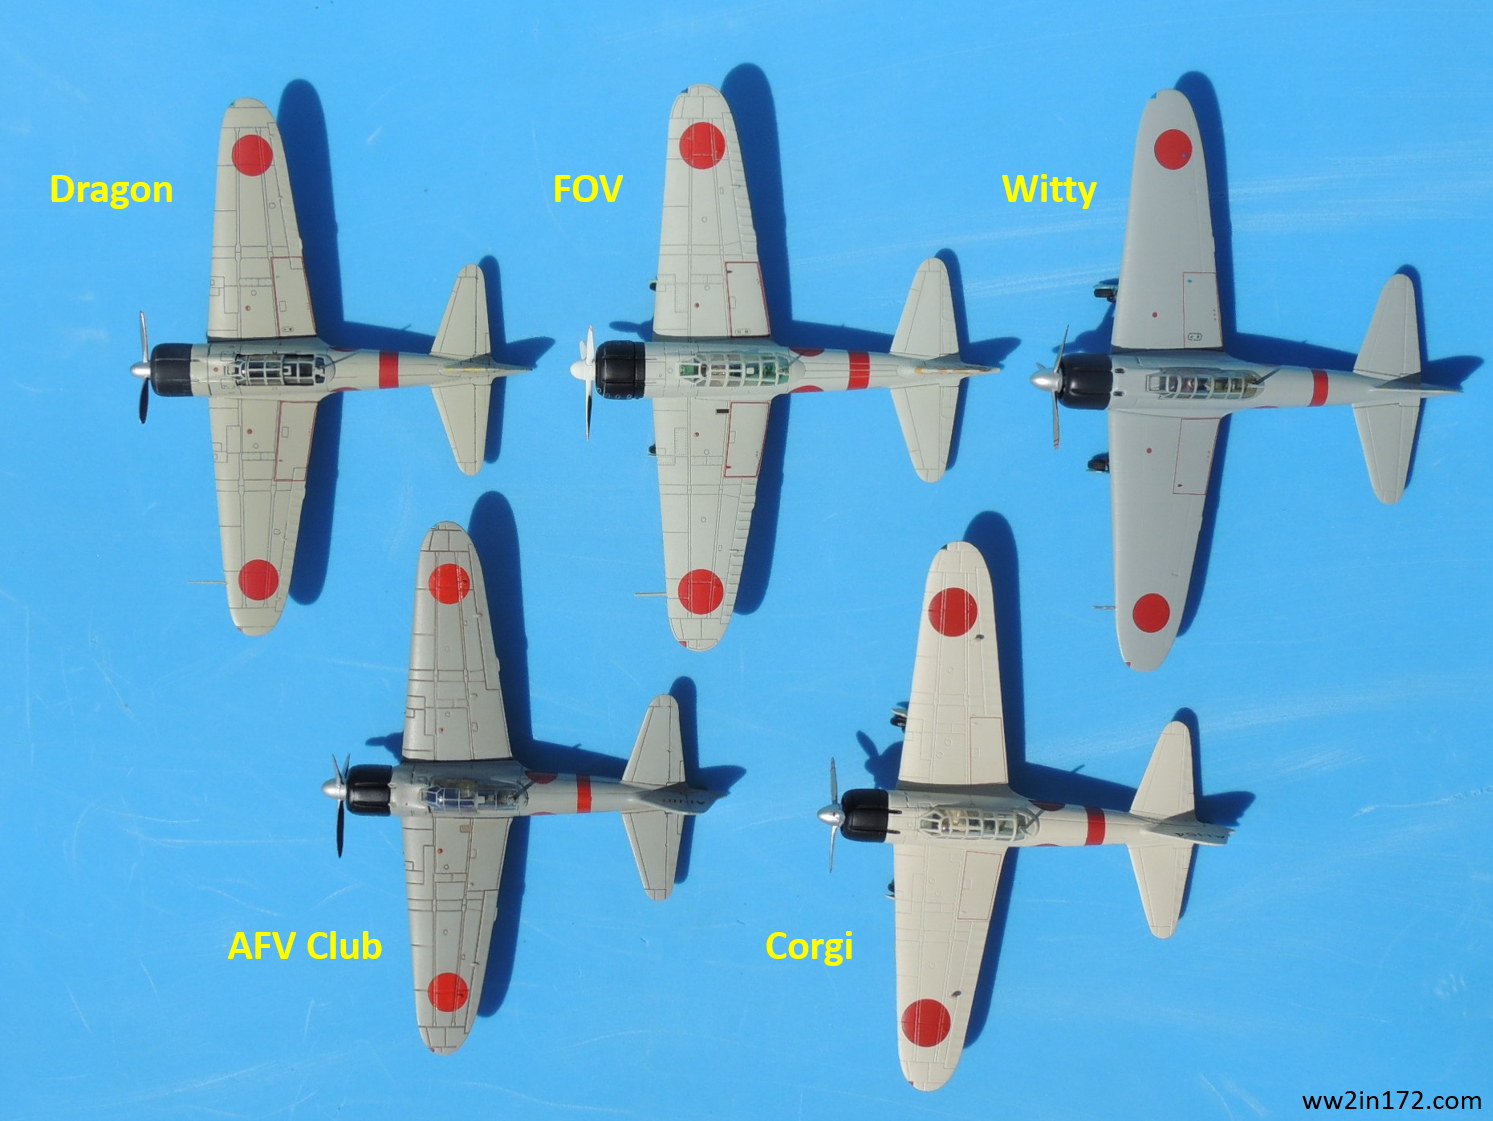
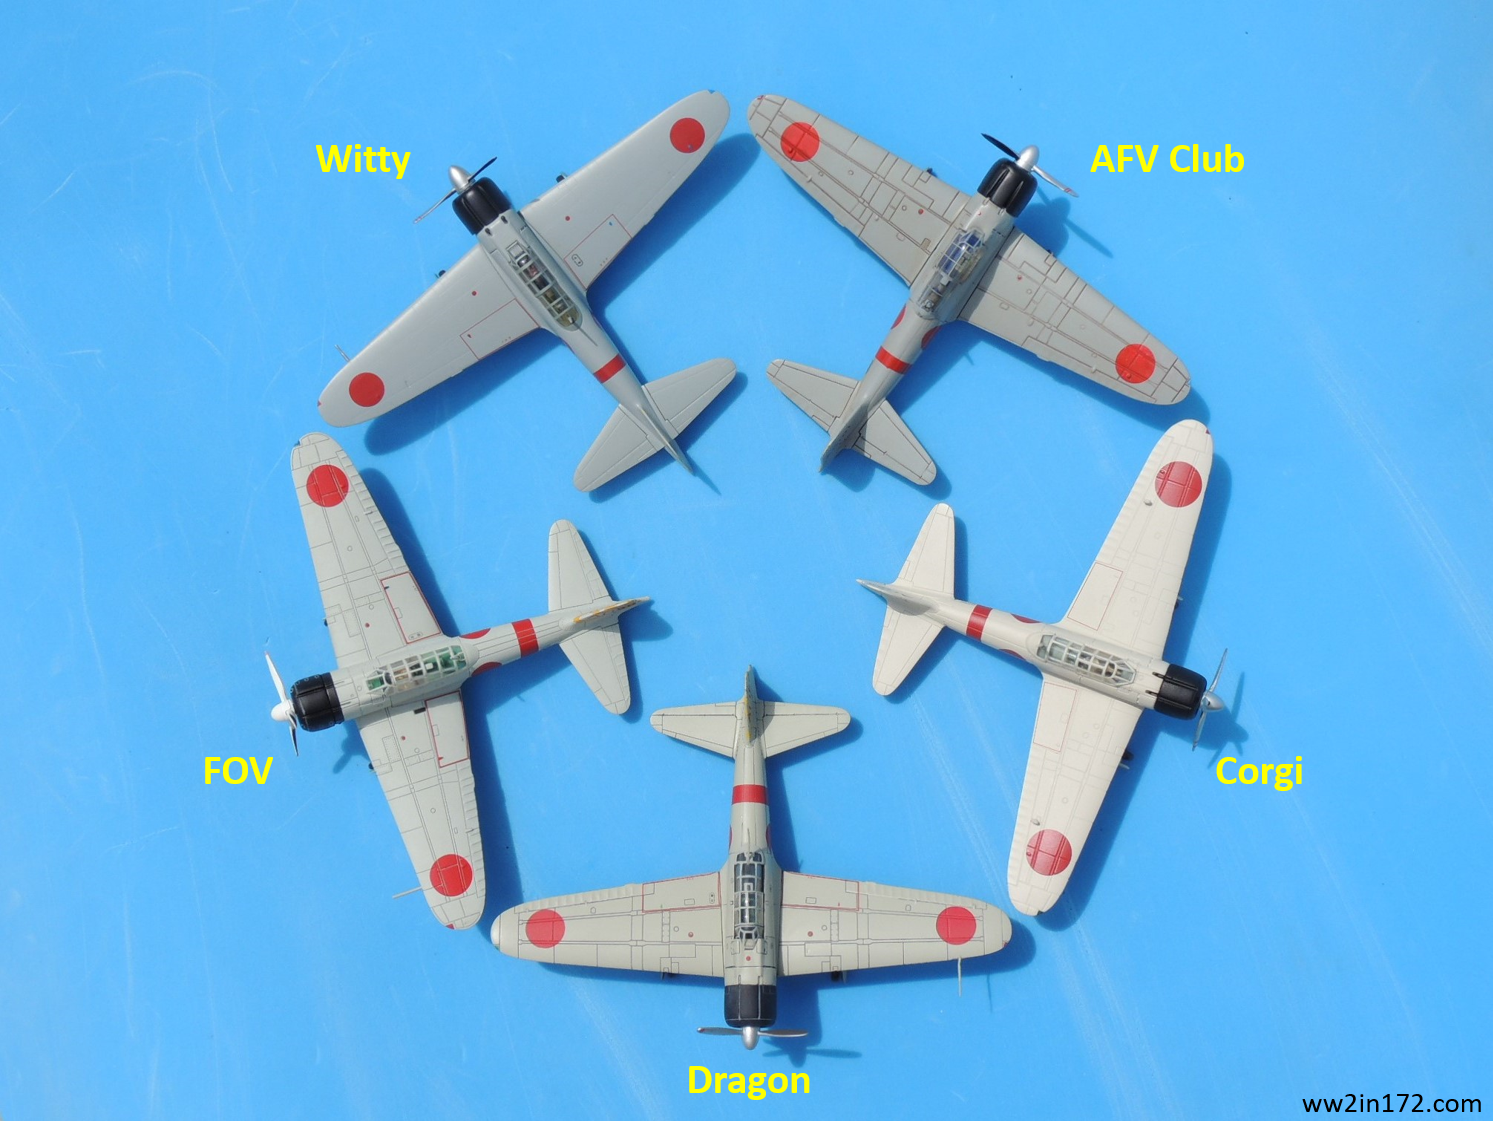
The photo below shows the Akagi Zero models from the five aforementioned manufacturers, in alphabetical order from left to right. Note the difference in the base color, which reflects the continuing debate over the true color of the actual Zeros.Zero Fronts 3Below is an overhead shot of the five models. Note that the AFV Club and Dragon models have “inked” panel lines, burnt umber and black, respectively, which make the lines stand out. By contrast, the panel lines on the Witty, which are widely considered to be close to scale, are barely visible. My preference is the middle route taken by both Corgi and FOV — while their panel lines may be overscaled, the fact that they were not inked results in a Goldilocks look.Zero OverheadFinally, the lagniappe overhead shot below allows better comparison of dimensions. As is apparent from the photo, the difference in dimensions is de minimis (couldn’t resist the alliterative flourish). Ultimately, however, the reader can make that judgment.Zero Pentagon 1For purposes of the diorama, the plan is to use these five prebuilt models plus four duplicates to complete the nine Zeros in Akagi’s first wave. Since these manufacturers combined have produced only the AI-154 and AI-155, the project will require disguising the tail numbers so that they match the nine tail numbers used on the Akagi (see table in previous post). That is the subject of the next post. 

Again, thank you for your indulgence and I hope you enjoyed the post. If something looks amiss, please let me know. I would be delighted to correct inaccurate information so that this may be useful to other 1/72 scale collectors and wargamers. As always, comments, questions, corrections, and observations are welcome. As mentioned, stay tuned to see these Zeros with the nine new tail numbers in the next post.


* While Atlas Editions and Oxford Diecast also produced A6M2 Zeros for aircraft carriers, neither made an Akagi Zero. Atlas produced a model belonging to the Kaga aircraft carrier (AII-105). Using the same Atlas casting, Oxford Diecast later produced an A6M2 Zero model belonging to the Ryujo aircraft carrier (DI-108). In any case, the Atlas/Oxford models are wheels-up only (wheels are molded retracted into the lower fuselage), requiring a stand and making it difficult to pose them next to other models.

The A6M Zero in 1/72: Shigeru Itaya Leads the Zeros at Pearl Harbor, Part 3 – The Forces of Valor Model

This is Part 3 of Shigeru Itaya Leads the Zeros at Pearl Harbor. It is a review of the Forces of Valor 85032 1/72 scale model of Itaya’s Zero at Pearl Harbor. For a brief biographical note on Shigeru Itaya and a review of the Dragon Wings model of the same aircraft, please refer to the previous two posts. Relevant information on Itaya’s aircraft from those posts is repeated below to make this review self-contained. The reader may want to skip directly to the review of the FOV model. 

Itaya’s A6M2 Zero, Tail No. AI-155

As discussed in Part 1, Itaya led the 43 Zeros from all carriers in the first wave of the attack on Pearl Harbor. In each wave the Zero planes were the first airborne, both because they needed the least runway to take off and in order to protect the slower, less maneuverable torpedo and dive bombers that followed. As the leader of the first wave of Zeros, Itaya was the first Japanese pilot airborne during the attack.

As noted previously, there is precious little information available on Itaya. This dearth of information extends to Itaya’s plane at Pearl Harbor, a Mitsubishi A6M2 Zero, tail no. AI-155. Although there are some references on the internet that Itaya’s Zero’s tail no. may have been something other than AI-155, the books I consulted consistently use that number. To my knowledge, there are no existing photos of the AI-155, though there are enough photos of other planes from the Akagi aircraft carrier to give us a reasonably accurate understanding of its colors and markings.

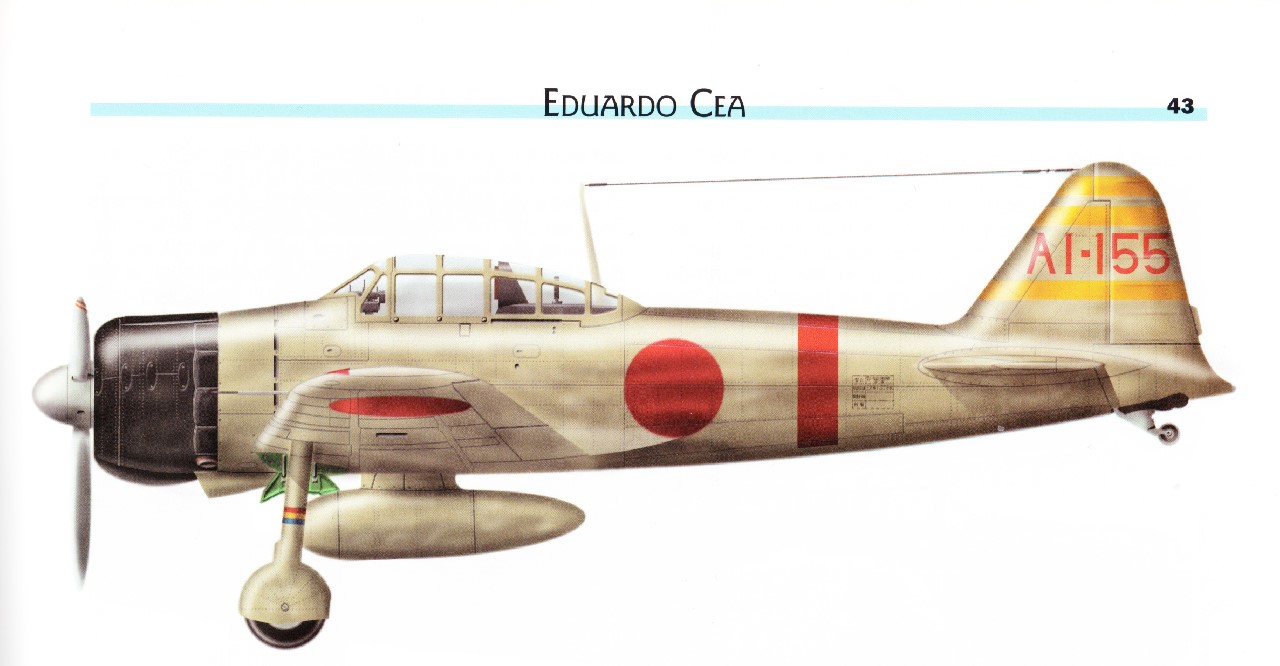
Below is a color profile from what is probably the most comprehensive source of information on the colors and markings of WWII Japanese aircraft, Eduardo Cea’s eight-volume treatise entitled Japanese Military Aircraft. I scanned this particular profile from Volume 2, The Air Force of the Japanese Imperial Navy: Carrier-Based Aircraft, 1922-1945 (I). While I’m aware that there are a number of errors in the English translation of the Spanish text that are somewhat distracting, the series is beautifully illustrated, incredibly informative, and inarguably comprehensive, and, being fluent in Spanish, I blithely overlooked the errors. 🙂 The profile is reproduced here for discussion purposes under the fair use exception to the copyright laws.1/72, 85032, A6M, AI-155, Akagi, FOV, Forces of Valor, IJN, Itaya, Japanese Navy, Pearl Harbor, Zeke, ZeroItaya’s Zero at Pearl Harbor has been released in 1/72 scale by three different manufacturers: Dragon Wings 50017; Forces of Valor 85032; and Witty Wings 72-012-001. This post concerns the Forces of Valor (FOV) model. The Dragon Wings model was reviewed in the previous post. A review of the Witty Wings model will follow shortly in a separate post, with equivalent photos to the other two for ease of comparison.

The Forces of Valor 85032 Zero

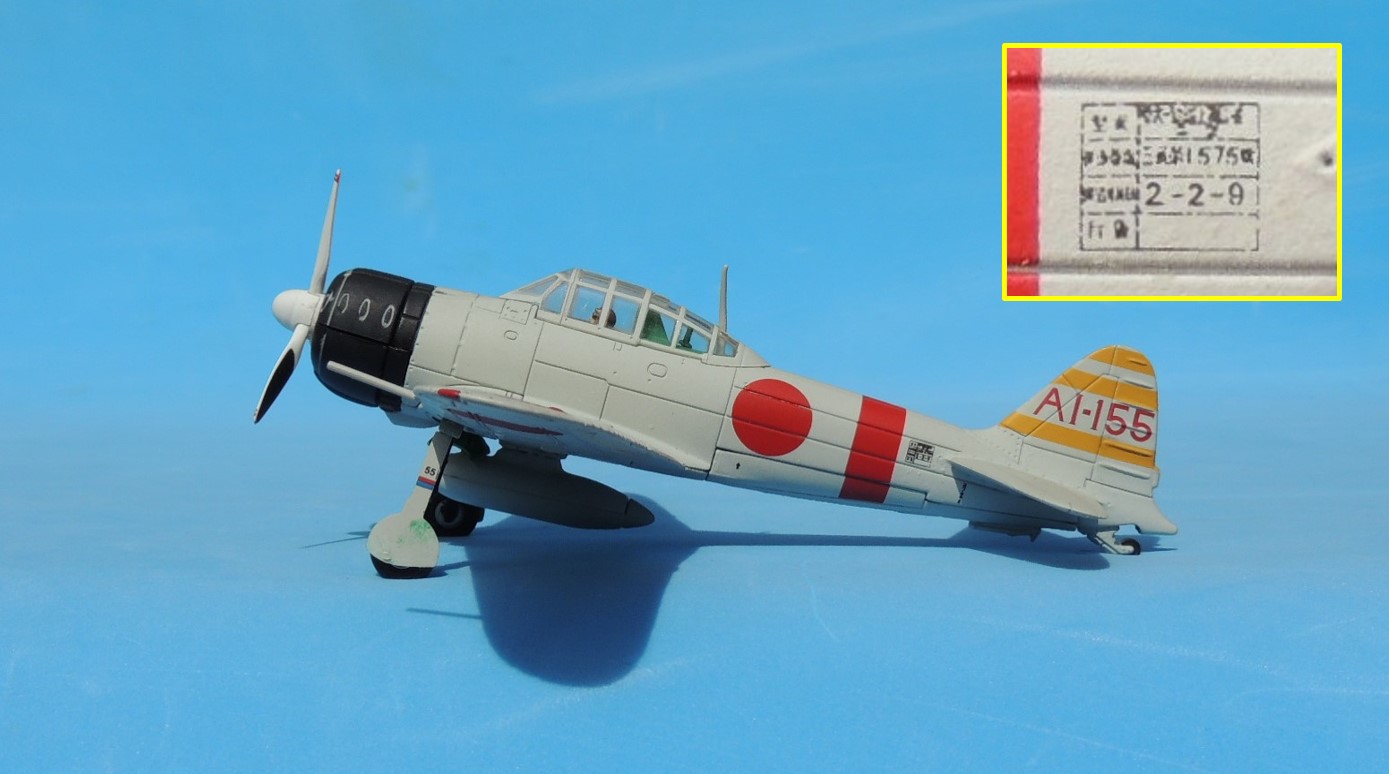
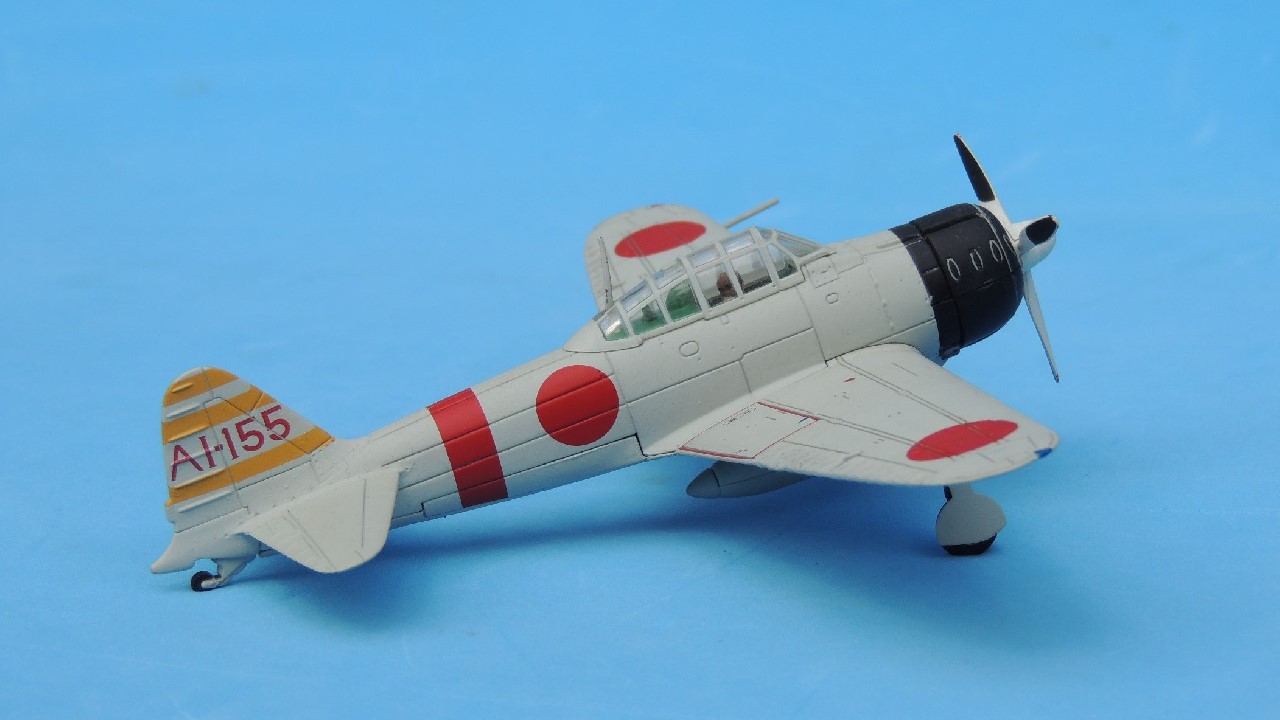
Below is a portside view of the FOV model. Unlike the Dragon model, the FOV model does not have the caramel “ameiro” finish. Its tone is not gray, either; instead, it’s more of a light ivory.1/72, 85032, A6M, AI-155, Akagi, FOV, Forces of Valor, IJN, Itaya, Japanese Navy, Pearl Harbor, Zeke, ZeroIn the photo below, note the somewhat deep panel lines throughout the model. Though they are clearly overscaled — about as pronounced as Dragon’s — they do not necessarily detract from the model because, unlike Dragon, FOV did not highlight them with a black wash.1/72, 85032, A6M, AI-155, Akagi, FOV, Forces of Valor, IJN, Itaya, Japanese Navy, Pearl Harbor, Zeke, ZeroThe photo below provides an excellent view of the tail no. “AI-155.” As mentioned in the Dragon review, the “AI” code was the designation for the Akagi aircraft carrier. In the three-digit number after “AI”, the first digit (“1”) indicates that it is a fighter plane. The last two digits (“55”) are simply the aircraft number within the unit. The tail numbers on Japanese carrier aircraft were usually red.

Note also the three horizontal yellow stripes on the tail that indicated command: three stripes for the group leader; two stripes for a squadron leader (9 aircraft); and one stripe for a flight leader (3 aircraft). Note also the “no step” rectangular area outlined in red at the rear of each wing next to the wing root.1/72, 85032, A6M, AI-155, Akagi, FOV, Forces of Valor, IJN, Itaya, Japanese Navy, Pearl Harbor, Zeke, ZeroThe photo below provides an excellent view of the Hinomaru, which was carried on both sides of the fuselage aft of the wing and on both the upper surface and underside of each wing — six “circles of the sun” in total. The vertical red stripe is the identification mark for the aircraft carrier Akagi.

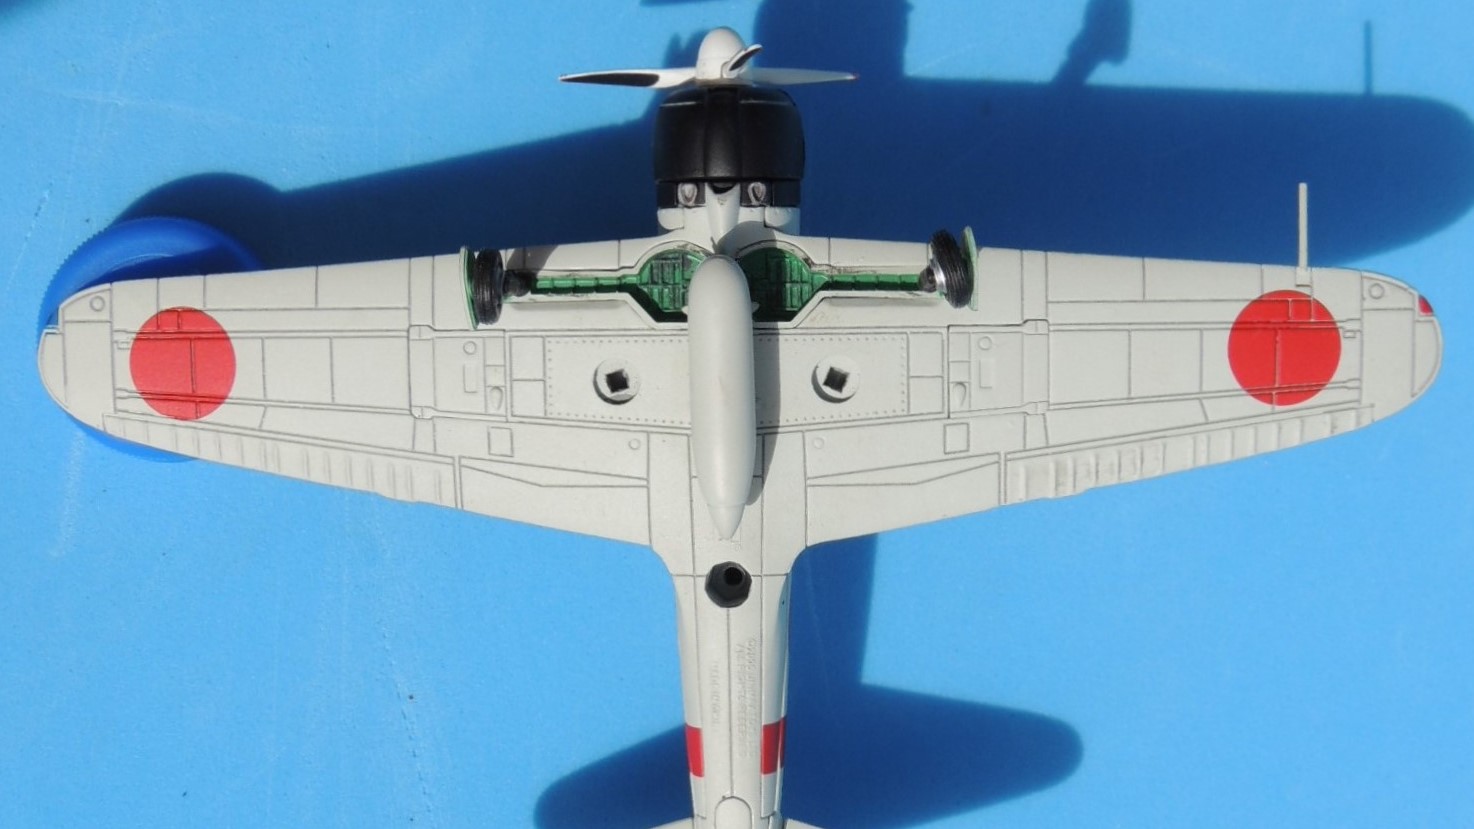
Note also the manufacturing plate stenciled just aft of the red stripe. The inset shows that the plate bears the number 1575, meaning it was the 1,575th Zero built. The “2-2-9” means it was built in the Japanese year 2602, second month, ninth day = February 9, 1942. (Yes, two months after Pearl Harbor. 🙂 Forces of Valor “borrowed” this particular stencil from a Zero recovered at Port Moresby in April 1942.) Incidentally, the A6M is called the “Zero” because it first entered service in the Japanese year 2600 (1940), the zero year of the new Japanese century. Please bear in mind that the entire plate is just 4mm wide (just over 1/8 inch). Though the manufacturing plate is not as crisp as Dragon’s, FOV should still be commended for the effort.dragon-zero-port-w-inset-2Below is a shot of the starboard side. Note the absence of the manufacturing plate, which was only stenciled on the port side.1/72, 85032, A6M, AI-155, Akagi, FOV, Forces of Valor, IJN, Itaya, Japanese Navy, Pearl Harbor, Zeke, ZeroIn the photo below, note that FOV incorrectly painted the propeller white. The propeller should have been polished natural metal, like the Dragon’s. Note also the two red warning stripes on the tips of the blades that created two neat red circles when the propeller was spinning. As is the case with the vast majority of 1/72 scale prebuilt models, the propeller spins freely.

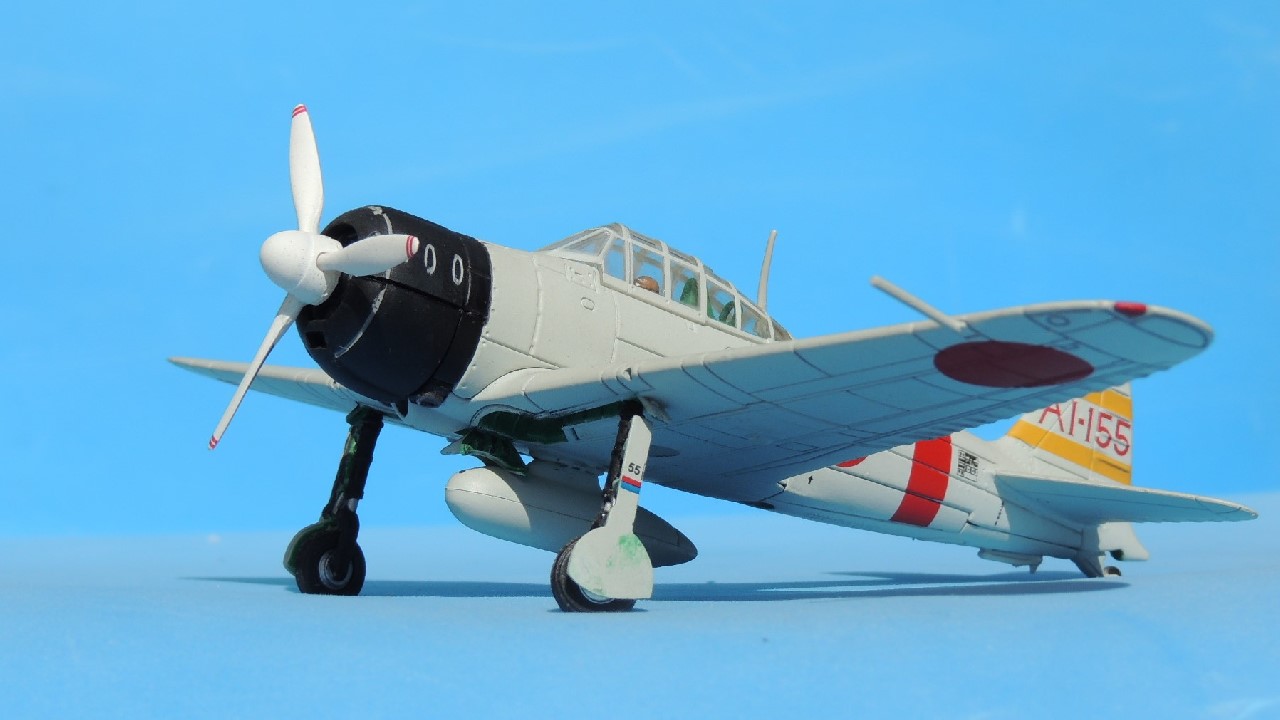
Note the outlets for the 20mm cannons on the leading edges of the wings just above the landing struts. Also on the leading edge of the portside wing, note the pitot tube, which cannot be taken for granted. The Corgi Zeros, for example, do not have one.1/72, 85032, A6M, AI-155, Akagi, FOV, Forces of Valor, IJN, Itaya, Japanese Navy, Pearl Harbor, Zeke, ZeroThe photo below shows that the landing strut covers on the FOV model, like the Dragon’s, also have the “55” that matches the last two digits of the tail number. The FOV also has the correct A6M2 cowling, which had four oval-shaped fasteners on each side of the matte black cowling, one on the front part of the cowling and three on the sides. Note also the metal drop tank that gave the Zero an extra 73 imperial gallons of fuel (87 US gallons), significantly increasing its range. Later drop tanks were made of wood and had a slightly different shape.1/72, 85032, A6M, AI-155, Akagi, FOV, Forces of Valor, IJN, Itaya, Japanese Navy, Pearl Harbor, Zeke, ZeroThe Feature

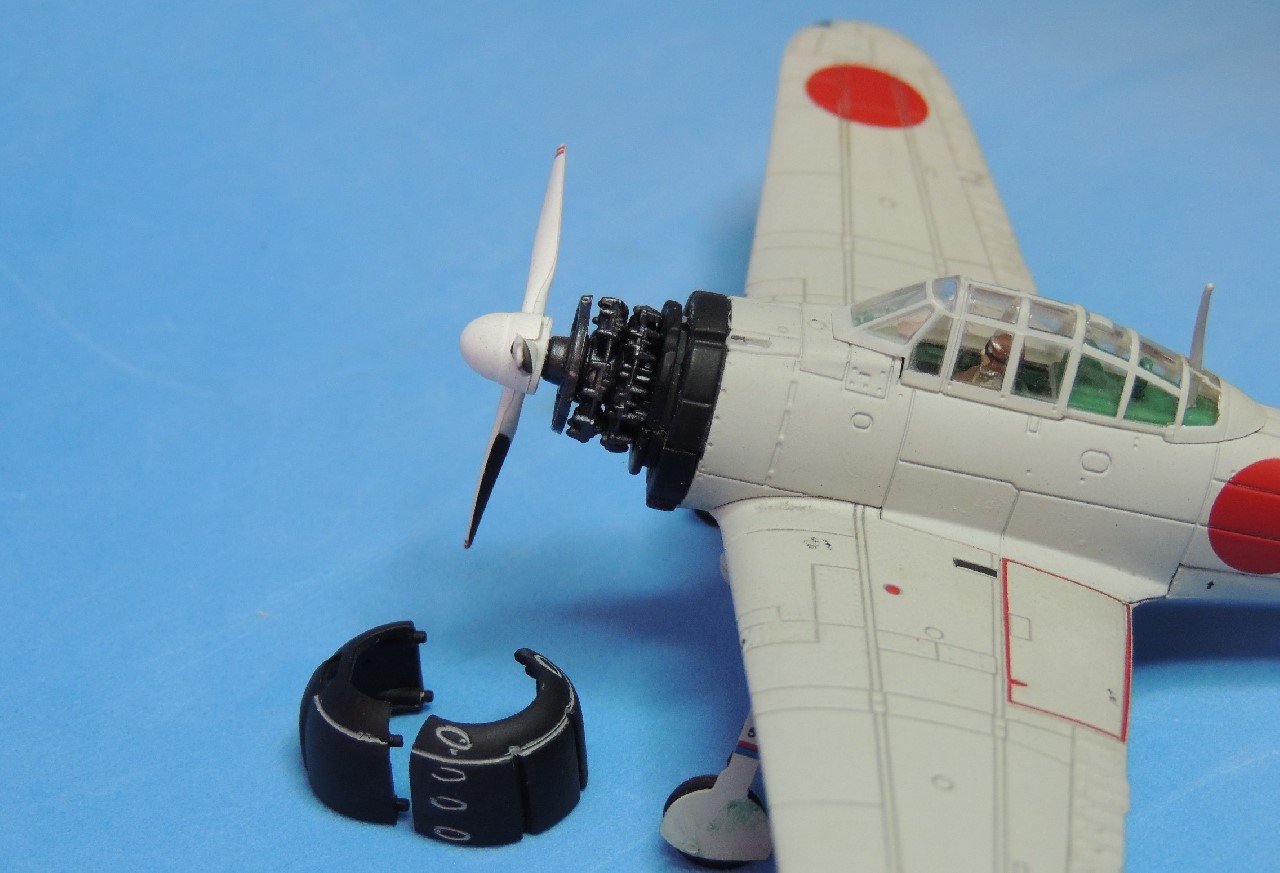
It was a welcome surprise that the cowling on the FOV Zero is a separate, removable piece that reveals a Sakae two-row 14-cylinder radial engine. The basic motor is unlikely to make any collector salivate, as it lacks detail, but it looks the part, particularly without magnification. As I’ve pointed out in the past, special features often come at the expense of accuracy, as with the opening canopy on the Dragon model. However, the removable cowling on the FOV is a simple feature accomplished without loss of accuracy that opens up diorama possibilities. The one quibble would be the white wash to highlight the fasteners, which can be easily remedied with a simple black wash. Note also that, unlike Dragon, FOV included a pilot.1/72, 85032, A6M, AI-155, Akagi, FOV, Forces of Valor, IJN, Itaya, Japanese Navy, Pearl Harbor, Zeke, ZeroThe Rub

Some collectors were critical of the unsightly screw holes on the underside of the wings and fuselage, as can be seen in the lagniappe photo below, used to secure the model to the packaging. While they’re noticeable and unattractive when you flip the model on its back, it is somewhat of a consolation that they’re on the underside of the model and, at least for me, were not a deal-breaker. Still, it may be a consideration for more serious collectors.1/72, 85032, A6M, AI-155, Akagi, FOV, Forces of Valor, IJN, Itaya, Japanese Navy, Pearl Harbor, Zeke, ZeroThe Upshot

The Forces of Valor 85032 Mitsubishi A6M2 Zero is an attractive model that resembles the original fairly well.  The excellent casting shows no perceptible problems in its proportions. The cowling, propeller, and undercarriage are all well executed, with no apparent accuracy issues. The markings are accurate, though not as crisp as those on the Dragon. The removable cowling is a welcome feature for those who build dioramas. The FOV 85032 Zero, released under the enthusiast series, was also released as a 95032 regular issue. The only difference between the two releases is that the 85032 has both wheels up and wheels down options, while the less expensive 95032 only has a wheels down option. I have both versions and there appears to be no difference in the finish or weathering. In my opinion, the FOV Zero is a great little model that compares favorably with Zero models of most other manufacturers. 

Again, thank you for your indulgence and I hope you enjoyed the post. If something looks amiss, please let me know. I would be delighted to correct inaccurate information so that this may be useful for other 1/72 scale collectors and wargamers. As always, comments, questions, corrections, and observations are welcome. Stay tuned for a review of the Witty Wings model of the very same aircraft in the next post.

sPzAbt 505: Charging Knights on Metal Chariots, Eastern Front 1944

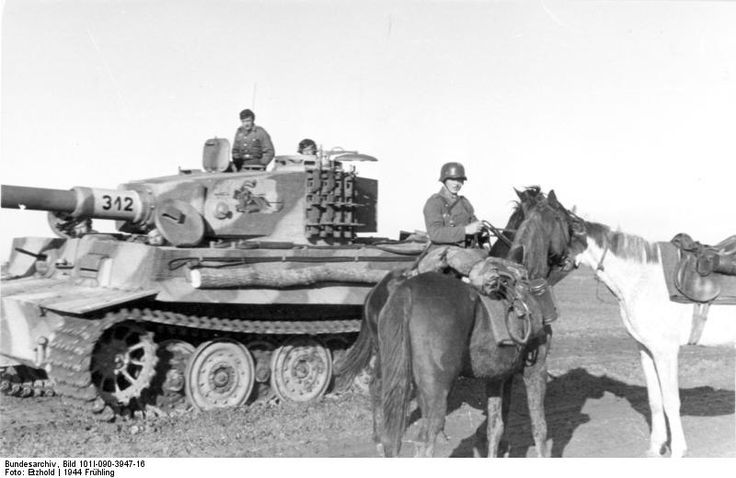
This 1944 Bundesarchiv photo is of Tiger No. 312 of the famous Schwere Panzer Abteilung 505, with its distinctive charging knight.

Easy Model EM 336220 1/72 Tiger Tank sPzAbt s.Pz.Abt. 505 horses

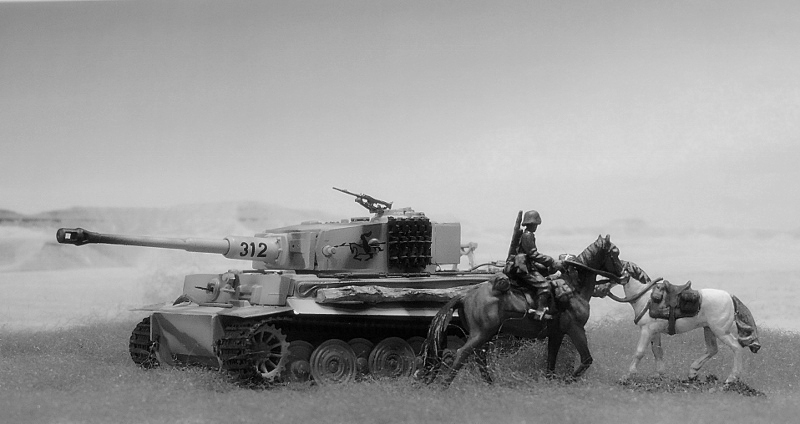
Here’s the recreation.

Easy Model EM 336220 1/72 Tiger Tank sPzAbt s.Pz.Abt. 505 horses

Here’s the scene in color.

Easy Model EM 336220 1/72 Tiger Tank sPzAbt s.Pz.Abt. 505 horses

For those interested, here’s the source of each piece:

  • Tank: Easy Model 36220, Tiger I Late Type (s.Pz.Abt.505-Russia, 1944);
  • Soldier: Forces of Valor 83091, German SS Cavalry Division (Eastern Front, 1942);
  • White Horse: Revell 2514 Soviet Cossacks;
  • Log on the hull of the Tiger: Well, that’s from my backyard. Very Happy